About: HU66 lock and pick
hu66 lishi
hu66 lock
lishi hu66 lock pick
lishi hu66 car list
lishi hu66 user guide
in detail…
hu66 lock
hu66 pick
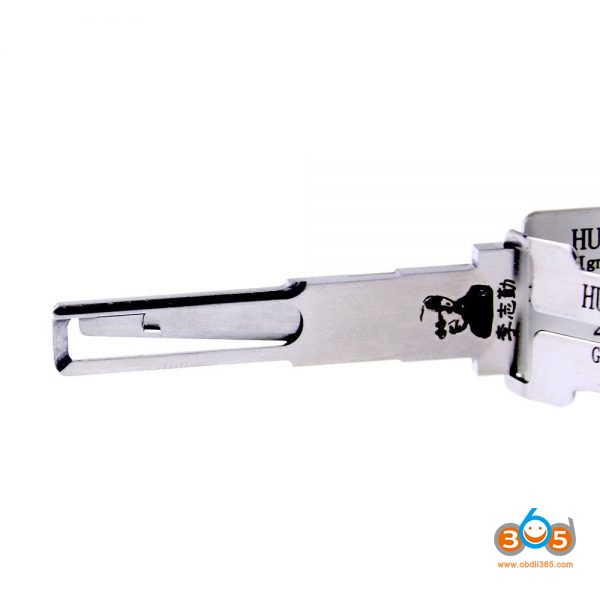
lishi hu66 lock pick:
lishi hu66 tool has 3 versions, from generation 1 to 3:
hu66 1 lock pick
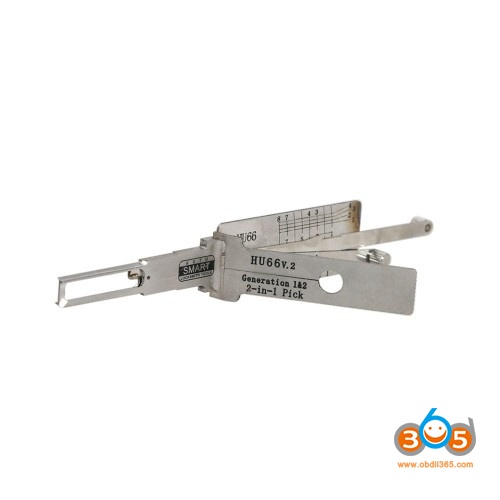
hu66 2 lock pick
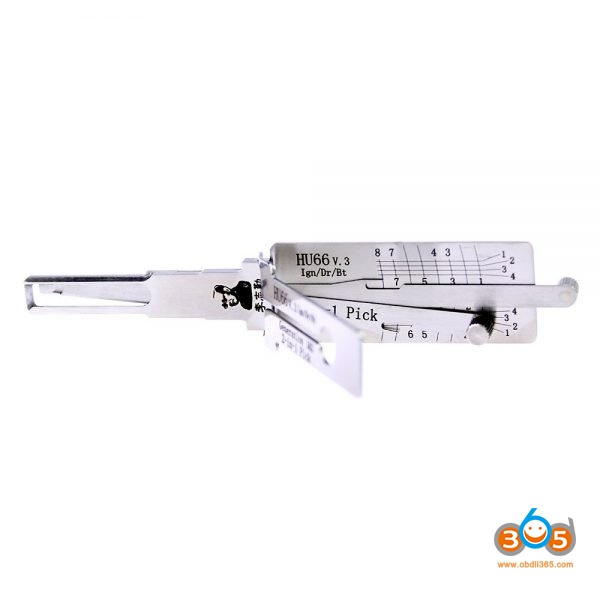
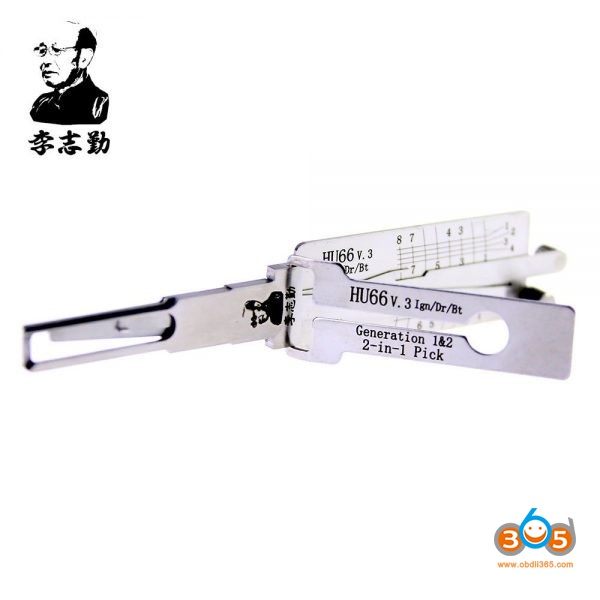
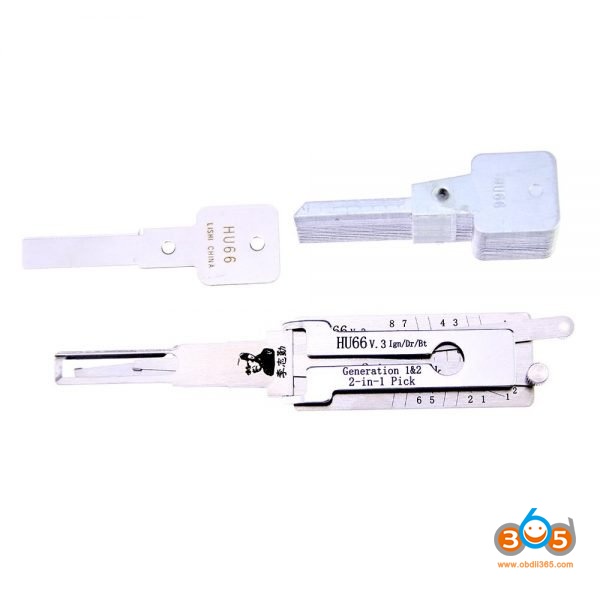
hu66 3 lock pick
This is how to tell the difference between the HU66 generation 1, 2 and 3 locks and how to deal with them:
The face cap of the gen 3 lock is sunken and flush with the body of the lock, and the gen 3 lock is also much bigger and a totally different shape to the gen 1 and 2 locks next to it.
This makes it instantly identifiable visually – it is the only one of the VAG HU66 locks that can be simply identified by appearance.
VAG locks follow 2 different wafer configurations:
- Gen 1 lock follows a 1 up 1 down configuration
- Gen 2 and 3 locks follow a 2 up 2 down configuration
As we can easily identify the generation 3 lock visually, we only need to understand how to ID the difference between the gen 1 and 2 lock.
To do this we must:
- Fully insert the 2in1 pick into the lock
- Move the lifter to position 1 and find the spring
- Assuming the spring wafer is felt on the bottom grid
- Move the indicator to position 2
- If the spring wafer is also felt on the bottom grid then it has 2 wafers on same side of lock in a 2 up 2 down format, so it is a gen 2 or 3 lock. If the spring wafer had been felt on the top grid then this would signify a 1 up 1 down configuration – so would be a generation 1 lock
(So, the gen 3 lock can be identified visually, but to tell the difference between the gen 1 and gen 2 lock you must feel using the tool.)
This is an almost instant confirmation of which lock we have in front of us.
lishi hu66 2 in 1:
Why there is a single lifter and a twin lifter HU66 2in1 pick and decoder?
Because there exist 2 different Lishi 2in1 picks, a single lifter version and a twin lifter version.
- Single lifter tool: this is the best tool for generation 1 and 2 locks. It will pick the gen 3 lock but on many will struggle to decode it
- Twin lifter tool: this tool was designed for gen 3 locks to ensure an accurate decode of the lock, it will also pick and decode all gen 1 and 2 locks
The newer twin lifter 2in1 was introduced in 2011 for new VAG locks, and as an added bonus would also pick all gen 1 and 2 locks as well.
The need for the new tool was a design alteration in the wafer in late 2010. The manufacturers decided to introduce cuts, grooves or ridges to the inside top and inside bottom of the wafers, so as the single lifter relied on the top inside and bottom inside of the wafer for its decode reading, this hampered the decode function for the single lifter tool on gen 3 VAG locks
To defeat the decode interference change made by the manufacturer, Lishi simply changed the tool design, so all picking and decoding is carried out using the key snib on the centre of the wafer
This produced an instant fix and continued defeat for the VAG lock into gen 3 and beyond.
Lishi HU66 V3 (Twin Lifter) 2in1 Decoder and Pick is designed for VAG: VW, Audi, Seat, Skoda, Porsche
[Profile: HU66 (2 Track Internal)]
Suitable for: Door, boot and Ignition locks.
Lishi Tools (exactly speaking “Lishi 2in1 Decoder and Pick”) is the most effective way to unlock and decode vehicle locks whilst at the scene. The tools we supply are from the original manufacturer, ensuring quality and supply is guaranteed. There are currently more than 90 tools available.
Mr. Li is designer, creator, inventor of all Lishi tools. Lishi Tools was formerly known as “Lishi” which was widely used on their products as a logo. Mr. Li had a partnership with an UK company named Tradelocks (aka. UAP Limited) to market his tools worldwide. Tradelocks is still selling Lishi tools with their trademark “Genuine Lishi”, but the two companies has no relationship at all, when their contract ended in 2014. And later, Mr. Li had a new logo which uses his own head as the trademark, and brand name changed from Lishi to Li Zhi Qin (Mr. Li’s name in Chinese), which is the three Chinese characters stands for, but it’s still known as Lishi all over the world except China.
lishi vw vehicle coverage:
List of makes and models (for guidance only)
AUDI
A2 2000-2008, A3 1997-2008, A4 1996 onwards, A6 1996 onwards, A8 1996-2008, Allroad Quattro 2000-2005, Cabrio 1996-2008, Q7 2006 onwards, S2 Coupe 1996-2008, S3 2001-2004, S4 2002-2004, S6 1997-2008, S8 1997-2008 & TT Coupe 1998-2008
FORD
Galaxy 1995-2006
PORSCHE
911 1998-1999, Boxster 1997-1998, Cayenne 2003 onwards & Cayman 2009 onwards
SEAT
Alhambra 1996 onwards, Altea 2004-2008, Arosa 1997-2005, Cordoba 1999-2009, Ibiza 1998-2009, Inca 1998-2008, Leon 2000-2008 & Toledo 1999-2008
SKODA
Fabia 2000-2008, Felicia 1998-2008, Octavia 2001-2008, Pickup 1998-2008, Roomster 2006 onwards & Superb 2002-2008
VOLKSWAGEN
Beetle 1998-2008, Bora 1998-2004, Caddy 1999-2008, Camper 2010 onwards, Cross Golf 2006 onwards, Eos 2006 onwards, Euro Van 2000-2004, Fox 2005 onwards, Golf 1998 onwards, Individual 2004 onwards, Jetta 2000 onwards, Lupo 1998 onwards, Multivan 2003 onwards, Passat 1997 onwards, Phaeton 2003 onwards, Polo 1998-2004, Scirocco 2009 onwards, Sharan 1995 onwards, Tiguan 2007 onwards, Touareg 2003 onwards, Touran 2003 onwards, Transporter 2001-2009 & W8 2002-2004
lishi hu66 user guide: