2016/12/29

Program Toyota Rav4 2016 Key via MINI VCI Techstream

This blog will show you how to program new fob ( Frequency Operating Button ) for Toyota Rav4 2016 with cheap MINI VCI Cable and Techstream V10.30.029.

Device:
TIS Techstream Ver 10.30.029
Work with: MINI VCI J2534 diagnostic cable
techstream-program-key-fob-for-toyota-rav4-2016-1
Vehicle model and year: Toyota Rav4 2016
techstream-program-key-fob-for-toyota-rav4-2016-2
First connect MINI VCI 16pin connector to car obd port and the other side connect to USB port of computer
techstream-program-key-fob-for-toyota-rav4-2016-3
Then Switch ignition on
Run Techstream V10.30.029 and click “Connect to vehicle”
techstream-program-key-fob-for-toyota-rav4-2016-4
Toyota Techstream software will read out vehicle information, you should choose “w/ Smart Key” and “RADAR CRUISE” like the picture shows, then click next
techstream-program-key-fob-for-toyota-rav4-2016-5
Choose “Smart Key” option in System Selection Menu
techstream-program-key-fob-for-toyota-rav4-2016-6
Then select “Utility”
techstream-program-key-fob-for-toyota-rav4-2016-7
Select “Smart Code Registration”
techstream-program-key-fob-for-toyota-rav4-2016-8
Then press “Next” after all check boxed are checked
techstream-program-key-fob-for-toyota-rav4-2016-9
Press “Pre-Start CHK” button to review registration process, then press “Start” button to begin the process.
techstream-program-key-fob-for-toyota-rav4-2016-10
Note: you should carry out process below as soon as possible
Touch Engine Start Button with a registered key, then move the registered key out of the vehicle
techstream-program-key-fob-for-toyota-rav4-2016-11
Touch Engine Start Button with a new key
techstream-program-key-fob-for-toyota-rav4-2016-12
Done! The key code registration is complete
techstream-program-key-fob-for-toyota-rav4-2016-13
Finally, test your new key and enjoy!

Note: you don’t need to pay Extra cost for V10.30.029 techstream, it will come with MINI VCI diagnostic cable. Or you can free download this software from obdii365.com official blog! Thanks.
http://obd365.blogrip.com/2016/12/30/techstream-program-key-fob-on-toyota-rav4-2016/

2016/12/27

Troubleshoot Mercedes S430 Airmatic Suspension via Autel DS708

If You decide to buy a Mercedes-Benz, maybe an S-Class, CLS-Class, R-Class, CL-Class or E-Class. One day you hear of other Mercedes-Benz owners having suspension problems. The next day you start having air suspension problems yourself. Your Mercedes-Benz drops to the ground.


How to solve these problems? Yes, you can troubleshoot most of airmatic suspension problem by using a good diagnostic scanner such as Besides MB diagnostic scanner SD Connect C4 or Star C3 which is mainly used at dealerships, there are other diagnostic tools you can use to diagnose Mercedes Benz.


You should know that generic OBDII readers can not access to airmatic control unit, some can read out and clear the fault codes but they can not perform airmatic test and troubleshooting.


Today, our engineer recommend Autel MaxiDAS DS708 to Troubleshoot Mercedes airmatic suspension.

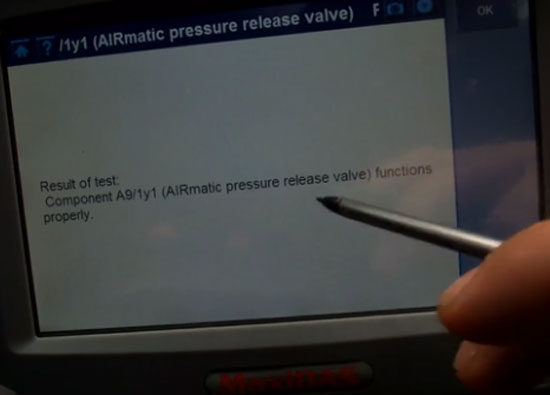
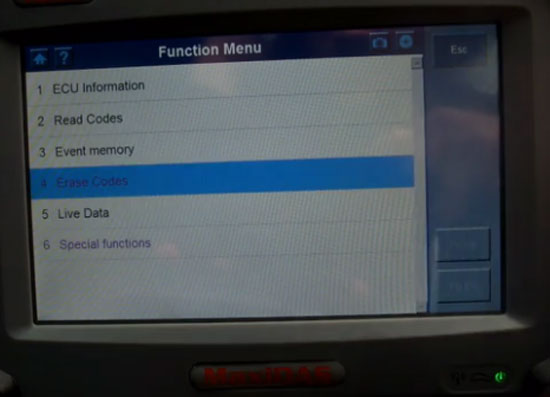
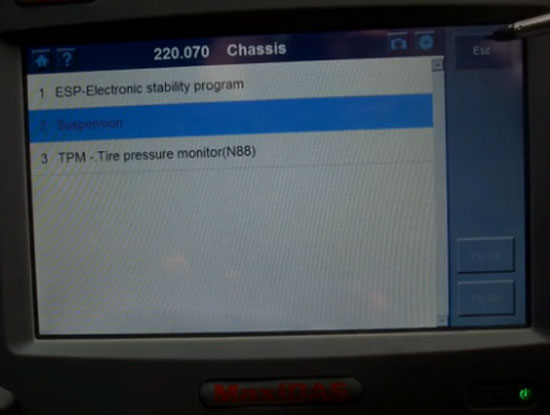
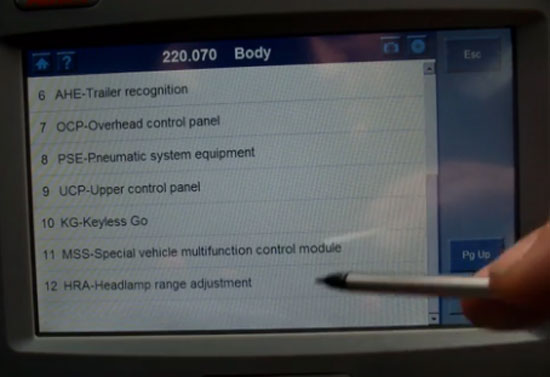
Below will show you How DS708 test the airmatic systems including air compressor or the pressure release valve.

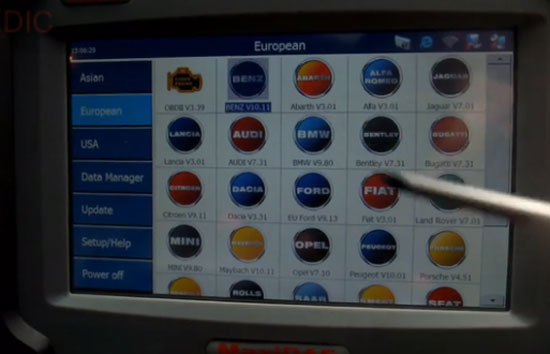
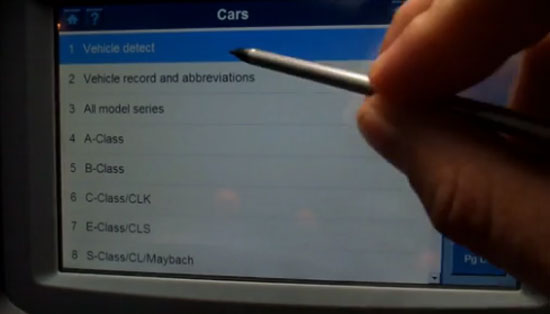
Step 1: Choose vehicle information

choose-vehicle-1

choose-vehicle-2

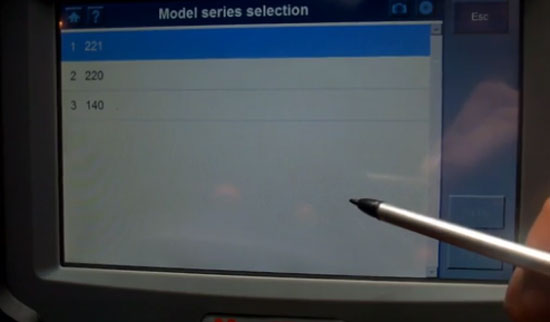
w221

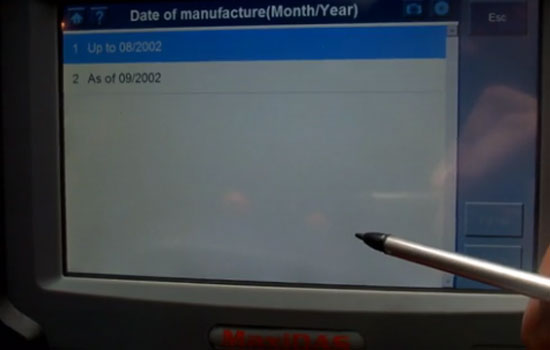
choose car year
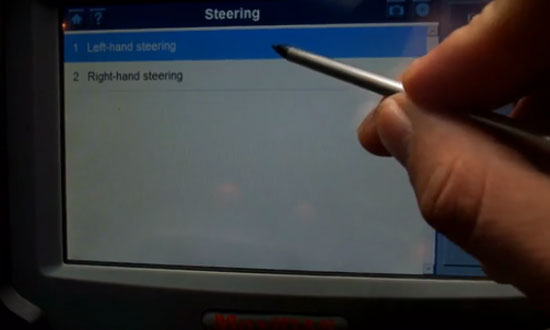
Steering

Steering

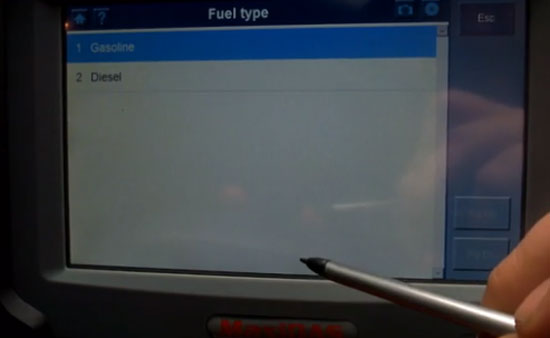
Fuel Type

Fuel Type

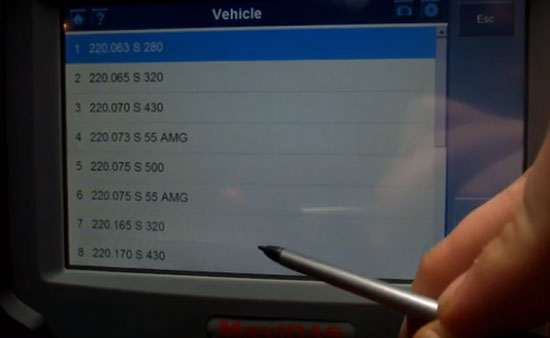
Vehicle

choose-model

It is communicating...


Step 2: Pneumatic tests

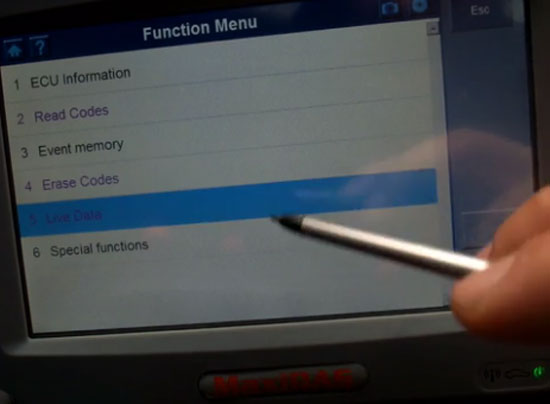
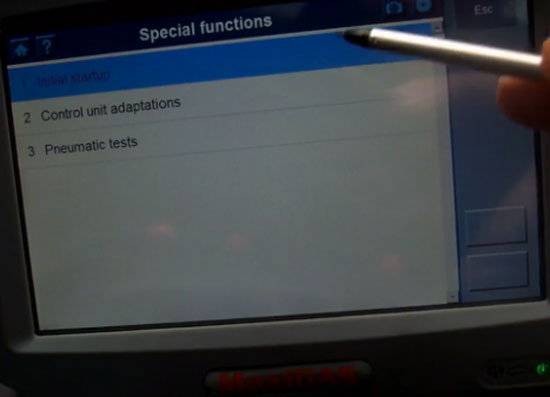
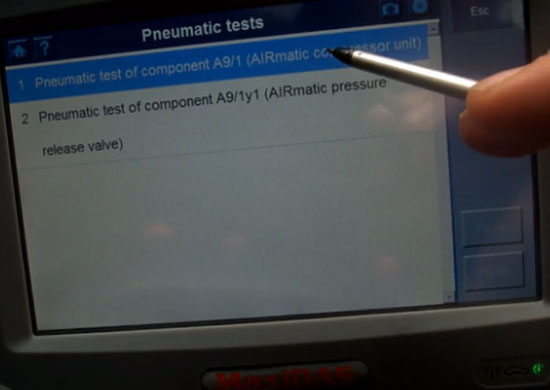
Choose special functions->Pneumatic tests-> AIRmatic compressor unit

special function

Pneumatic tests

AIRmatic compressor unit

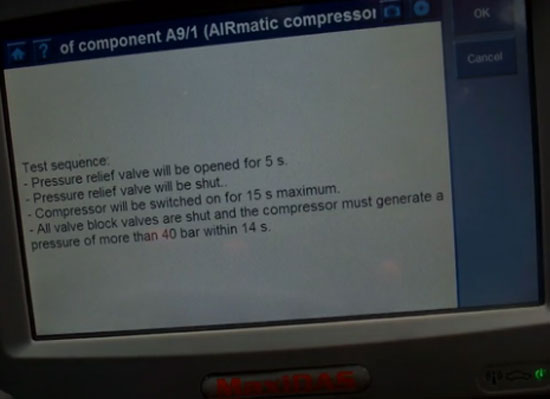
Test sequence

Test sequence

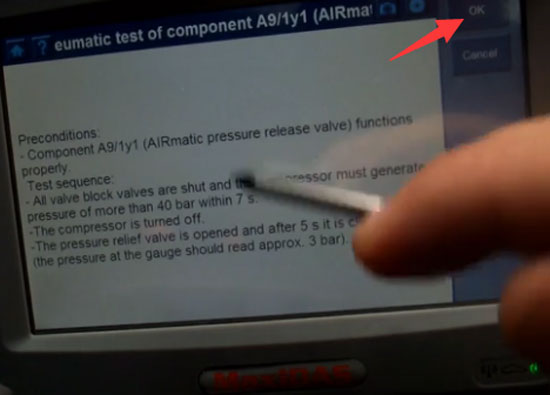
Go back to choose AIRmatic pressure release valve

Click OK to continue

Click OK to continue

Test result

Test result

Done!

These can work with most Mercedes-Benz equipped with airmatic suspension such as:

CL Class: years 2000-2006 (W215 w/ ABC):years 2007-2012 (W216 w/ Airmatic)

CLS Class: years 2005-2011 (W219 w/ Airmatic):years 2005-2011 CLS55AMG &CLS63AMG

GL Class: years 2007-2012 (W164 w/ Airmatic)

ML Class: years 2005-2011 (W164 w/ Airmatic): years 2005-2010 (ML63AMG)

R Class: years 2006-2010 (W251)

S Class: years 1999-2006 (W220 w/,w/o 4matic): years 2000-2006 (W220 w/ABC)

years 2003-2006 (W220 w/ Airmatic & w/ 4matic),

years 2007-2012 (W221 w/ Airmatic, w/o 4matic):

years 2007-2012 (W221 w/ Airmatic, w/4matic)


You can also use Autel DS708 diagnostic Scanner to program immobilizer keys and others:

ds708-other-function-1
ds708-other-function-2

ds708-other-function-3

ds708-other-function-4

ds708-other-function-5

2016/12/26

MPPS V18 vs. Kess V2 vs.K-tag vs. Galletto

How to choose the right ECU tuning tool you need really? MPPS v18, ktag, kess, fgtech4 or 2? Tips from pros here… Hope this helps.

ECU tools/CommunicationMPPS V18KESS v2KTAGFgTech galletto v54
OBD2
BOOT
BDM
J-TAG
Tricore
So, KESS v2 supports obd2, boot
MPPS v18 works for obd2, Multiboot, Tricore for Marelli ECU’s
KTAG can work for bdm, j-tag, boot
FgTech Galleto v54 4 (or Fgtech 2) work no issues with obd2, bdm, j-tag, boot

Communication
ECU tools
OBD2BOOTBDMJTAGTricore
MPPS V18
KESS v2
KTAG
FgTech 2 /
Fgtech 4
So, 3 options are available for OBDII connection: mpps v18, kess, fgtech
3 options for BOOT: kess v2, k-tag, fgtech galletto
2 options for BDM: ktag, fgtech
2 options for JATG: ktag, fgtech 4/2
Only 1 way for Tricore: MPPS V18!

That is why you need buy more than one ecu programmers.

When to buy Fgtech Galletto and kess v2 together?
Galletto 4 work with truck, including Benz truck, read and write ECU via both BDM and OBD; KESS not works with truck, read and write ECU via only OBD, not BDM.

When to buy Kess v2 and Ktag together?
KESS V2 is a ECU programming tool that is perfect for OBD use, while KTag is perfect for Jtag, BDM and all the Boot application (tricore and ST10).
With KESS V2 you programming directly through the OBD port of the vehicle, while with Ktag (Ktag 2.13) you need to take apart the ECU and open it, after you can make the read/write operation.
Many ECU has the advantage that can be read and write from OBD port (so KESS V2 is perfect), but there are lot ECU that need to disassemble from the car and open and this is the case for all the ECU that need to be programmed with Jtag, BDM and Boot protocols, so KTAG is needed.

When to buy Fgtech v54, Kess v2 and Ktag all together?
Because non of China tool will cover all cars good and if you buy clone tools, buy all (galletto+kess+ktag) from them, that you will cover more cars, or better to buy a good original tool if you will do the work as a pro, all depends want you will do.


Reference:
MPPS covers MAIN + TRICORE + MULTIBOOT and a wide range of controllers incl. M3.8, M5.9, ME7xx, MED9, MED17, EDC15/16/17, Delphi, Siemens, Marelli, Delco, Sagem, Trionic and many others…
Kess covers all major brands and protocols including Line, CAN, EDC17 and MED17 and Ford J1850
ktag firmware v6.070 with ksuite v2.13 supports BDM MOTOROLA MPC5xx, and BMW Gasoline F Chassis and Mercedes W222
FGTech Galletto 4 is a famous chip tuning tool for all cars, trucks, motorcycles, Marine, BDM MPCxx, BDM Boot Mode Tricore, checksum
Fgtech 2 comes with all Cars, Trucks, Traktors and bikes. New Boot Mode System Tricore Infineon Tricore Sak TC1766, Sak TC1767 *new Infineon Tricore sak TC1792,TC1796,TC1797,TC1767. READ / WRITE New BMW by OBD2 port.
http://blog.obdii365.com/2016/12/26/mpps-v18-vs-kess-v2-vs-ktag-vs-fgtech/

2016/12/25

Hyundai Santa Fe Troubleshooting via ELM327 Bluetooth


Here is a tutorial on using MINI ELM327 OBD2 scan tool to clear check engine light for Hyundai Santa Fe.

Device needed:
V1.5 Bluetooth ELM327 MINI Interface($7.99, Free shipping)
Bluetooth ELM327 MINI
Torque lite APP run on Android PAD (download from Android APP store)
Torque lite APP
Vehicle model: Hyundai Santa Fe

Detailed procedure
Step 1:Turn ignition on and Insert ELM327 MINI interface to vehicle OBDII port (the red indicator will light)
Insert ELM327 MINI interface to vehicle OBDII port
Step 2: connect Android pad with ELM327 code reader via Bluetooth
Power up Android PAD
Click on “Setting” -> choose “Bluetooth”
choose-bluetooth
Then click “search for device”, the pad will find the available devices, choose “OBDII” to connect
pair-bluetooth
Input required PIN:1234 (or 0000), If these two codes don’t work, read the manual for the Bluetooth adapter to find out what code the manufacturer used.
find out what code
And click OK to pair with OBDII

Step 3: Clear fault codes
Open “Torque(Lite)” app
open-torque-app
When it connected to ECU ok, click “setting” icon to go to function menu
click-on-setting-icon
Then choose “Fault Codes…” option
fault-code
Choose “Show logged faults” and wait, it is requesting fault codes
Show logged faults
It will show you the code on the screen,
display-error-code
fault-code
You can click “web” to search for help or what does the code means on internet
click-on-web-1
obdii-trouble-code
Or you can just go back to choose “Clear logged faults”
Clear logged faults
Then read fault codes again, it will prompt you “No fault codes stored in ECU”
No fault codes stored in ECU
Done! These are all steps to clear check engine light, some customers also feedback that ELM327 scanner can also be used to diagnosis Hyundai Tucson 2011, Hyundai santa fe 2004 and so on.

2016/12/22

JMD Assistant Handy Baby OBD Adapter User Manual

It’s a user manual of a JMD Assistant obd adapter working with the Handy baby key programmer to copy 48 chips or do all keys lost for VAG vehicles with the 4th immobilizer systems.


What is a JMD assistant adapter?

The obd adapter is tested ok to use with the Handy baby key programmer to copy new keys and program new keys when all all lost for Volkswagen vehicles with 4th immobilizer systems!! That is also the reason for why you need to buy JMD assistant.


What models are supported by the JMD assistant?

Handy baby vag car list - copy/clone keys with the JMD assistant
JMD assistant clone chip list


Handy baby vag car list - do all key lost with the JMD assistant
JMD-assistant-all-keys-lost-list


Where to buy the JMD handy baby assistant?

There are lots of online shops available; here one site should be mentioned - that’s http://www.obdii365.com/. Items there are tested for hundreds of times; no need worry about quality guarantee


JMD handy baby assistant


How to locate the JMD assistant in the car?

JMD assistant is connected through the OBD port on the car.


JMD assistant is connected through the OBD port
* If dashboard happen spangled or re-light (don’t worry that phenomenon is ok)

*Finish could listen beeper short “BiBiBi” by OBD that’s was OK could next step

*Finish could listen beeper long “Biiiiiii” by OBD that’s can’t clone so far. (upgrade continue)


How to update JMD Assistant to a new version?

JMD Assistant connect to computer with USB cable, and open JMD Client software, click “UPDATES” –“JMD Assistant update”, then wait it until finish update.
JMD Assistant update
JMD Assistant update 2


Note: Make sure your computer have install Cp2102 driver and link to internet, and you should turn off Anti-virus and defender during update.


How to read info of JMD Assitant?

JMD Assistant Handy Baby key copy machine’s coil , and get into” basic-info” menu, wait several seconds and press OK to read, it will show information of JMD Assistant.
read info of JMD Assitant

Any successful case of using JMD assistant with Handy baby?


Handy Baby and JMD Assistant Copy VW Beetles 48 Key

http://blog.obdii365.com/2016/12/11/handy-baby-and-jmd-assistant-copy-vw-beetle-48-key/

JMD assistant and Handy baby add VW Polo 2014 key

http://blog.obdii365.com/2016/12/08/handy-baby-and-jmd-assistant-add-vw-polo-2014-key/

How to copy VW 4th ID48 chip via JMD Handy baby

http://blog.obdii365.com/2016/12/06/copy-vw-id48-chip-via-jmd-handy-baby/


How do users think of the JMD assistant?


So far, no bad reviews of this product. Here are all users feedback with photos. They tell you all the truth.
handy-baby-jmd-assistant-collect-vw-data-success-1
handy-baby-jmd-assistant-collect-vw-data-success-2
handy-baby-jmd-assistant-collect-vw-data-success-3
handy-baby-jmd-assistant-collect-vw-data-success-4
handy-baby-jmd-assistant-collect-vw-data-success-5
handy-baby-jmd-assistant-collect-vw-data-success-6