2021/08/31

SVCI 2020 Special Function List

 SVCI 2020 full special works so far with 2018 version, which is available while loading. The updated version adds VAG component protection and v38 special functions including Immo IV and V functions enough to convince people to give it a try.


STIC has updated the list of special function for a few brands. Check a list below. It is for sharing purpose only.

SVCI 2020 Commander software lists
Commander softwareVersionInclude special functions
VAG (VW/Audi) SKODA
SEAT
V18.0Yes
V24.0Yes
V38.1Yes
BMW MINIV10.4Yes
V10.5No
Mercedes-Benz SMART MAYBACHV5.11Yes
V7.0Yes
V10.8Yes
RENAULT DACIAV5.2Yes
V6.3Yes
V7.4Pending upgrade
PEUGEOT CITROENV5.10Yes
V6.7Yes
V8.0Pending upgrade
FIAT
ALFA ROMEO LANCIA
V5.1Yes
V5.7Yes
V7.6Pending upgrade
OPEL
VAUX HALL
V5.8Yes
V6.6Yes
V7.5Pending upgrade
Ford
Mazda
V4.9Yes
V7.7Pending upgrade
CHRYSLER
DODGE JEEP
V3.3Yes
V3.4Pending upgrade
TOYOTA LEXUS SCIONV9.0Yes
V11.7Pending upgrade
Nissan INFINITIV4.3Yes
V5.7Pending upgrade
HYUNDAI
KIA
V2.1Yes
V4.4Pending upgrade
VOLVOV4.3Yes
V6.2Pen
Pending upgrade
MITSUBISHI MOTORSV2.1Yes
V3.7Pending upgrade
PORSCHEV4.1Yes
V7.1Pending upgrade
SUZUKIV1.2Pending upgrade
LAND ROVERV2.6Pending upgrade
JAGUAR
DAIHATSUV1.4Yes
DAFV1.0Yes
BIKES
Snowmobiles Water scooter
V1.2Yes

Video example:

Launch X431 PAD VII Online Coding till 2021

 Confirmed: Launch X431 PAD VII can perform Online SCN Coding till year 2021 including VW, Audi, Mercedes Benz, BMW etc. This software is constantly being updated, and it is recommended that you provide the specific car model and VIN number for confirmation.


This is Launch X431 PAD 7 car model software list, if not listed, please upgrade the software first:

1     Aston Martin

2     Audi

3     Aust Ford

4     Aust Holden

5     BAIC

6     Mercedes Benz

7     BMW

8     BXFIAT

9     BXGM

10   CHANGAN

11   CHANGCHENG

12   Changhe

13   Chrysler

14   Citroen

15   DAEWOO

16   DAIHATSU

17   DEMO

18   DFXK

19   EOBD2

20   Ferrari

21   Fiat

22   FLYER

23   FUTIAN

24   GAZ(GAZ)

25   GM

26   HAFEI

27   Hmazda

28   Honda

29   Huachen

30   Hyundai

31   Isuzu

32   Iveco

33   IZH(IZH)

34   JACTY

35   JIAO

36   JINLONG

37   Joylong

38   Jpisuzu

39   KIA

40   Landrover

41   LIFAN

42   LIUWEI_TY

43   LUXGEN

44   MAHINDRA

45   Maruti

46   Maserati

47   Mazda

48   Mitsubishi

49   Nissan

50   Opel

51   Paz(Paz)

52   Perodua

53   Peugeot

54   Porsche

55   Proton

56   Qirui_Ty

57   Renault

58   Reset Bleed

59   Reset BMS

60   Reset Brake

61   Reset DPF

62   Reset ETS

63   Reset GEAR

64   Reset IMMO

65   Reset INJEC

66   Reset oil

67   Reset SAS

68   Reset TPMS

69   Rover

70   Saab

71   Saicmg

72   Saipa

73   Samsung

74   Seat

75   Seaz

76   SGM

77   Skoda

78   Smart

79   Sprinter

80   SSANGYONG

81   Subaru

82   Suzuki

83   TATA

84   Toyota

85   Trumpchi

86   UAZ(UAZ)

87   USA Ford

88   VAZ(VAZ)

89   VOLVO

90   VW

91   Weili

92   Xiali

93   XINKAI

94   ZAZ(ZAZ)

95   Zhongshun

96   ZHONGTAI

97   ZHONGXING


Related article:

How to enable SCN Coding Option in Launch X431 Pad VII?

2021/08/23

Easydiag 12V to 24V HD Adapter or X431 HD Adapter

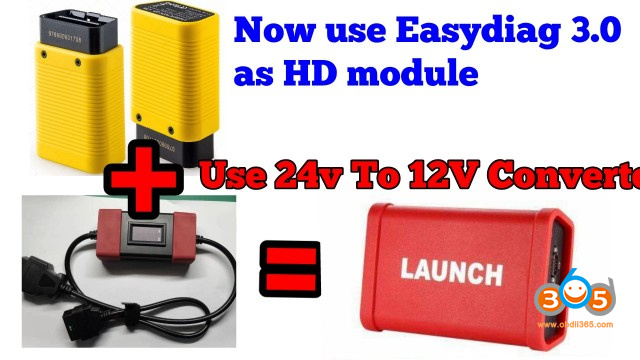
 Easydiag + 24V to 12V adapter = HD Module for trucks? The easydiag 12V to 24V HD adapter has been a while since it was released, it is advertised it would do HD modules’ job.  There are two most frequently asked questions:

1.) It works both K-line and CAN Bus?
2.) Does it have the database for heavy duty trucks?

easydiag-truck-adapter


Answer and Suggestion:

1).

The 12V to 24V heavy duty adapter has no component for kline. Only usable for diagnosis via CAN. 

It only converts 24-12V, no protocols, so only CAN will work.

On trucks with CAN line is not so bad.
On trucks with K-line (old) none working.

Using easydiag with USA 12v trucks obd2 no problem and don’t need a voltage converter, but when i try to use an obd2 to 9 pin adapter to read the older trucks (K-line) it will not connect.

2).

It does not have a database for heavy duty.

Only buy original launch x431 24v truck adapters with separate software.

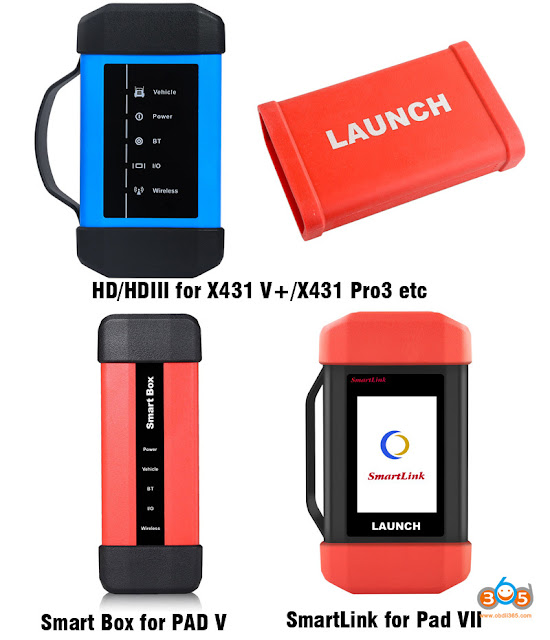
You can use HD or HD III for X431 V+, Pro3 or Smart Box for Pad V, SmartLink for PAD VII (PAD V, PAD VII need to purchase truck software in “Mall”)

launch-x431-heavy-duty-adapters

Launch X431 HD Module Functions
  • Identification of control units
  • Adaptation of control units
  • Reset service intervals
  • Reading vehicle data streams
  • Display of current system parameters
  • Check actuators
  • Reading and erasing vehicle fault codes
Powerful special functions:
  • Component Replacement, Cylinder Compression Test, Injector Cut Out Test, DPF Regeneration
  • Communicates with ABS & Transmissions from Bendix, Wabco and Allison
  • Tech to Tech remote communication function

Supported heavy duty vehicle list:

Europe:

  • MERCEDES BENZ
  • MAN
  • VOLVO
  • SCANIA
  • IVECO
  • DAF
  • RENAULT

U.S:

  • Freightliner
  • INTERNATIONAL
  • Kenworth
  • PETERBILT
  • STERLING
  • WESTERN STAR
  • MACK
  • DETROIT
  • CUMMINS

Asia:

  • HINO
  • FUSO
  • ISUZU
  • UD
  • HYUNDAI


So if you need to diagnose CAN BUS truck, the easydiag converter is worth a try.  Trucks are very expensive, original Launch HD adapter is definitely the best solution.

http://blog.obdii365.com/2021/08/23/easydiag-12v-to-24v-hd-adapter-or-x431-24v-truck-adapter/

2021/08/19

Can Yanhua ACDP Read 2021 BMW M5 ISN MG1?

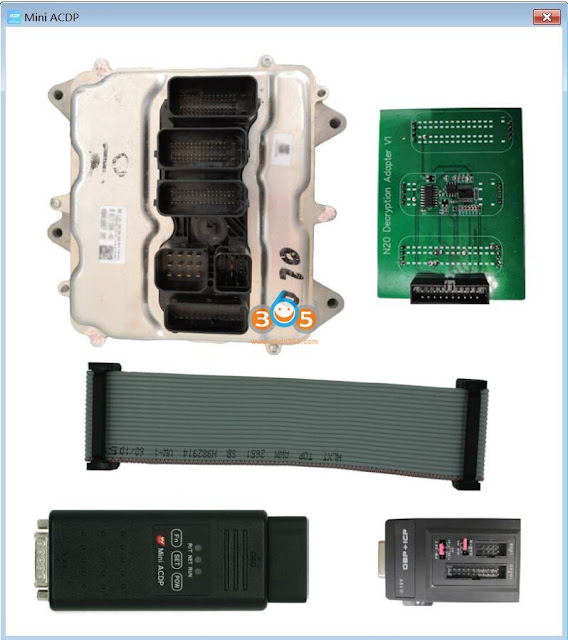
 Yanhua Mini ACDP + ISN Module + N20 interface board are capable of reading isn mg1 ecu

Build date 2020-09, 2021 bmw m5 comp, VIN: WBS83CH01MCFXXXXX. The ECU model is S63B44T4.

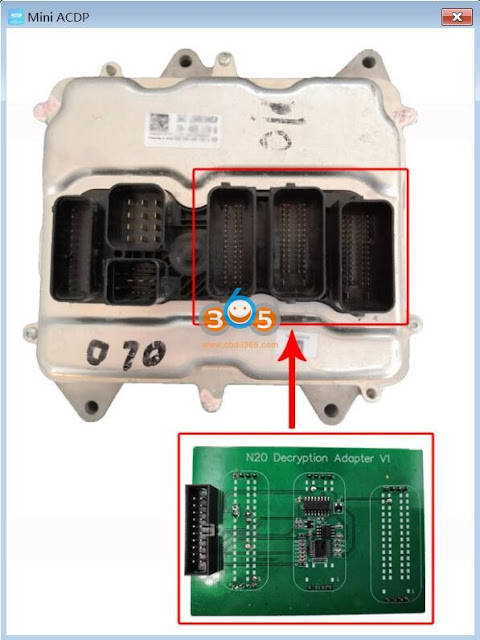
Good to know: N20 interface board is applied to N20\N13\S63 ECU model.


Prepare and hardware connection:

  1. For S63 (MEVD172H) and S63 (MEVD1728), here are 4 steps to prepare.

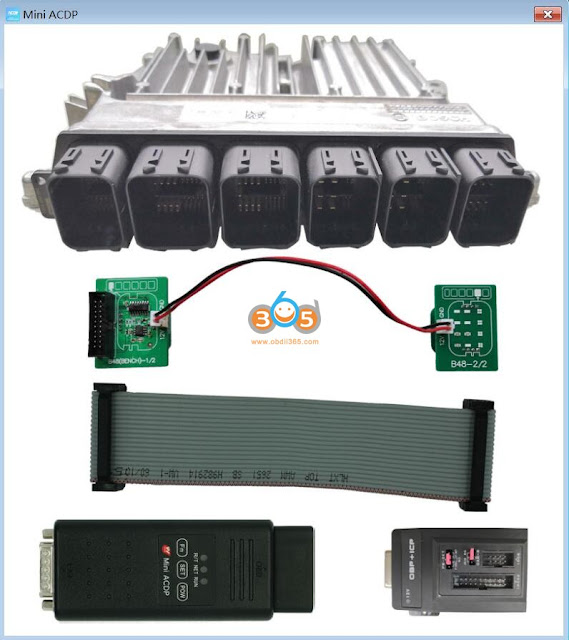
Step 1. Please prepare ACDP, OBP+ICP adapter, interface board and DME.

Yanhua ACDP Read 2021 BMW M5 ISN MG1 1


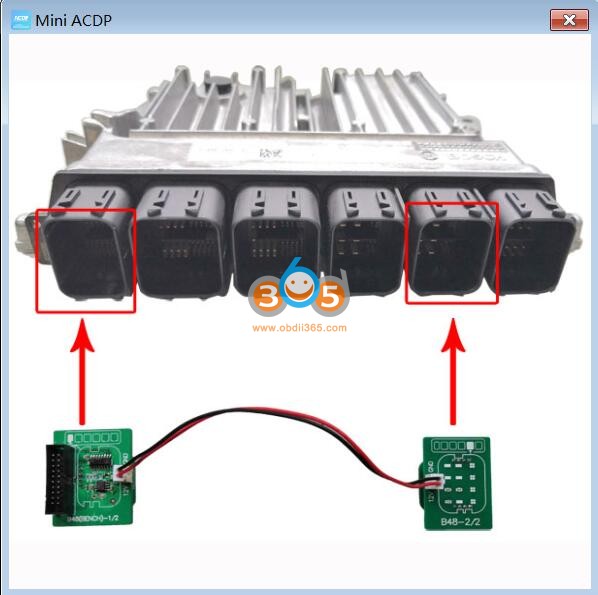
Step 2. Connect the interface board correctly to the DME interface as shown.

Yanhua ACDP Read 2021 BMW M5 ISN MG1 2


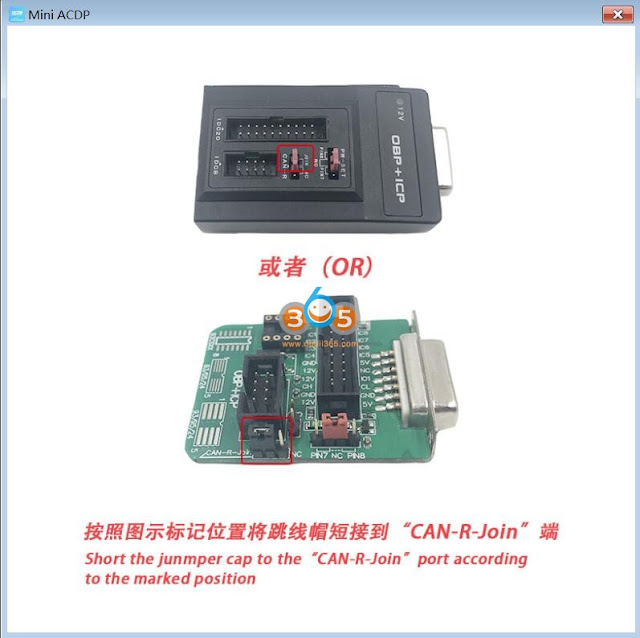
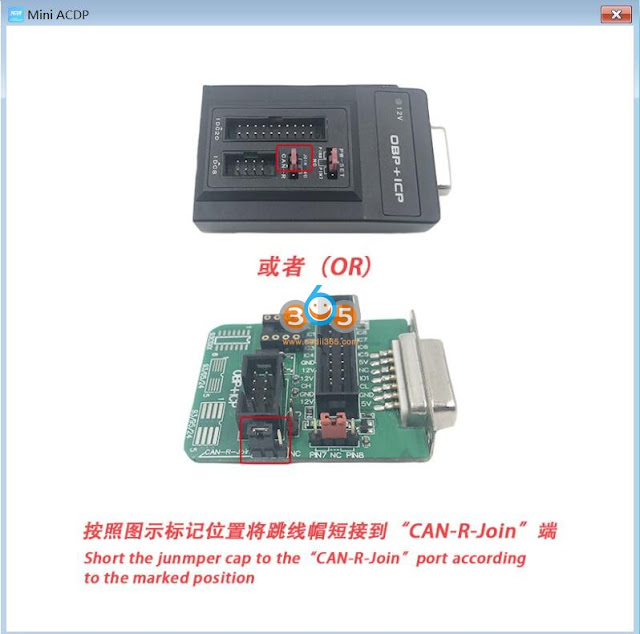
Step 3. Short the CAN resistor on the OBP + ICP adapter to the “CAN-R Join”.

Yanhua ACDP Read 2021 BMW M5 ISN MG1 3


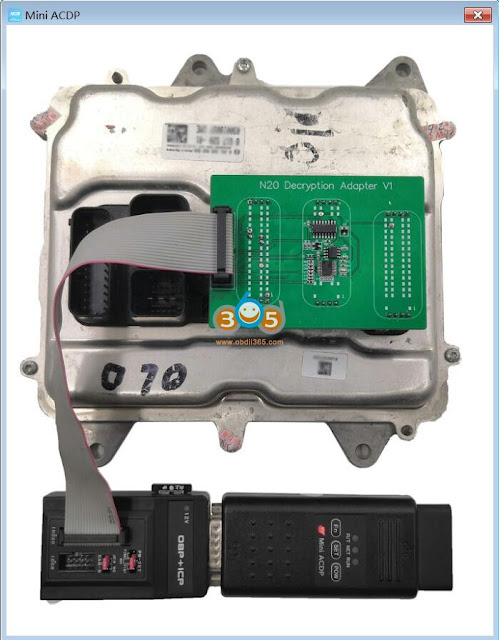
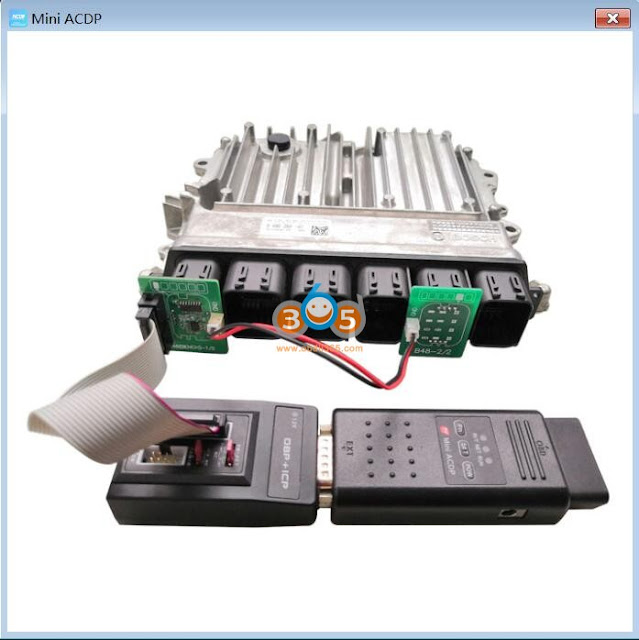
Step 4. Connect ACDP, OBP+ICP adapter, interface board and DME.

Yanhua ACDP Read 2021 BMW M5 ISN MG1 4


  1. S63 (MG1CS201), here are are 4 steps to prepare

PS: if the ECU model is B48, please use B48 interface board.

Step 1. Please prepare ACDP, OBP+ICP adapter, interface board and DME.

Yanhua ACDP Read 2021 BMW M5 ISN MG1 5


Step 2. Connect the interface board correctly to the DME interface as shown.

Yanhua ACDP Read 2021 BMW M5 ISN MG1 6


Step 3. Short the CAN resistor on the OBP + ICP adapter to the “CAN-R Join”.

Yanhua ACDP Read 2021 BMW M5 ISN MG1 7

Step 4. Connect ACDP, OBP+ICP adapter, interface board and DME.

Yanhua ACDP Read 2021 BMW M5 ISN MG1 8


Next is the operation on Yanhua Mini ACDP APP.

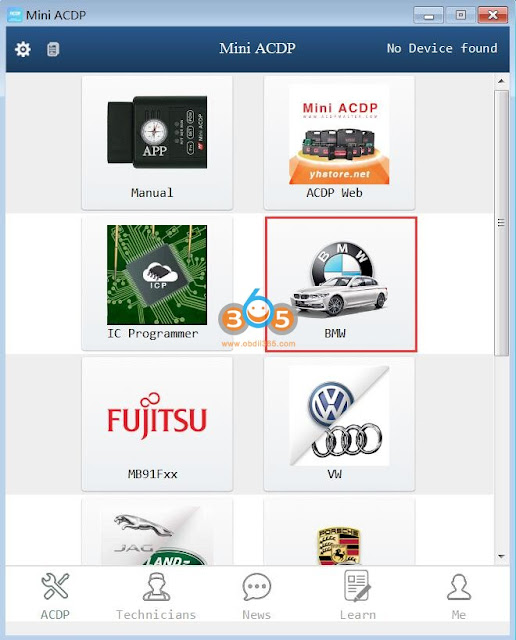
Click on “BMW”.

Yanhua ACDP Read 2021 BMW M5 ISN MG1 9


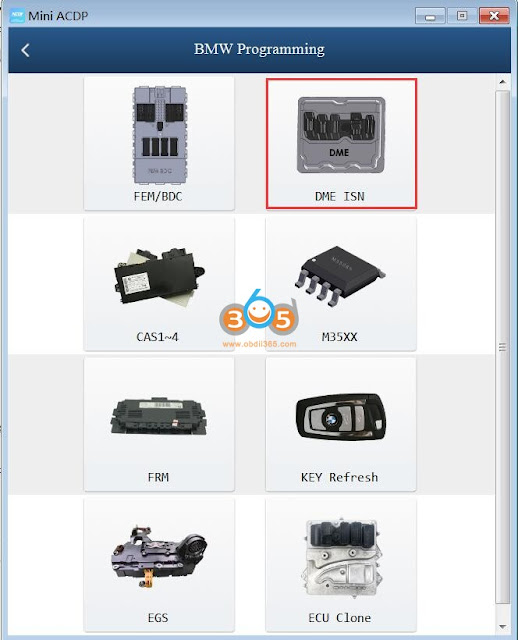
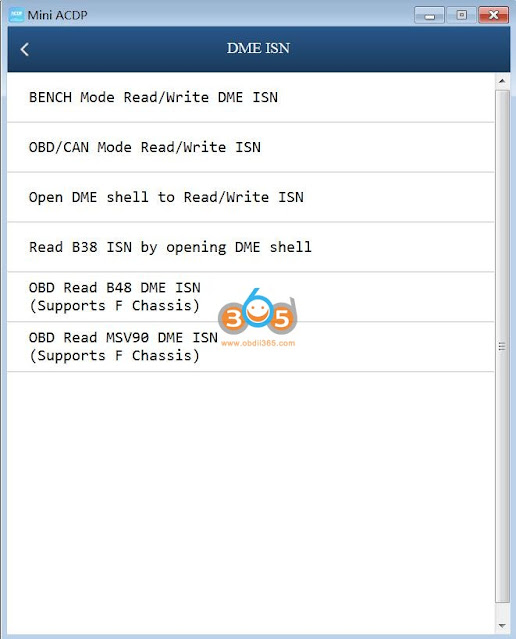
Click on “DME ISN”.

Yanhua ACDP Read 2021 BMW M5 ISN MG1 10


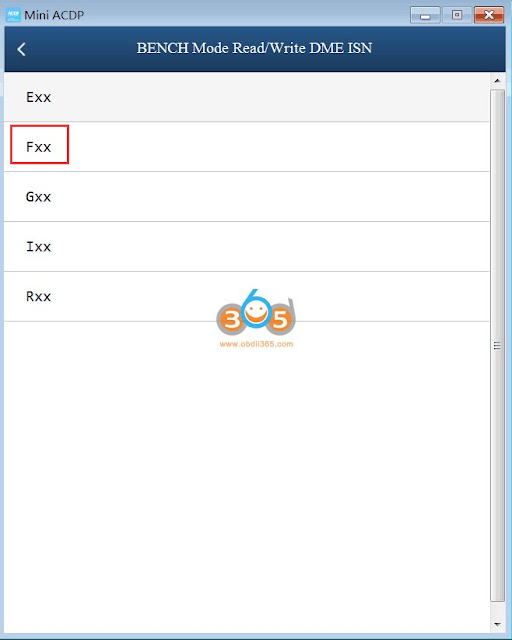
Click on “Bench Mode Read /Write DME ISN”.

Yanhua ACDP Read 2021 BMW M5 ISN MG1 11


Click on “Fxx”.

Yanhua ACDP Read 2021 BMW M5 ISN MG1 12

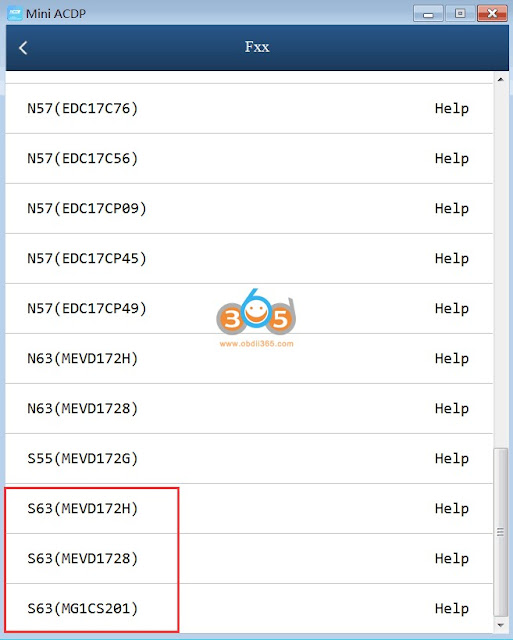
Scroll down and you will see S63 (MEVD172H), S63 (MEVD1728), S63 (MG1CS201).

For S63 (MEVD172H), it supports “Identify” and “Read /write ISN”;

For S63 (MEVD1728), it supports “Identify” and “Read /write ISN”;

For S63 (MG1CS201), it supports “Identify” and “Read ISN”;

Yanhua ACDP Read 2021 BMW M5 ISN MG1 13

Next is to follow the on-screen guide to operate.


Alright, this is how to use Yanhua Mini ACDP to Identify, Read and write ISN for BMW S63.

www.obdii365.com

2021/08/17

Restore a BOSCH EDC17 ECU with MPPS V18?

 Guide on how to restore a BOSCH EDC17 ECU after a boot mode flash goes wrong with KTM Bench programmer, I have full backup with password extracted with ktm bench but ecu f flasher tell me wrong password.

Credit to: A.N. Idiot (A.K.A. PsiDOC)


This guide is something I have cobbled together after a brick situation occurred on a BMW

EDC17CP45 ECU whilst in boot mode. Some bits may be in the wrong order or I have forgotten something so use a guide, not a procedure.

Please note: This guide assumes you made a backup of the ECU software before flashing.

If you did not, this guide cannot help you!


What happened?

Using PCM Flash in the Bosch MEDC Bootloader Module – Module 71, a flash erase starts and

then ends unexpectedly with an error or not completed. In 99.9% of cases this usually leaves

the ECU in boot mode as well.


Check if the ECU is in bootmode and investigation:

To test if we are still in boot mode, try to identify the ECU again using Bosch MEDC Bootloader

Module – Module 71.

If it identifies: then try to flash again as the ECU is NOT in boot mode.

If it does not identify: Switch to the Infinion Tricore BSL module – Module 53 and see if the ECU

will now identify.

If it does identify, read the eeprom and save it just in case you need to do a full ECU clone.

When you try to read the internal flash this will not complete and you will see an incorrect

password error. This is expected.

If the ECU DOES NOT identify you can try opening the ECU and soldering a wire to the boot pin.

Then try again using the Infinion Tricore BSL module – Module 53, with the grey wire – BOOT from your scanmatik cable connected to the boot pin wire you just connected.

If it identifies, then we are good to go.

If it does not identify, This guide cannot help you. There is a bigger issue with the ECU than a bad flash.


Recovery Explanation:

You will notice when we tried to read the internal flash in the Infinion Tricore BSL module –

Module 53 it refused by an incorrect password error. This is our only hurdle to jump on the

path to recovery.

If you backed up the BSL password in PCM Flash using the Bosch MEDC Bootloader Module –

Module 71 you can try using that password in the PCM Flash Infinion Tricore BSL module –

Module 53 to reflash the ECU. It may well work but I cannot guarantee it as I have not tried.

If, like myself, you did not back up the password then we need to recover that password from the backup file and then use it to reflash the ECU. Fortunately MPPS V18 has a handy password recovery tool we can use. For the rest of the guide you will need a MPPS V18 tool, the associated tricore cable and the MPPS tricore boot software.


Recovery:

Open the ECU and solder a wire to the boot pin – (this may not be necessary as the ECU is

already in boot mode – give it a shot without the boot pin connected. It may well save opening

the ECU).

Connect the MPPS Tricore cable to the ECU for Power, Ignition and Can lines. Please note: The

ignition wire is the GREEN K-Line wire NOT THE RED POWER WIRE!

Connect the GREY boot wire on the cable to the boot pin wire (if you soldered a wire to the

boot pin. If not can be ignored).

Connect the Tricore cable to the power supply via the barrel style power connector NOT the

banana plugs if fitted!

Switch on the power supply.

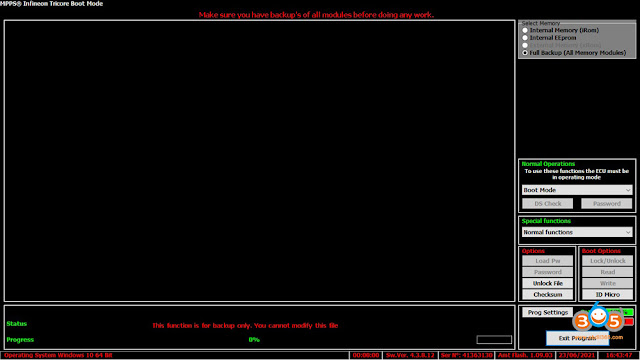
Now launch the Tricore Boot.exe MPPS software. You should see this:

Restore a BOSCH EDC17 ECU with MPPS V18 1

First, we need to ID The Micro, so click that button and follow the instructions.

After the bootloader has been loaded the output on the screen should look like the picture on

the next page but will NOT be identical as each processor has different parameters. Essentially,

if you get lots of green writing… GREEN IS GOOD!

If you get an error loading bootloader, check your connections to the ECU and (if fitted) boot

pin connection are all correct and try again. If it still errors out and you didn’t open the ECU

yet, now is the time to do it and solder a wire to the boot pin and try again.
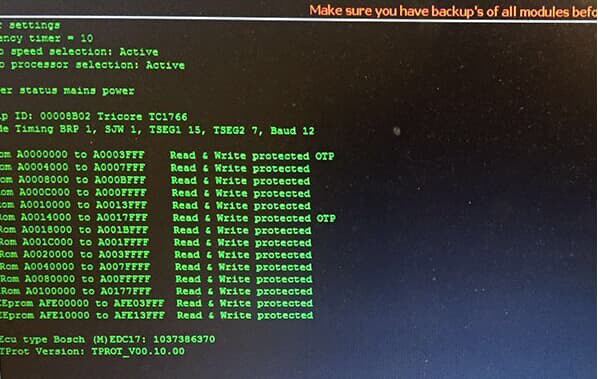
Restore a BOSCH EDC17 ECU with MPPS V18 2


Password Recovery:

After the ID Micro is done, you will now notice that a few more buttons are not grayed out

anymore, so let’s get that password shall we?

Click the password button. This will bring up the file utility dialog box as shown below but the

file name, ecu number etc will be blank.
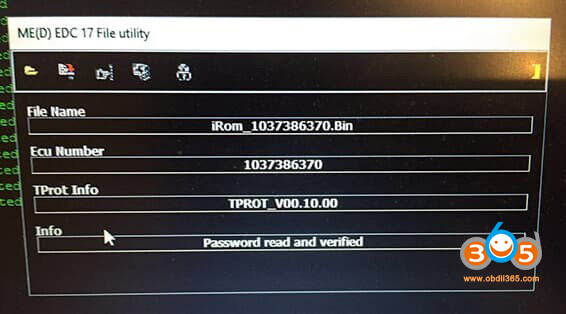
Restore a BOSCH EDC17 ECU with MPPS V18 3

Click the file open icon and select the flash file you backed up and select open / ok.

Now the file name etc details will be filled in, and more importantly, the info box should say

Password Read and Verified!

Now click the “Save Password” Icon in the Dialog Box and save the password.

Now close the file utility dialog box.

Reflashing the ECU.

We’re nearly there! Just a couple of bits to go

Now we have the password saved we can load that into MPPS, and flash the ECU back to life!

Click the Load PW Button. This will bring up a smaller dialog box that you can use to load the

password into the software.

Those that have got to here without opening the ECU as it’s stuck in boot mode should write

the backup file now without reading the ECU as it will be brought out of boot mode by a read or

write.

Those that are using the boot pin can read and write to the ECU as much as they wish.


Your ECU should now be back to life.

A brief explanation of what we just did:

If PCM flash errors out in GPT mode it has not only erased some of the data from the flash but

the ECU will be in boot mode as well.

So what we need to do is reflash the backup of the software back in. This will solve both the

missing code and put the ECU back into normal running mode.

GPT Mode will not work as the ECU is in boot mode already and will not pass the identification

checks.

And BSL mode requires the password to unlock and flash.

If you don’t have the password to flash, then MPPS V18 will recover the password from the

backup flash, which you can then load into MPPS as the password to use when flashing.

Now MPPS will flash the ECU with the backup and put the ECU in normal mode and the ECU will work.


http://blog.obdii365.com/2021/08/17/debrick-a-bosch-edc17-ecu-after-a-boot-mode-ktm-bench/

2021/08/16

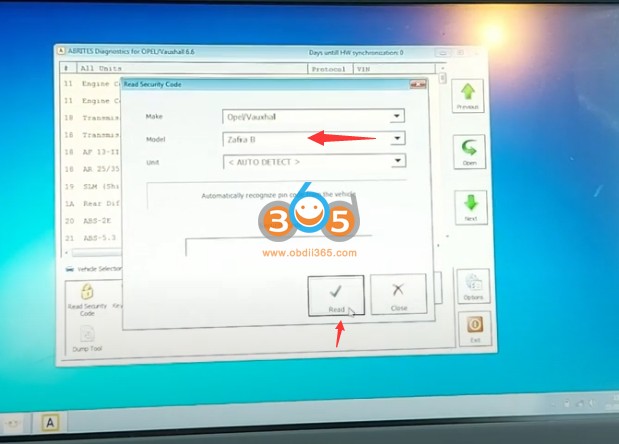
Program Opel Zafira 2009 Key with SVCI 2020

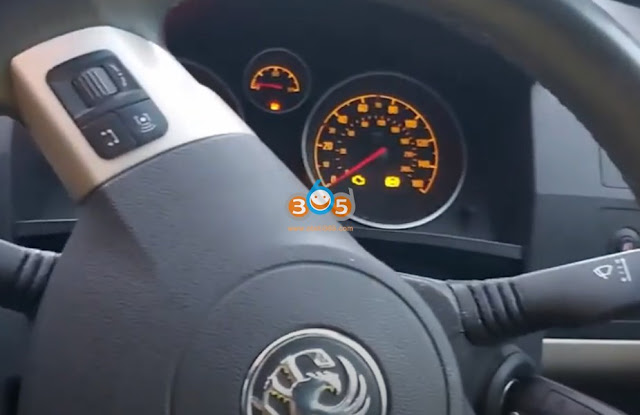
 SVCI 2020 is working OK with Opel 2009. I can extract the PIN code, key cutting code and program the new key without problems. Here is the tip to use SVCI 2020 commander to delete keys and transponder chip in a Vauxhall / Opel Zafira 2009 and program a new remote control car key.


Connect SVCI 2020 with vehicle

svci-2020-opel-zafira-b-2009-key-1

Turn in ignition switch with a working key
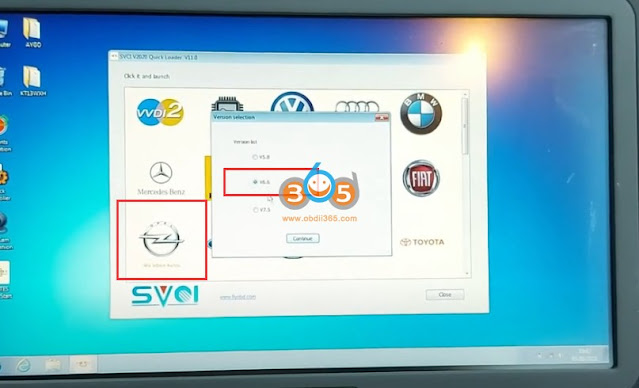
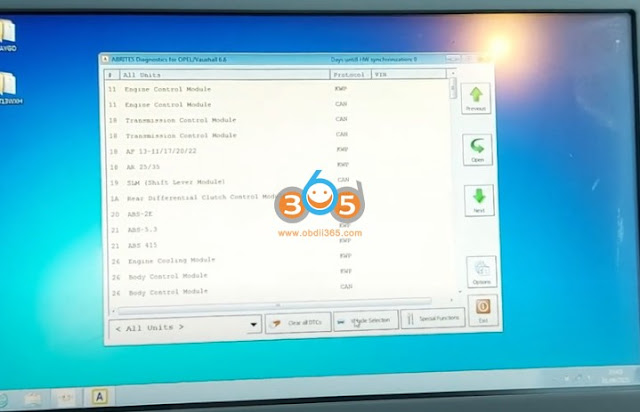
Run Opel software, choose software V6.5

svci-2020-opel-zafira-b-2009-key-2
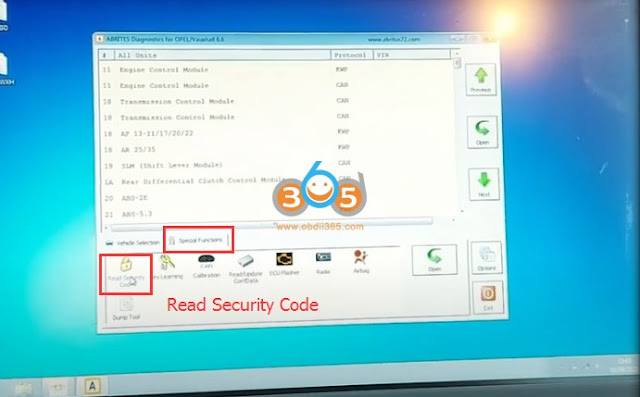
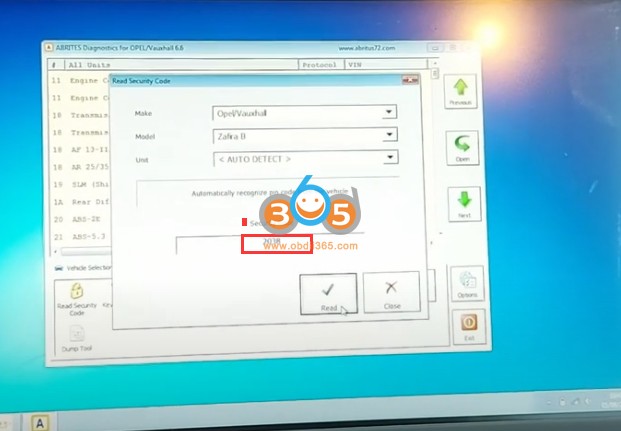
Go to Vehicle Selection -Special Function – Read Security Code

svci-2020-opel-zafira-b-2009-key-3

svci-2020-opel-zafira-b-2009-key-4


Select vehicle model Zafira B and press Read

svci-2020-opel-zafira-b-2009-key-5

svci-2020-opel-zafira-b-2009-key-6

SVCI 2020 Read security PIN code success
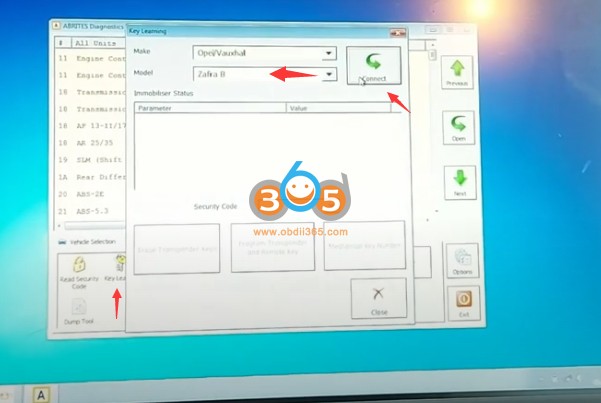
Select Key Learning Function – Zafira B, press Connect

svci-2020-opel-zafira-b-2009-key-7

svci-2020-opel-zafira-b-2009-key-8

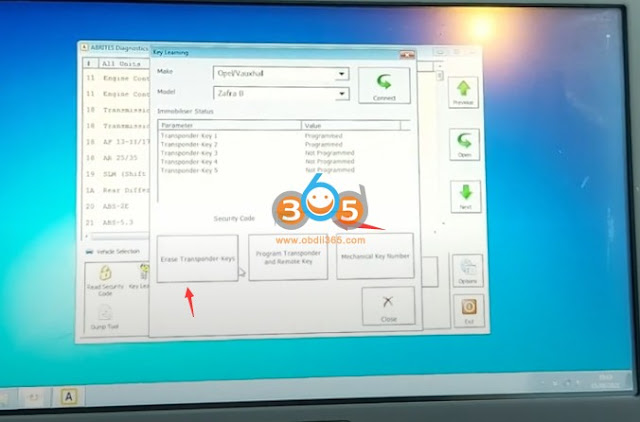
Then input pin code and press Erase Transponder Keys
Turn ignition off
Turn ignition on
Erase key success

svci-2020-opel-zafira-b-2009-key-9
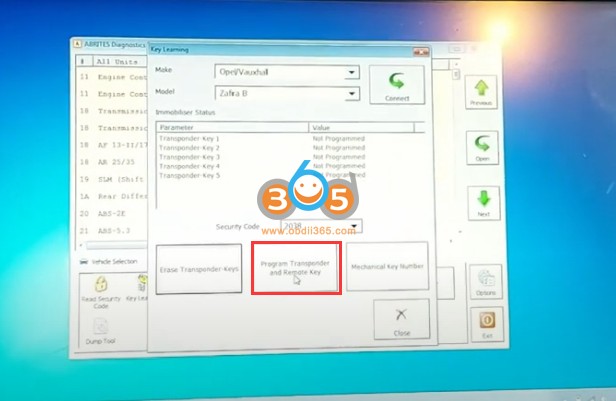
Select Program Transponder and Remote Key
Insert non-programmed transponder key and turn on the ignition
Turn ignition off
Turn ignition on

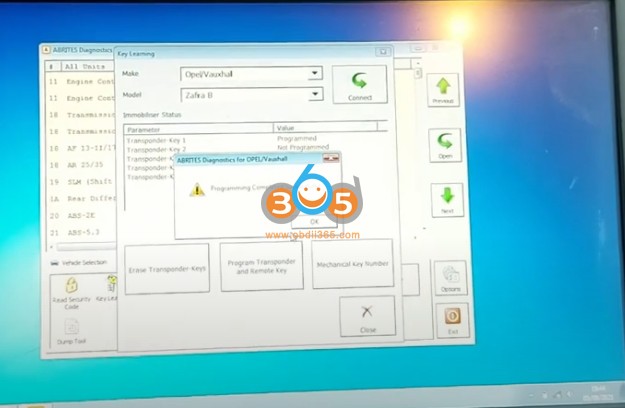
svci-2020-opel-zafira-b-2009-key-10

Program completed.

svci-2020-opel-zafira-b-2009-key-11

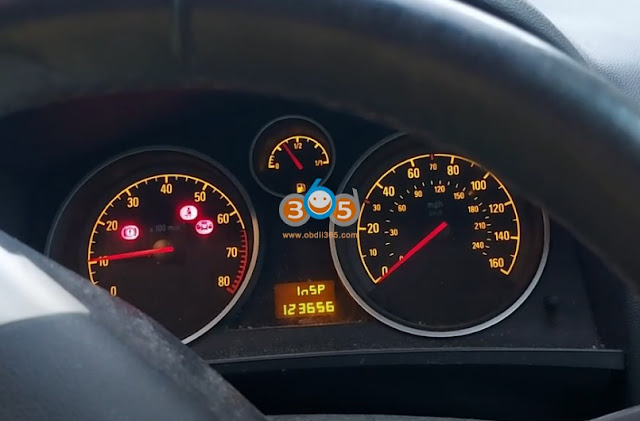
Test the new key. It is working.

www.obdii365.com

http://www.key-programmer.org/2021/08/17/add-opel-zafira-2009-key-with-svci-2020/

2021/08/13

Which Tool to Change Audi A3 2009 Oodmeter?

 To calibrate cluster for an Audi A3 2009 cayc motor, can i get the job done with this tool OBDSTAR ODOMASTER or GODIAG GD801 or Yanhua Digimaster 3 or any other way to do this? Via OBD2 or need to dismantle the cluster?


Audi A3 Cluster Calibration Tools Reviews:


  1. OBDSTAR ODOMASTER: Someone has done Audi A3 2009 Cluster Calibration with it.


OBDSTAR ODOMASTER A3 Cluster Calibration coverage:

2003-2006

2007-2010

MQB 2014.06-

MQB 2012-2014.06


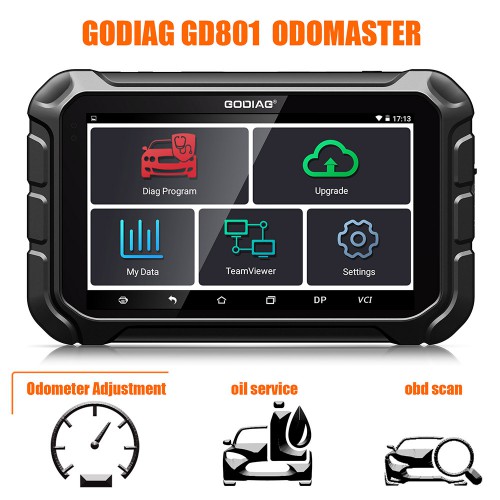
GODIAG GD801 is also working too as they share the same odometer software.

godiag-gd801-change-audi-a3-odometer-1


  1. Yanhua Digimaster 3: Someone has done Audi A3 2009 Cluster Calibration with it. it supports Audi A3 up to 2011.

digimaster-3-change-audi-a3-odometer-1


  1. XProg the safest for a3.

With xprog you can’t do it without removing the cluster


Audi cluster micronas 24 c32 Cluster Calibration guide for your reference:

U need xprog to read Micronas dump. not Use picture at xprog help.

  1. Read Micronas Flash and 24C32
  2. load It to Arbiters(FVDI) and decode(it will work for this), you will get full immo data
  3. U can try to repair flash – forum got procedure – need to fill FF some addresses but as U got new same cluster – read it too(if U got no key for spare cluster – if Got it u can do it by obd)
  4. change of immo data in spare cluster(export config data and write by xprog) – even key will work.


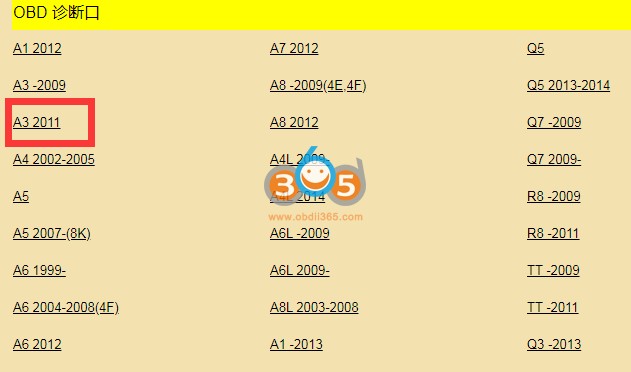
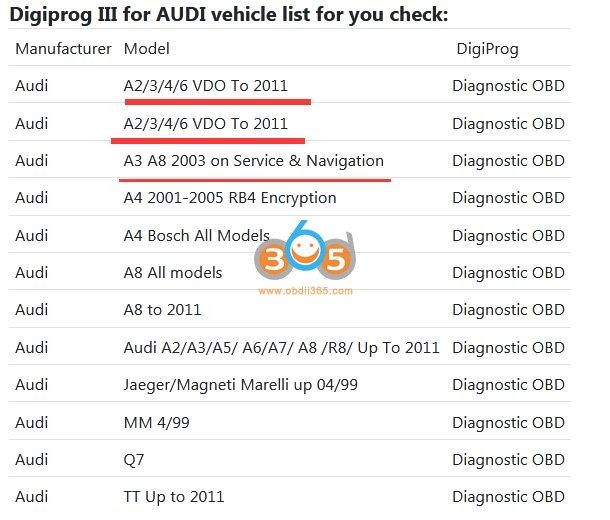
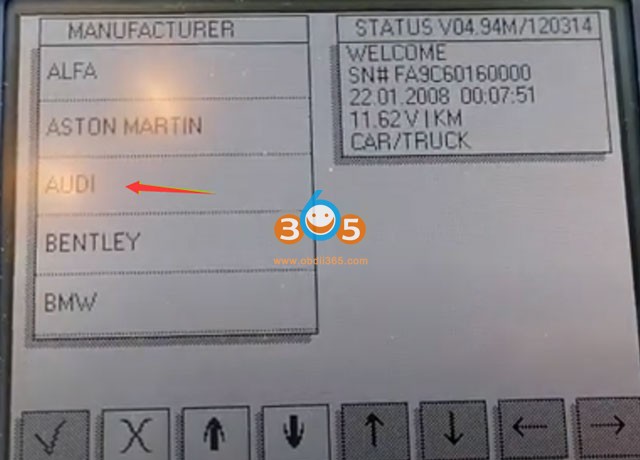
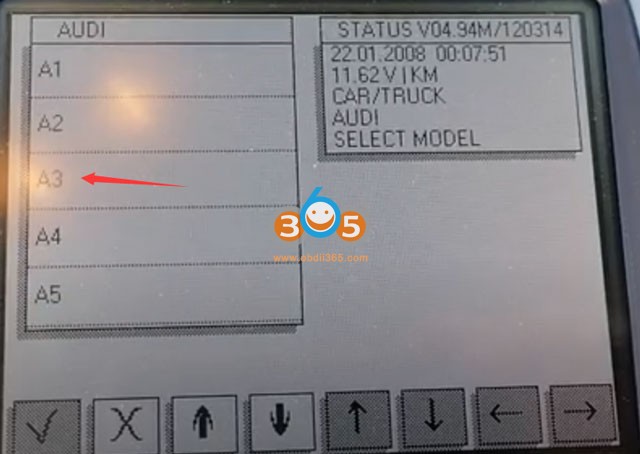
  1. Digiprog 3 4.94: Works perfect with digiprog

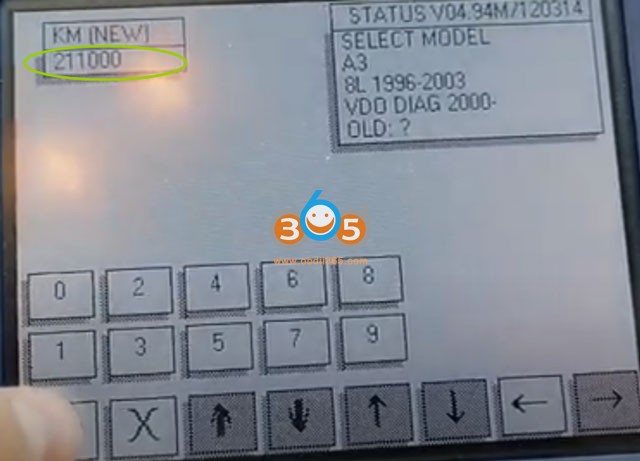
Look at this image of Digiprog 3 4.94 adds Audi A3 new version

Digiprog 3 works very good on this dashes made many of them with it

digiprog3-change-audi-a3-odometer-1

digiprog3-change-audi-a3-odometer-2

digiprog3-change-audi-a3-odometer-3

digiprog3-change-audi-a3-odometer-4


Any questions and suggestions, please contact at https://www.obdii365.com/.