2022/11/30

KT200 Audi EDC17CP14 via OBD or Bench

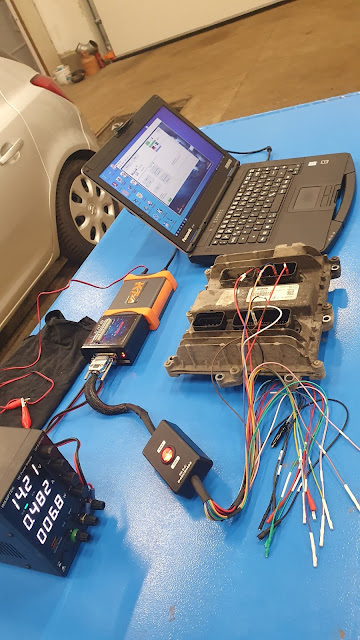
 Question: KT200 edc17cp14 in audi r/w ok? Bench or obd? EDC17CP14 method’s over OBD does not work. KT200 only can read but can not write this processor. Over bench mode everything is perfect. Any idea?

KT200 Audi EDC17CP14 via OBD or Bench 1

KT200 Audi EDC17CP14 via OBD or Bench 2

On bench it works.

KT200 Audi EDC17CP14 via OBD or Bench 3

Solution:

Some edc17cp14 can be read and write via OBD, for example Golf 6 edc17cp14 R/w normal obd with success. Checksum with kt200.

KT200 Audi EDC17CP14 via OBD or Bench 4

some SW versions cannot be written via OBD. Only after an update to a higher version.

Cp14 and cp20 very commonly made after 2009. Must bench. 

KT200 Audi EDC17CP14 via OBD or Bench 5

BOSCH EDC17 CP14 [ 1796 ] – VW / Audi / Seat / Skoda [Diesel] bench pinout

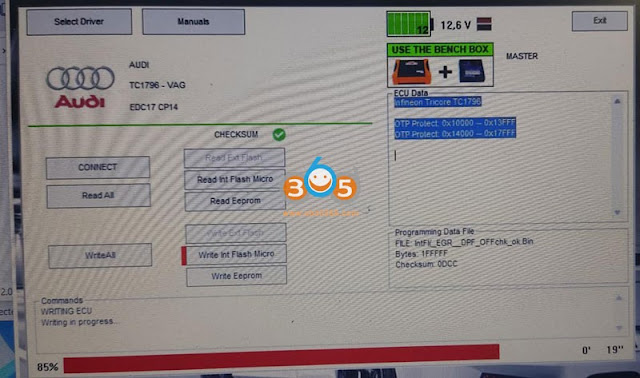
To read and write use the following driver:
→ BENCH TRICORE
→ VW / AUDI / SEAT / SKODA
→ TC1796 – VAG
→ EDC17 CP14

KT200 Read MAN TGX EDC17CV42 on Bench

 KT200 full read and write EDC17CV42 MAN TGX 18.440 Bench mode OK.


Connect the multifunction cable as follows:
KT200 Read MAN TGX EDC17CV42 on Bench 1
BOSCH EDC17 CV42 [ 1797 ] - Fendt, MAN [Diesel] pinout

To read and write use the following driver: 
→ BENCH MODE 
→ FENDT or MAN 
→ TC1797 
→ EDC17 CV42
KT200 Read MAN TGX EDC17CV42 on Bench 2

KT200 Read MAN TGX EDC17CV42 on Bench 3

KT200 Read MAN TGX EDC17CV42 on Bench 4

KT200 Read MAN TGX EDC17CV42 on Bench 5

KT200 Read MAN TGX EDC17CV42 on Bench 6


2022/11/29

Visteon DCU102 DCU104 Pinout to Ktag KT200

 There are many ecu programmers that can be used to read and write Visteon dcu102 dcu104 in Ford and PSA group, including KT200, Foxflash, Ktag, Dimsport, Autotuner etc.

Check pinout wiring diagram to each device respectively.


1.Visteon DCU 102 DCU104 pinout to Ktag

Ktag 7.020 tested and working.

Visteon DCU 102 pinout to Ktag

Ktag Vistion DCU 102 pinout
Visteon DCU104 pinout to Ktag

Ktag Vistion DCU 104 pinout
Example: Ford DCU104 work done with ktag clone
Read with KTAG in boot mode. ksuite SW correct automatically checksum on Flash/micro/maps etc.
Visteon DCU 102 DCU104 ktag 1

Visteon DCU 102 DCU104 ktag 2

Visteon DCU 102 DCU104 ktag 3

Visteon DCU 102 DCU104 ktag 4

NOTE: Ford DCU can be read and written by obd kess, PSA can be just written obd.

2.Visteon DCU 102 DCU104 pinout to KT200/FoxFlash/DFox


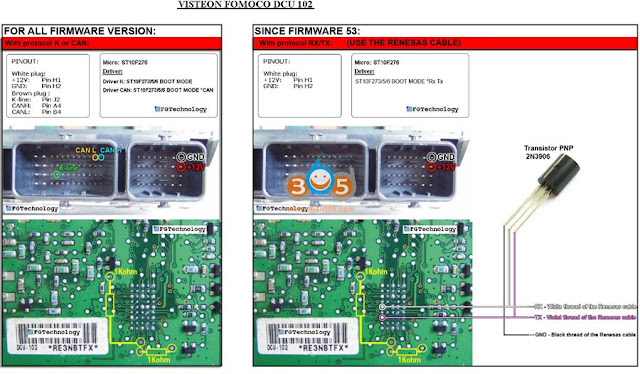
VISTEON Fomoco DCU-10x [ST10F276] – Fiat,Ford,Peugeot,Citroen [Gasoline]

Connect multifunction cable and the resistances as shown.

Visteon DCU 102 DCU104 ktag 5

Visteon DCU 102 DCU104 ktag 6

To read and write use the following driver:
→ TOOLS BOOT MODE
→ ST ST10Fxxx
→ ST10F273 / ST10F275 / ST10F276 *K
or
→ ST10F273 / ST10F275 / ST10F276 *CAN


Alternatively, read via RX TX:

Kit to use:
– Multifunction cable
– 2 resistance of 1000 Ω
– Transistor PNP 2N3906

Connect multifunction cable and the resistances as shown.

Visteon DCU 102 DCU104 ktag 7

Visteon DCU 102 DCU104 ktag 8

To read and write use the following driver:
→ TOOLS BOOT MODE
→ ST ST10Fxxx
→ ST10F273 / ST10F275 / ST10F276 *RxTx


VISTEON DCU-104 [ST10F276] – Fiat,Ford,Peugeot,Citroen [Gasoline]

Connect multifunction cable and the resistance as shown.


Visteon DCU104 kt200 1

Visteon DCU104 kt200 2

To read and write use the following driver:
→ TOOLS BOOT MODE
→ ST ST10Fxxx
→ ST10F273 / ST10F275 / ST10F276 *CAN
or
→ ST10F273 / ST10F275 / ST10F276 *K


For example:

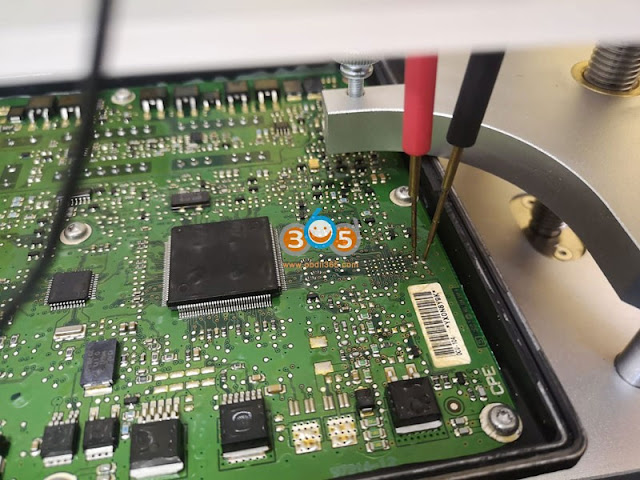
Citroen Jumper 2.2 HDI year 2010 Visteon DCU-102 KT200 working over boot mode. see 2 unsoldered pins like ktag’s. CNF is located at the side of your bench cable on/off switch.

Read only in Boot mode. I also tried obd writing Visteon DCU102. Perfect!

Visteon DCU102 kt200 1

Visteon DCU102 kt200 2

Visteon DCU102 kt200 3

Visteon DCU102 kt200 4

Visteon DCU 10X pinout to Dimsport 

Visteon DCU 10X pinout to dim sport

Visteon DCU 10X pinout to Fgtech

you can read & write with bootmode only
Tested to fgtech clone working great

Visteon DCU 10X pinout to Fgtech

Flex read it safe and fast in boot.

Autotuner can do all fast via Obd.

How to Use FoxFlash Software on 3 PC?

 Possible to install and activate FoxFlash manager software on another laptop?  Will it be possible to use on 2-3 computers? It would be great for us who are multiple persons in 1 company. As well for us who work outside the workshop.


Yes, you can set up foxflash manager app on up to 3 laptops. 


Version 1.3.0 of the FoxFlash Manager is now available. The manager has been improved and now 3 computers to 1 tool.

Download latest FoxFlash manager on https://www.dfb-technology.com/

After download, restart foxflash Manager, install drivers.

Your tool can now be used on a total of 3 computers without need to unbind.

It’s automatic now , needn’t send email for active 3 pcs.

1 tool can bind at 3 pc at the same time now. Use the same email tool links.

Use FoxFlash Software on 3 PC 1

Feedback:

Good news for users FOX FLASH. it’s working with 2-3 Pc. Thanks support foxflash.

Use FoxFlash Software on 3 PC 2

Use FoxFlash Software on 3 PC 3

Use FoxFlash Software on 3 PC 4


Clone BMW MSV90 DME with Yanhua Mini ACDP

 Another Yanhua Mini ACDP tutorial: How to clone BMW MSV90 DME on bench.

What’s required?

Clone BMW MSV90 DME with Yanhua Mini ACDP 1

Preparation:

Make connection follow instructions

1: Prepare ACDP, OBP+ICP adapter, interface board and DME
2: Connect interface board correctly to the DME interface
3:Short the CAN resistor on the OBP+ ICP adapter to the “CAN-R Join”
4: Connect ACDP, OBP+ICP adapter, interface board and DME

Clone BMW MSV90 DME with Yanhua Mini ACDP 2

Clone BMW MSV90 DME with Yanhua Mini ACDP 3

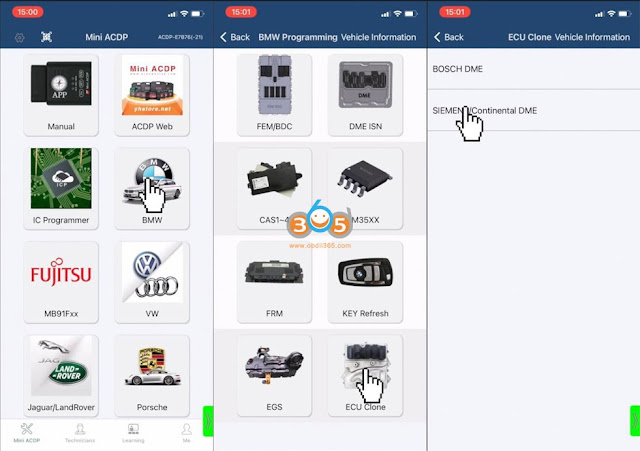
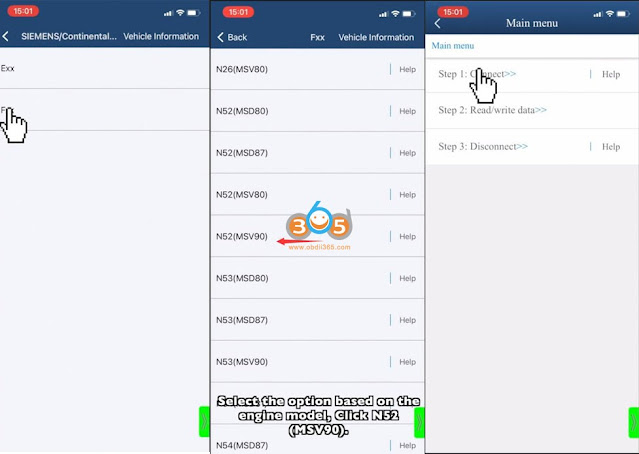
Step 1: Connect

Run ACDP Mini App

Select BMW->DME Clone-> Siemens/Continental DME-> Fxx->N52 (MSV90)->Connect

Clone BMW MSV90 DME with Yanhua Mini ACDP 4

Clone BMW MSV90 DME with Yanhua Mini ACDP 5

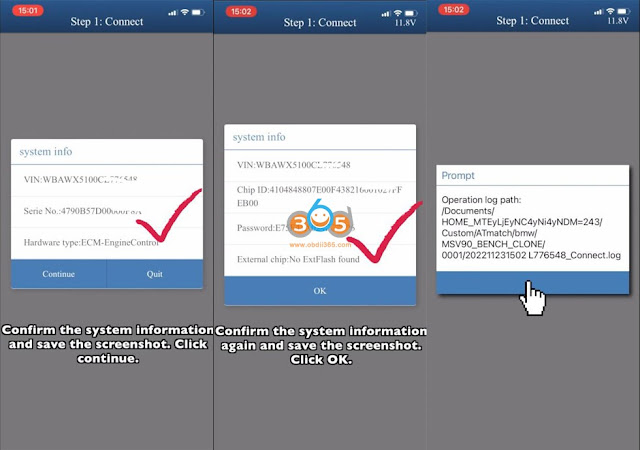
Well connection is built. Detect system information and save DME info.

Clone BMW MSV90 DME with Yanhua Mini ACDP 6

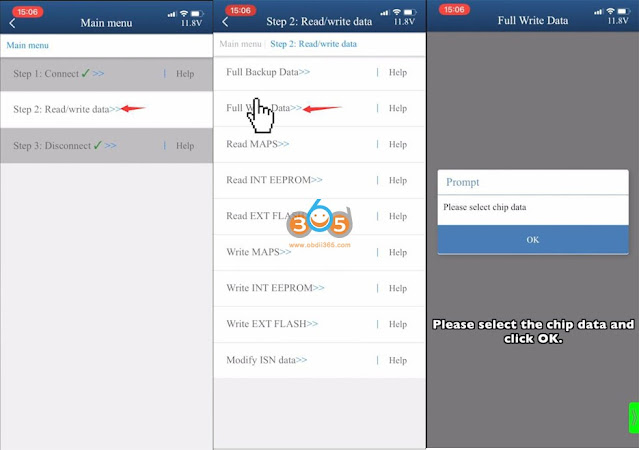
Step 2: Read and Write Data
Read and write data->Full backup data

Auto saved backup data

Clone BMW MSV90 DME with Yanhua Mini ACDP 7

Step 3: Disconnect

Clone BMW MSV90 DME with Yanhua Mini ACDP 8

Step 4:

Then connect another MSV90 DME you need to clone and prepare to write original data to this DME

Clone BMW MSV90 DME with Yanhua Mini ACDP 9

Step 5: Connect new DME

Read new target DME system information and save data

Clone BMW MSV90 DME with Yanhua Mini ACDP 10

Step 6:

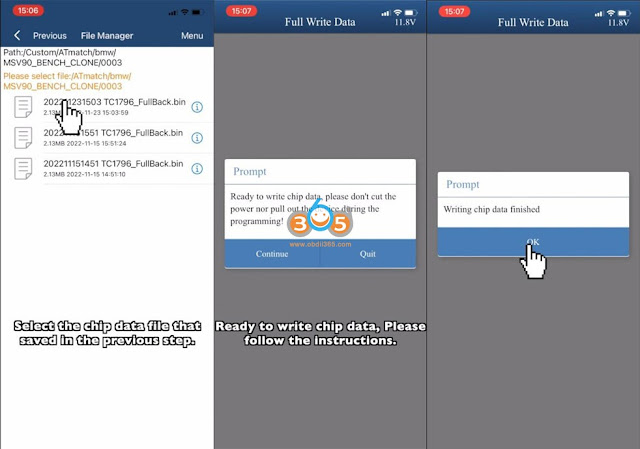
Select Read and Write data-> Full write data

Upload original chip data read in Step 2

Wait until write chip data finished

Clone BMW MSV90 DME with Yanhua Mini ACDP 11

Clone BMW MSV90 DME with Yanhua Mini ACDP 12

Step 7:

Don’t forget to perform disconnect procedure as well.

Done. Put new MSV90 back to vehicle.

2022/11/28

How to Use FoxFlash to Clone MEDC17 ECUs?

 FoxFlash support MEDC17 free clone service.  Most of other tools need patch the files after read out, but Foxflash is free.


How to Clone MEDC17 ECUs with FoxFlash?

How to clone medc17 ecu use clone services

1:Read out the old ecu all part like flash and EPROMs

2: Readout the new target ecu flash and EPROMs

3: use the tool box

4: use the clone server

5: select the ecu what you want to clone , read the help

6: Start clone it (normally use flash ), save as new file

7: Write back the new cloned file flash to target new ecu, write the old ecu EPROMs to new ecu too

8: Work done and test it.

KT200 Read VAG Infineon MED17.5.5 ECU

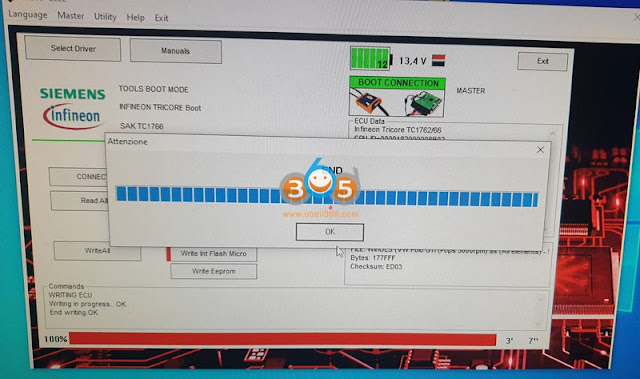
 KT200 read and write VAG Infineon MED17.5.5 successfully.

ECU: MED17.5.5
Mode: Boot Mode
R/W: OK
Cks: Manual (there’s checksums for all ECU but some MV/ED ECUs not okay)

you need to make checksum externally and car start.

Search our blog for checkcum software WinOLS or Lsuite.

KT200 Read VAG Infineon MED17.5.5 ECU 1

KT200 Read VAG Infineon MED17.5.5 ECU 2

KT200 Read VAG Infineon MED17.5.5 ECU 3

BOSCH MED17.5.5 [ TC1767 INT.F.] – VW, Audi, Seat, Skoda


Step 1: Password search

Connect the pinout below with multifunction cable and the white and violet wires on the pcb.
Use the driver:
→ TOOLS BOOT MODE
→ INFINEON TRICORE Tool Password
→ PASSWORD BFT
→ Click on “Find Password” and follow the software messages.

KT200 Read VAG Infineon MED17.5.5 ECU 4

Now that the password has been found it’s possible to read and write the control unit. See next step.

Step 2: Read and Write ECU

Connect with the multifunction cable the following pinout and the boot shown below.
Use the driver:
→ TOOLS BOOT MODE
→ INFINEON TRICORE Boot
→ SAK TC1767

KT200 Read VAG Infineon MED17.5.5 ECU 5