2024/02/28

How to Use Xhorse Multi Prog Script Function to Fix BMW CAS4 KM?

 Xhorse Multi Prog has built-in script function. Here we show how to use the Script Function to fix KM on BMW CAS4 5M48H.


When you run Script Function you will see Released features and Local script.

Released features: scripts from xhorse for multi-prog.

Local script: scripts made on your own and saved to your PC.

Xhorse Multi Prog Script Function to Fix BMW CAS4 KM 1

Where to get scripts for multi prog?

Currently xhorse does not release scripts yet, need to make scripts by yourself.

They will release scripts continuously in the coming updates.


Let’s continue.

Go to Script function. Import script (i.e repair KM BMW CAS4+)

Xhorse Multi Prog Script Function to Fix BMW CAS4 KM 2

Xhorse Multi Prog Script Function to Fix BMW CAS4 KM 3

Run script

Xhorse Multi Prog Script Function to Fix BMW CAS4 KM 4

You will see KM Repair tab

Xhorse Multi Prog Script Function to Fix BMW CAS4 KM 5

Xhorse Multi Prog Script Function to Fix BMW CAS4 KM 6

Press Yes and load original CAS4 5M48H d-flash to repair km

Xhorse Multi Prog Script Function to Fix BMW CAS4 KM 7

Input new mileage you desired, i.e 3333km

Xhorse Multi Prog Script Function to Fix BMW CAS4 KM 8

Xhorse Multi Prog Script Function to Fix BMW CAS4 KM 9

Save new KM.

Xhorse Multi Prog Script Function to Fix BMW CAS4 KM 10

KM repair is done.

2024/02/27

How to Add 2022 Toyota Alphard Key with Xhorse BA Cable?

 Xhorse XD8ABAGL Toyota BA adapter supports Toyota 2022- P4 BA smart key add key and all keys lost via OBD. The adapter is compatible with VVDI Key Tool Max Pro, Mini FT-OBD Tool and vvdi key tool plus.


Xhorse BA AKL Cable Vehicle List

BrandYearBoard NumberP4Note
Harrier2022-3041BA/
Venza2021-3041BA/
Sienna2021-3041BA/
Tundra20223041BA/
Levin2023-/BA/
Sequoia2023-3041BA/
Guangqi Venza2022-3041BA/
RAV4 Dual Engine E+2021-3041BAWith A/C button
GRANVIA2022-3041BA/
BZ4X2021-3041BA/
Land cruiser2022-2050BA/
Prius2023-3041BA/
Lexus NX2022-6100/RF432
Lexus NX20236100/312-314
Lexus LX2022-0010/RF432, new PCBA


Here is an example of adding a smart key to a 2022 Toyota Alphard using VVDI Key Tool Max Pro and BA AKL Cable.

The procedure should be the same on other 8A BA models.

Add 2022 Toyota Alphard Key with Xhorse BA Cable 1

Procedure:

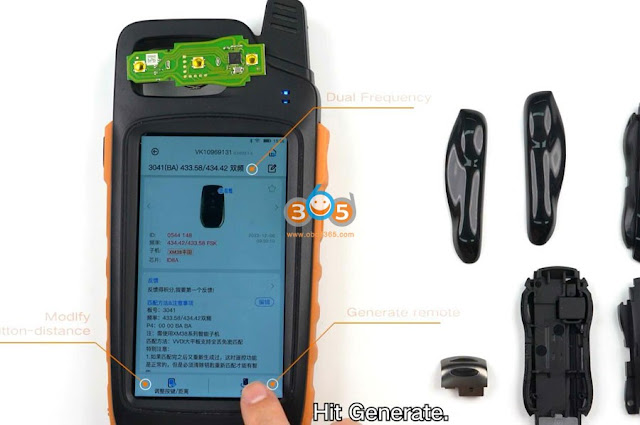
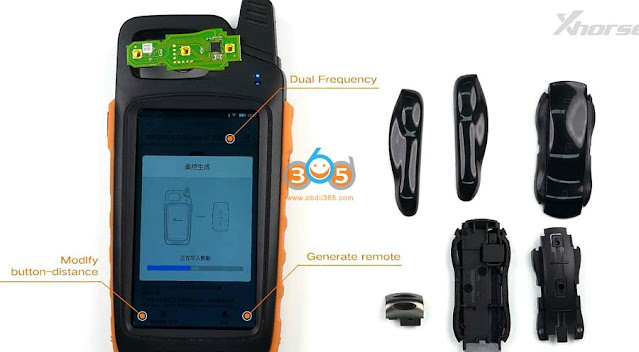
Step 1: Generate Remote
Remove key shell, insert a battery
Place the key PCB on the coil of the device
Go to Remote Program->Toyota
Here we select 3041(BA) 433.58/434.42 profile and generate remote.

Add 2022 Toyota Alphard Key with Xhorse BA Cable 2

Add 2022 Toyota Alphard Key with Xhorse BA Cable 3

Step 2: Connect Xhorse BA adapter
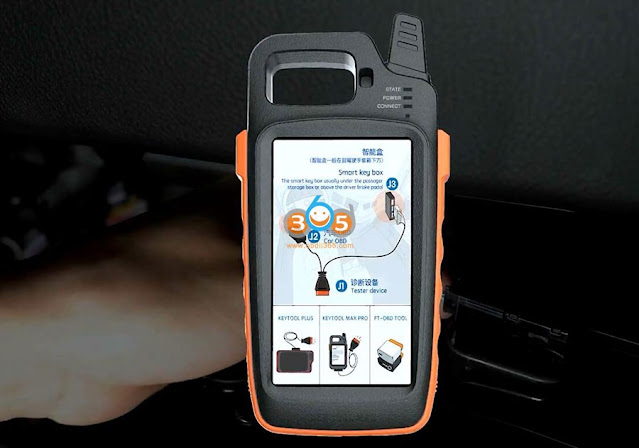
We need to read the immo data of the smart box of the vehicle
The smart box of the 2022 Alphard is above the driver brake pedal.
Remove 2 trim panels in a proper order.
Here is a connection diagram of the Xhorse 30 pin cable.

Add 2022 Toyota Alphard Key with Xhorse BA Cable 4
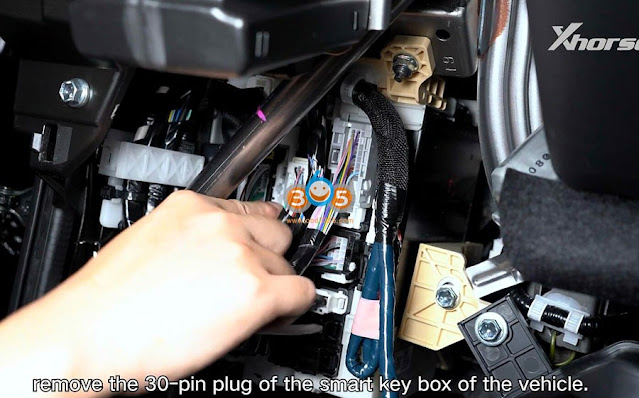
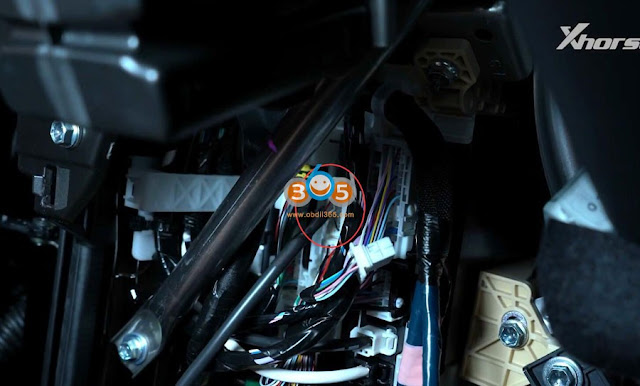
Remove the original 30-pin plug of the smart key box.

Add 2022 Toyota Alphard Key with Xhorse BA Cable 5
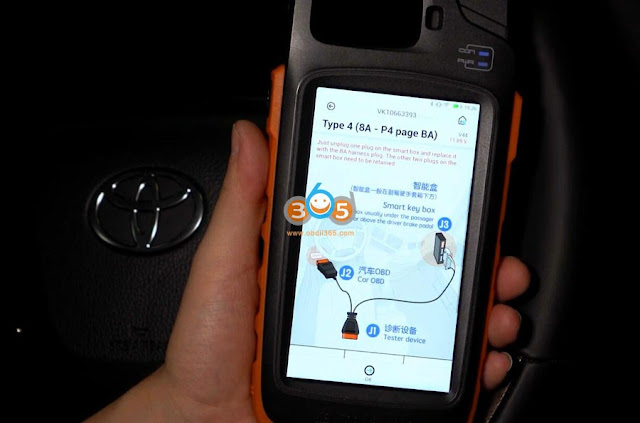
Unplug one plug on the smart box and replace it with the BA harness plug. The other two plugs on the smart box need to be retained.
Plug the Xhorse BA into smart key box.

Add 2022 Toyota Alphard Key with Xhorse BA Cable 6
Then connect BA cable with key tool max pro

Add 2022 Toyota Alphard Key with Xhorse BA Cable 7

Add 2022 Toyota Alphard Key with Xhorse BA Cable 8

Add 2022 Toyota Alphard Key with Xhorse BA Cable 9

Step 3: Backup immo data

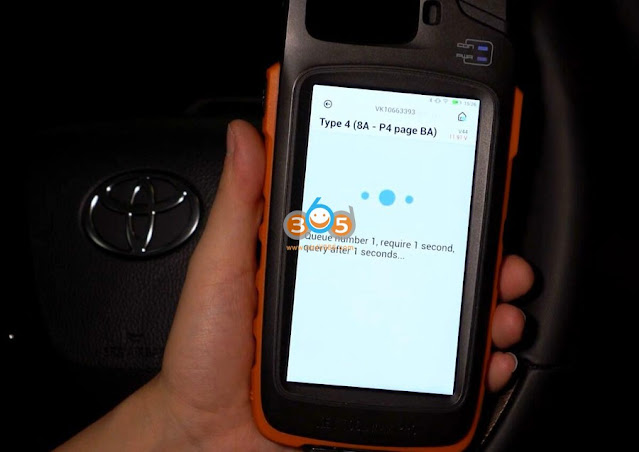
Go to IMMO Programming->Toyota->Select by type->Smart key after 2016->Type 4 (8A-P4 Page BA)->IMMO Programming
Backup smart box EEPROM data->30PIN cable reading

Add 2022 Toyota Alphard Key with Xhorse BA Cable 10

Add 2022 Toyota Alphard Key with Xhorse BA Cable 11

Add 2022 Toyota Alphard Key with Xhorse BA Cable 12

Add 2022 Toyota Alphard Key with Xhorse BA Cable 13

Turn on hazard lights
This function requires network connection
Go ahead and hit OK

Add 2022 Toyota Alphard Key with Xhorse BA Cable 14
Detect software number
Online calculating
Reading eeprom
Back up eeprom successfully

Add 2022 Toyota Alphard Key with Xhorse BA Cable 15

Add 2022 Toyota Alphard Key with Xhorse BA Cable 16

Add 2022 Toyota Alphard Key with Xhorse BA Cable 17

After the eeprom data backup is completed. You can generate an emergency key or add smart key.


Step 4: Add Amart Key
Before add smart key, unplug Xhorse BA adapter and plug original Toyota 30 pin cable to the smart box.
Select Add smart key
Turn on ignition to on position
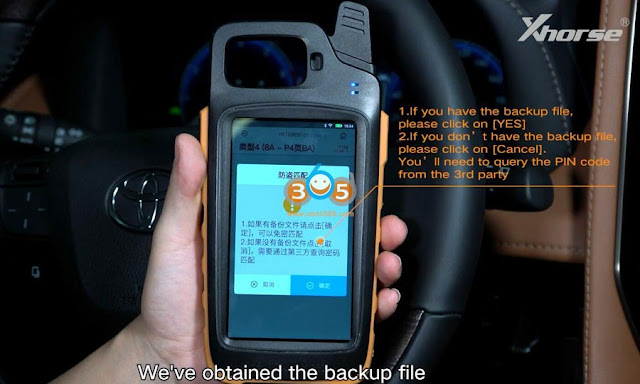
It xhorse device asks if you have backuped file, press Yes
Select EEPROM file we have backuped

Add 2022 Toyota Alphard Key with Xhorse BA Cable 18

Add 2022 Toyota Alphard Key with Xhorse BA Cable 19
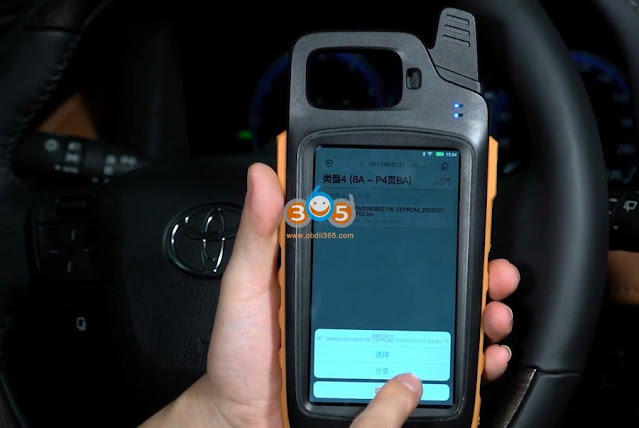
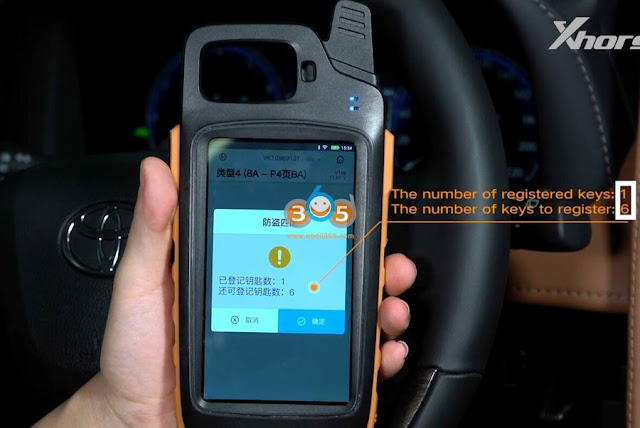
Read key information

1 key has been registered

Add 2022 Toyota Alphard Key with Xhorse BA Cable 20
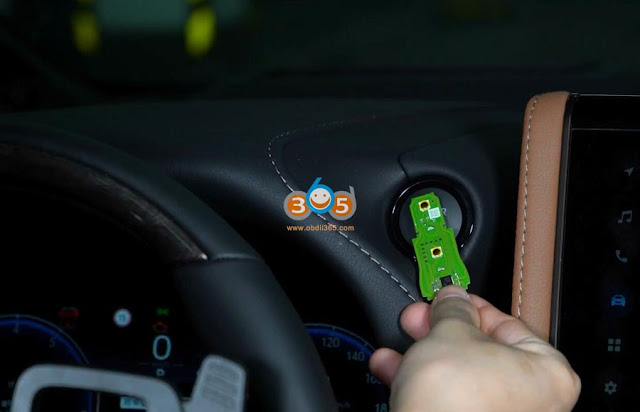
Put the register key close to Start button

Take it away after we hear 1 beep sound

Add 2022 Toyota Alphard Key with Xhorse BA Cable 21

Take new key to be programmed to Start button
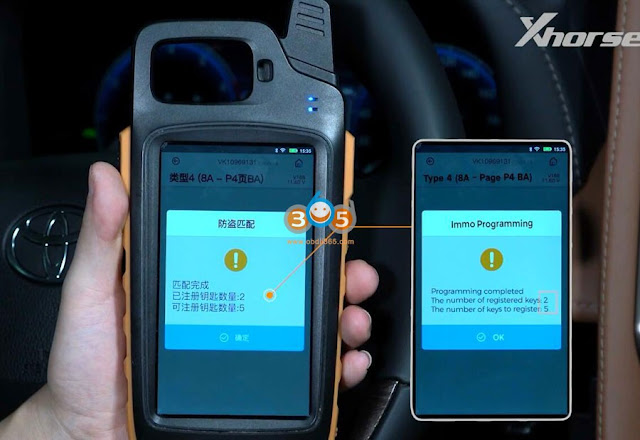
Take it away after we hear two beeps

Add 2022 Toyota Alphard Key with Xhorse BA Cable 22
We successfully added a smart key to this model.

Add 2022 Toyota Alphard Key with Xhorse BA Cable 23

Test the new smart key.


http://blog.obdii365.com/2024/02/27/add-2022-toyota-alphard-smart-key-with-xhorse-ba-cable/

2024/02/25

2011 Toyota RAV4 Xhorse XM38 Only 1 Beep Solution

 Problem:

2011 toyota Rav4 push to start. Fcc should be HYQ14AEM I’m using Xhorse XM38 generated key usually works like a charm. The key was new and reprogrammable. Autel Im508 says success learning but reads 0 keys dash did come on with 1 beep in process instead of 2.

2011 Toyota RAV4 Xhorse XM38 Only 1 Beep

Possible solutions:

1. Check the signal strength. If its 6 set to 0. I had this issue with a prado and fixed it with signal strength changed to 0

2. Take the board out of the case and it should give you 2 beeps had same problem other day with a Lexus.


Sometimes I’ve had in the past if the wrong xhorse profile was used you need to program in a non toyota smart key profile to the key (I usually choose a random mazda one) then reprogram the correct toyota profile and try program to the vehicle again.
When the wrong profile is used or it fails it stores some data that doesn’t change when changing to another toyota profile. By programming in a completely different type of vehicle key/transponder type it can then clear that data.
I think this may be a common problem I can’t remember how I found this solution, it’s worked for me many times in the past.
I also do the manual reset procedure on the xm38 remote but I don’t think that really does anything. (Remove battery. Hold down lock button and reinstall battery, light will stay solid let go of lock, program in new profile)
And as others said definitely have XM38 board out of case while programming to vehicle.


3. Use original key, always works.

Foxflash Fiat IAW 9DF OBD Check to Bypass Solution

 One of foxflash users failed to read and write Fiat MARELLI IAW 9DF ECU via OBD.

Error writing error ChangeSpeed. Possible Secure Gateway presence. Check to bypass.

Foxflash Fiat IAW 9DF OBD 1


Here is the clue.

If it is 2018+ model, it has SGW. Put the SGW bypass cable.

Need to bypass cable or open ecu and jtag boot.

HW000 no need to open ECU, it is VR reading. You need a bypass cable if SGW model.

If it is HW000, it is faster on bench. It takes 10 minutes to read and 10 minutes to write on bench.

Foxflash Fiat IAW 9DF OBD 2

HW01 OBD ok, the real reading takes a very long time, more than two hours. Reading 2h30 writing 5-10 minute.

Bench is faster,  hw01 take out and read full mode on desk. Only 4 screws. About 18 min read 20 min write on desk.

Foxflash Fiat IAW 9DF bench

Hw02 only jtag boot about 22 min read 26 min write.

HW02 is a hard ecu. Take it at 80 degree in Ofen for 20 min then it works or headgun to hot it.


Check Foxflash Fiat 9DF Jtag pinout:

Foxflash Read Fiat Marelli 9DF via OBD or Jtag Mode?


How to Clone Benz SIM271DE with Yanhua Mini ACDP?

 How-to: clone Mercedes Benz SIM271DE DME module with Yanhua Mini ACDP and module 18 on bench.


NOTE: Module 18 can only clone SIM271DE and SIM271KE DMEs.

As for other DMEs CR3.XX, CR4.XX, CR5, CR6, CR60.XX, SIM4LKE, CRD.11, CRD2.XX, ME9.7, MED17.7.X, SIM266 etc, ACDP can only reflash, cannot clone these DMEs.


Procedure:

Power on ACDP
Open ACDP App, check if device is connected
Go to Benz->DME Clone->Bench mode->select Chassis, i.e C Class ->SIM271DE

Clone Benz SIM271DE with Yanhua Mini ACDP 1

Clone Benz SIM271DE with Yanhua Mini ACDP 2

Press Help and check wiring diagram

Clone Benz SIM271DE with Yanhua Mini ACDP 3

Connect DME with ACDP/ACDP2 follow the wiring diagram

Click SIM271DE

Select Step 1: Connect
Connect with the ACDP standard power adapter 12V
Read VIN and confirm
Confirm and save system information

Clone Benz SIM271DE with Yanhua Mini ACDP 4

Clone Benz SIM271DE with Yanhua Mini ACDP 5

Select Step 2: Read/Write data->Full Backup Data
Make sure you connect 12V power supply and set up DME well.
Read and save chip data
Full backup chip data success

Clone Benz SIM271DE with Yanhua Mini ACDP 6

Clone Benz SIM271DE with Yanhua Mini ACDP 7

Clone Benz SIM271DE with Yanhua Mini ACDP 8

Go back to Main menu, click Step 3: Disconnect

Clone Benz SIM271DE with Yanhua Mini ACDP 9

Connect another donor SIM271DME unit with ACDP following the same wiring diagram
Go to ACDP app, select Benz->DME Clone->Bench mode->select Chassis, i.e C Class ->SIM271DE
Select Step 1: Connect
Read donor DME system information and save

Clone Benz SIM271DE with Yanhua Mini ACDP 10

Clone Benz SIM271DE with Yanhua Mini ACDP 11

Clone Benz SIM271DE with Yanhua Mini ACDP 12

Select Step 2: Read/write data
Full Write data
Select chip data
Upload original backup data
Ready to write chip data with Yanhua ACDP
Don’t disconnect the power or unplug the device during writing process
Write data successfully

Clone Benz SIM271DE with Yanhua Mini ACDP 13

Clone Benz SIM271DE with Yanhua Mini ACDP 14

Clone Benz SIM271DE with Yanhua Mini ACDP 15
Go back to the Main menu, click Step 3: Disconnect (Must do this)

Install new DME to car and test.

Video reference:

\