2023/03/30

How to Self Change Autel Scanners' Language?

 Most Autel diagnostic scanners are multilingual and come with English in default. To change language you have to provide device serial number to Autel engineer to switch language you desired.


Now Autel release a new policy that you can change language for some Autel scanners by yourself.


Autel preferred language operation guide


1. What is it?

Customer can choose their desired language when receive the machine. It’s more convenient and saves time. But it has 1 chance ONLY. If used up you cannot change the language by yourself and have to change it manually by providing S/N. 


2. Prerequisite

Users have to meet ALL these three requirements in order to change language by themselves.


1). Applied Autel products & versions

Only these models are allowed to be changed language by users.

AutelOTOFIX
MaxiCOM MK808Z-TSV1.98D1 LiteV1.98
MaxiPRO MP808Z-TSV1.98D1V1.98
MaxiCOM MK808Z-BTV1.98IM1V1.98
MaxiCOM MK808SV1.98D1 MaxV2.86
MaxiCOM MK808S-TSV1.98D1 PlusV2.86
MaxiCom Ultra LiteV2.86D1 Pro(660)V2.86
MaxiSys Elite IIV2.86IM2V2.83
MaxiCOM MK906ProV2.86EvoScan UltraV2.83
MaxiCOM MK906Pro-TSV2.86
MaxiCOM MK908Pro IIV2.86

*For other Autel scanners, you still have to provide S/N to change language.


2). Applied language: 

Products:

  • MaxiCOM MK808Z-TS
  • MaxiPRO MP808Z-TS
  • MaxiCOM MK808Z-BT
  • MaxiCOM MK808S
  • MaxiCOM MK808S-TS
  • MaxiCom Ultra Lite
  • MaxiSys Elite II
  • MaxiCOM MK906Pro
  • MaxiCOM MK906Pro-TS
  • MaxiCOM MK908Pro II

Multi-language: 13 available

English, Spanish, French, German, Russian, Polish, Portuguese, Swedish, Italiano, Dutch, Traditional Chinese, Japanese, Korean

*Australian Ford and Holden models have been added to the above scanners without extra license.


  • IM2
  • EvoScan Ultra

13 Language available

English, Spanish, French, German, Russian, Polish, Portuguese, Swedish, Italiano, Dutch, Traditional Chinese, Japanese, Korean

These two products don’t have AU cars.


OTOFIX:

  • D1 Lite
  • D1
  • IM1
  • D1 Max
  • D1 Plus
  • D1 Pro(660)

10 Languages available: English, German, Italian, Dutch, Portuguese, Polish, Spanish, Swedish, Russian, French


3). Device delivery time 

Make sure your machine is delivered after 2023.03.01. (Only new software version allows to change language by themselves)


How to Change Language by Yourself?

Press the power button to turn on the Autel scanner.

The initial screen will ask to select language. Here you select English to continue.

self change autel language 1

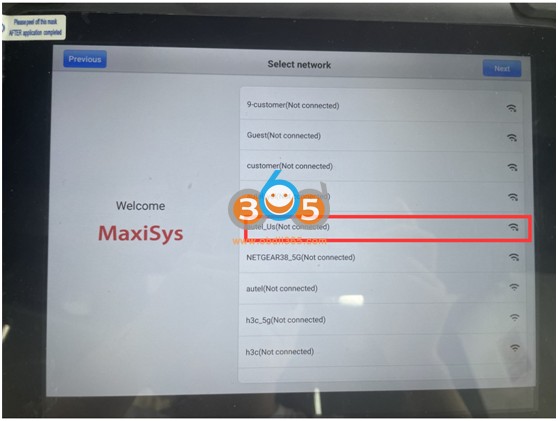
Connect WiFi autel_us, input WiFi password

self change autel language 2

self change autel language 3

Machine will auto detect if there is new App version, press Yes if there is a new version. Then accept the license agreement.

self change autel language 4

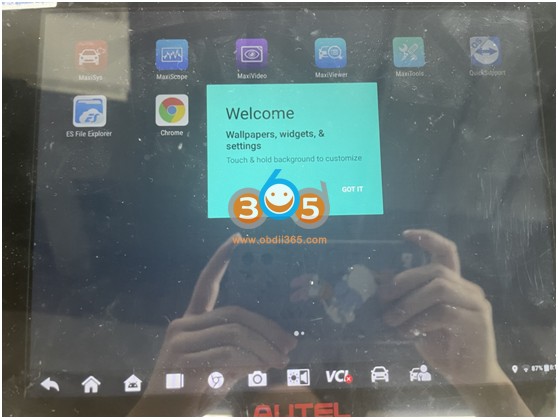
Welcome page.

self change autel language 5

English comes in default. Go to MaxiSys-Settings to choose language, i.e Traditional Chinese

self change autel language 6

After selecting language you desired, there is no software in Diagnostic and Service menu.
Need to update software in Update section.


But the machine is brand-new, so follow system prompts to register Autel account.

self change autel language 7

self change autel language 8

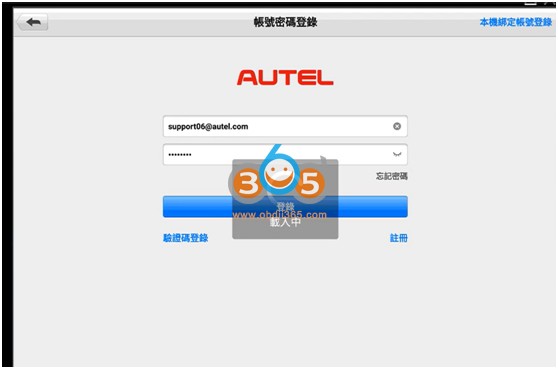
Then log in account with email and password.


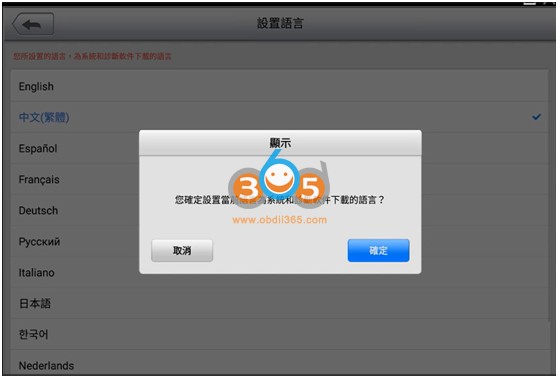
Go to Update functiom. Scanner will ask to confirm if you are going to change this language.

Press Yes to download software.

self change autel language 9

self change autel language 10

NOTE:

If press “NO” not to download software in desired language, then you have a chance to change language again.

If press “Yes” to change language, Now you have English and Traditional Chinese language in your machine. You are allowed to switch between each other.  BUT you cannot change to 3rd language by yourself.

self change autel language 11

self change autel language 12

IMPORTANT!!!

If you need to change language to 3rd one, i.e Spanish, you must provide S/N to the Autel engineer to change it manually. Otherwise, Autel will tell you language is not authorized.

self change autel language 13


Users ONLY have 2 chances to change the language.

1. Change 2nd language by yourself following the above instructions. 

2. Change 3rd language manually by provide S/N. 

If all used up, you cannot change language anymore. 


Any requestions feel free to contact us

Skype:OBDII365.com

Email:Sales@obdii365.com

WHATSAPP:+86 18150118226

https://www.obdii365.com/service/change-autel-scanners-language-by-yourself.html

2023/03/27

How to Modify and Update AMT BST Black Clone?

 Here are the tips to update AMT BST clone black box plastic programmer to 1.0.10.9 offline and modify hardware to better read ECUs.

Only black box support 1.0.10.9. The ecu bench tool golden box only 1.0.7.9. As for the modification, it should be work with gold box and fetrotech tool (tested).


Part I: Update AMT BST black box clone

Update AMT BST black box to the latest version 1.0.10.9.

You have to install the software comes with your device,
https://mega.nz/file/BxURxZwK#zw2ZdnKmvY…g-jI77_QZM
Install the drivers from the driver folder
Connect the device and wait to be recognized.
Open the software  (If you are online don’t make any upgrade). Check if it is connected to an ecu.

Copy and paste all the files from the folder in the link to your AmtBst folder  and replace all the old files

https://mega.nz/file/Qx9EzRzZ#RhSGc0IN-m…SHpOg-rx4c

Next time you will open the program your device will be updated, If you are online everytime you open will ask to furter software upgrade, Don’t do it.

Now it works offline with version 1.0.10.9.

Update AMT BST black box clone

Another feedback:

I did an update on my black box without internet connection and it does work offline.
I only read a ford edc16c34 from 2011 (new spc) with the latest version software 1.0.10.9.
I’ve used it and update it only without internet connection.
By the way I didn’t find the pinout in the documentation so I’ve used the pinout from pcmflash module 77.
You can find the pinout on pcmflash site on english version.


NOTE:

The newer black box comes with 1.0.10.9 software already.  In this case you don’t need to update the black box.

There is a duplicate installer zipped and you just ignored that and used the one in the main directory.

Also installed the drivers from the rar in the main directory, then this tool never needed to update and the software works perfect, Please ignore the update when online but will just add it to the firewall to block it.


Part II: How to Improve/Modify AMT Black Box Version 1.0.10.9.

Improve AMT Black Box Version 1.0.10.9 to better read VAG ME9.

This version works well with edc16 and edc17 but there were problems with vag med9. Look at the gpt signals:
1) Read ID – ОК (but not always, sometimes need to run several times):

modify AMT BST black box clone 1

modify AMT BST black box clone 2

modify AMT BST black box clone 3

2) Read Flash – Error:

modify AMT BST black box clone 4

modify AMT BST black box clone 5

So, as we can see, the problem is in the wrong form of GPT signals (always must be meandr 10kHz and 15.625 kHz). In addition, the signal is rather weak – less than 5 volts, I was researching the circuit, it was assembled not quite correctly, on bipolar transistors with a large voltage drop …
Also, reading instability – is the absence of a large capacitance in the power circuit to absorb voltage drops when the ECU is powered on.
I was building an external GPT generator on Arduino Nano and using the output stage from a Chinese PCM Powerbox (with field effect transistors and level control (3.3v, 5v, 12v)):

modify AMT BST black box clone 6

modify AMT BST black box clone 7

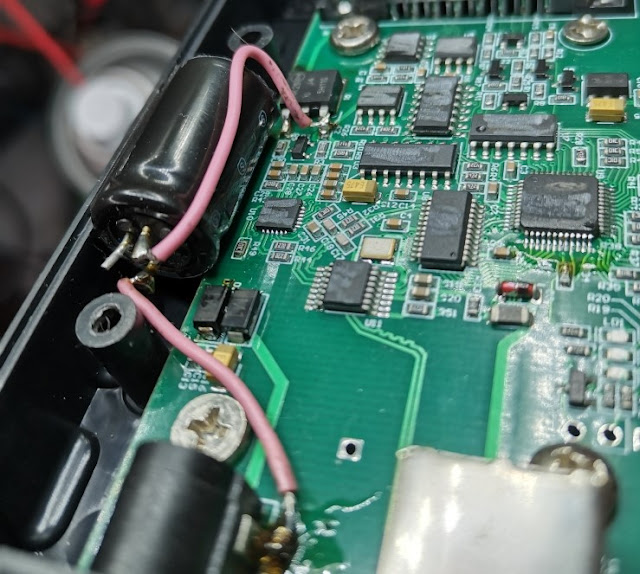
And also soldering the 470 mkF capacitor after the diode for power supply to the supply transistor:

modify AMT BST black box clone 8

and lo and behold – the device reads\writes stably the MED9.1 ecu – checked 20 times.

modify AMT BST black box clone 9

Capacitor ( voltage rating is 470 mf 35v) has got 3 legs ( +body leg) – from BMW MEVD17 ecu ) Plus – on transistor emitter, minus – power supply minus.
modify AMT BST black box clone 10

modify AMT BST black box clone 11

 
People also modify the Fetrotech tool black followed this way and it worked.
It is very good modification for the fetrotech black.
renault edc16c36 all ok.
tested fetrotech black mod 470 Uf.
modify fetrotech black


ECU Bench Tool Golden Box vs Black Box

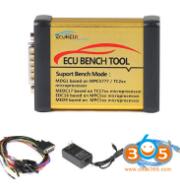
 What’s the difference between gold ecu bench tool and black bench tool (AMT BST clone)?


ItemECU Bench Tool Golden Box
ecu bench tool gold box
ECU Bench Tool Black Box

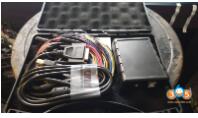
ecu bench tool black box


Version1.0.7.91.0.10.9
OfflineYesYes
OnlineNoYes
Reset buttonYesNo
UpdateNoOnline No update

Offline Yes

PCR 2.1NoNo
Firmware upgrade/downgradeYes, has a reset buttonNo, no reset button
MED9.1Yes with correct pinoutNeed luck with correct pinout
MG1YesYes
MD1YesYes
Ford edc16c34Not listed, but works with pcmflash pinoutNot listed, but works with pcmflash pinout


ECU Bench Tool PCB

ecu bench tool gold box pcb 1

ecu bench tool gold box pcb 2

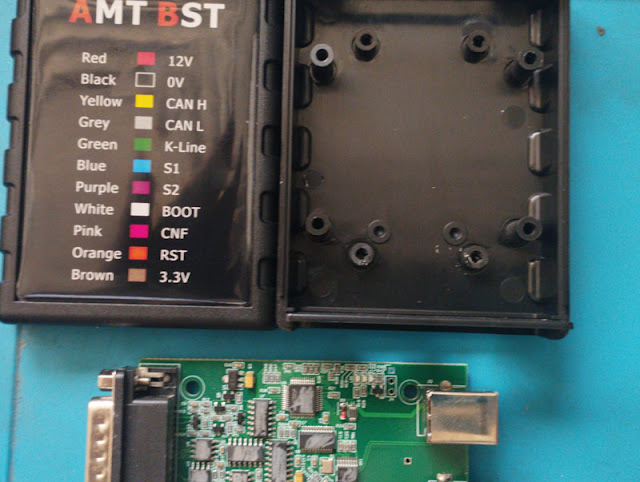
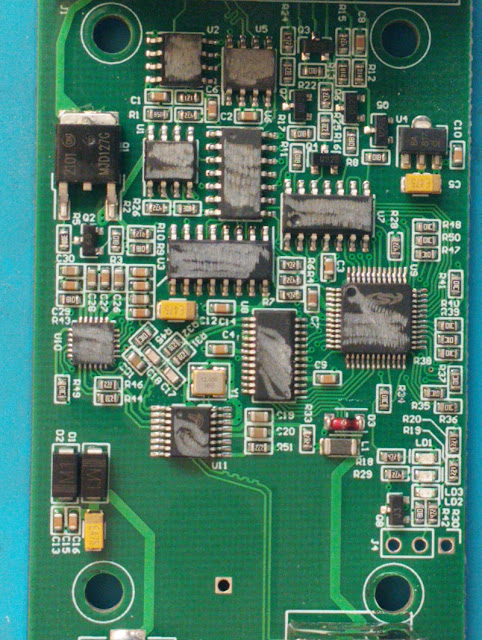
AMT BST clone black box PCB

ecu bench tool black box pcb 1

ecu bench tool black box pcb 2


Gold ecu bench tool

Software download offline 1.0.7.9

https://mega.nz/file/i9pnyIxL#65pbAT6WirsZvEwIEhDwdDp3lMwC_xLJxoqqKf_Cl4k

1.0.7.9 software works fine.

For now all edc16, MEDC17 and MD1 work flawlessly. very good tool for the price, for bosch ecu better than pcm flash because don’t need dongle or registration.

Gold device works great with med9 vag (med9.1 with Good pinout it work) but nothing on pcr2.1 , no possible to update.

If you go to 10.10.9 then you have a problem open software, you need to downgrade to 10.7.9 to work offline.

You must uninstall new version and install old version.
after with long press reset button with device connected, it start flashing leds and reset device and downgrade the firmware. Then you can work with 10.7.9.


Black bench tool

The black box looks like the original.  The black version in the plastic box has no reset button.

Only black box support 1.0.10.9. The black box is 1 to 1 clone of original. You don’t have any bootloader or any patched dll to work offline, it works just like original in offline mode. The disadvantage is that you can’t roll back the firmware.

The black clone works good on edc16, MEDC17, but vag med9 sometimes report error s1 and s2. You may need a modification.

How to Modify and Update AMT BST Black Box 1.0.10.9?

2023/03/24

Tips to Program VAG Micronas AKL in Service Mode

 For VAG Micronas Cluster all keys lost you cannot do it via OBD, you’ll need to read cluster and remove a resistor to do it.  Or get third party to get immo and sync data.

Tips to Program VAG Micronas AKL in Service Mode 1

Tips to Program VAG Micronas AKL in Service Mode 2

Tips to Program VAG Micronas AKL in Service Mode 3

Pull the cluster and try to put in service mode.

You need remove cluster, desolder eeprom make service mod with vvdi solder back to cluster and put the car and you can read immo data and dealer key make with 7byte cs after need ori eeprom write back in obd and you can key learn to car.

Or read cluster dump file (micronas) with xprog-m and program new key with tango.

Xhorse VVDI2 can easily do it, if you prepare 24C32 eeprom. It will damage the immo data to get access to bootloader for patching Micronas. After that you will get access via OBD to rewrite eeprom backup and extract all Immo data to make key.


Here are the tips to program VAG Micronas Cluster Transponder with all keys lost by xhorse vvdi2 in ABS service mode, i.e 2009 VW Tiguan.  The procedure can also be applied to these login type include (CDCxx+24C32, A3/TT/R8 (CDC32xx), NEC24C32, NEC24C64, NEC24C64(2012 TFT color display), NEC24C64(2013-), NEC24C64(2013 TFT color display), Audi A1, Audi Q3). All tt and a3 2007-2012 are micronas.

  • Open the dash, read the eeprom with programmer.
  • Upload the binf le to the vvdi2 and mofidy.
  • Write the modified file to the eeprom
  • Connect the dashboard on the car and write the original file back by OBD
  • Then read the immo data and program the key.

Don’t forget to SAVE ABS coding with VVDI before the process. You can restore with VVDI2 too.

This function is in the same menu of vvdi2 as eeprom update section, dash with micronas + 24C32.

Xhorse VVDI2 Service mode

All login type have similar operation for lost all keys,

backup ABS coding->read EEPROM with BDM programmer->Prepare a service EEPROM data->write service EEPROM data to cluster->Put instrument in car->select correct login type->Load

original EEPROM file->activate car OBDII communication->write EEPROM via OBDII->read immo data->save immo data->make dealer key->add key->reset instrument.

Tips to Program VAG Micronas AKL in Service Mode 4

Service mode all Keys lost:

Some login type cannot read immo data while lost all working key. Login type include (CDCxx+24C32, A3/TT/R8 (CDC32xx), NEC24C32, NEC24C64, NEC24C64(2012 TFT

color display), NEC24C64(2013-), NEC24C64(2013 TFT color display), Audi A1, Audi Q3). This type can make dealer key with following steps:

1) Activate OBD communication by open dangerous light, press on the brakes for several times. Backup ABS coding, you can run backup function on bottom right corner, or enter diagnostics 03 ABS, backup abs coding

2) Find EEPROM chip from instrument, usually use 24C32 or 24C64 chip, read EEPROM dump with BDM programmer and save as original EEPROM dump

3) Enter “Service Mode”, load original EEPROM dump and prepare service EEPROM dump. Attention: DON’T overwrite the original EEPROM dump

4) Write service EEPROM dump to EEPROM chip (24C32 or 24C64)

5) Restore dashboard to car

6) Back to main window and select right login type

7) Load original EEPROM dump (IMPORTANT!!!)

8) Activate OBD communication by open dangerous light, press on the brakes for several times

9) Press “Write EEPROM” write original dump to dashboard via OBDII (IMPORTANT!!!)

10) After write success, read immo data and save (IMPORTANT!!!)

11) Make a new dealer key and add to immobilizer system

12) If car use keyless key, learn the dealer key with learn method (with immo data support)

13) Start engine with new dealer key, complete.

2023/03/22

Yanhua Mini ACDP Clone VAG DQ500 Gearbox

 Will Yanhua Mini ACDP clone Audi gearbox DQ500? Which module?


Yes, module 19 adds DQ500 0DE/0BH gearbox cloning.


How to Clone VAG DQ250 Gearbox with Yanhua Mini ACDP?

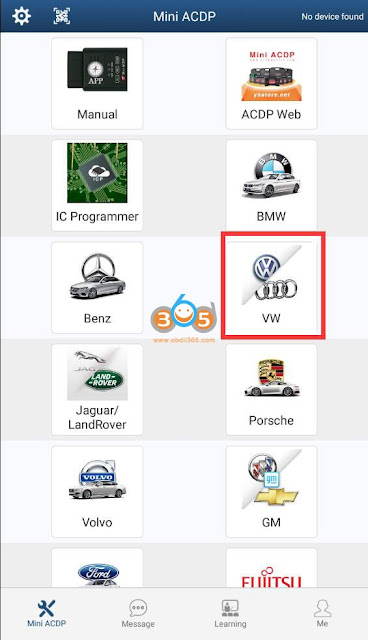
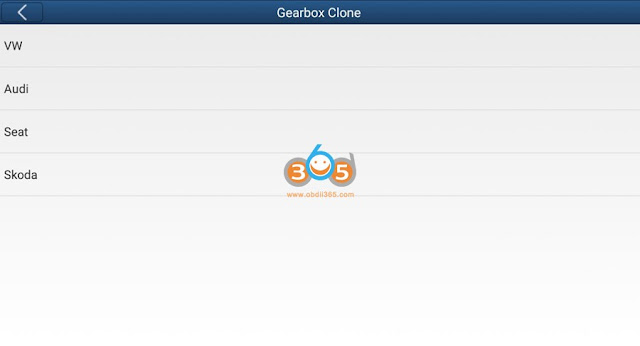
Menu path:

VW->Gearbox Clone->VW/Audi/Seat/Skoda

Yanhua Mini ACDP Clone VAG DQ500 Gearbox 1

Yanhua Mini ACDP Clone VAG DQ500 Gearbox 2

Yanhua Mini ACDP Clone VAG DQ500 Gearbox 3


ACDP mini will clone following DQ500 TCUs

  • Audi DQ500 (0DE)
  • Audi DQ500 (0BH Bosch)
  • Audi DQ500 (0BH Continental)
  • VW DQ500 (0DE)
  • VW DQ500 (0BH Bosch)
  • VW DQ500 (0BH Continental)
  • Skoda DQ500 (0DE)
  • Skoda DQ500 (0BH Bosch)
  • Seat DQ500 (0DE)
  • Seat DQ500 (0BH Bosch)

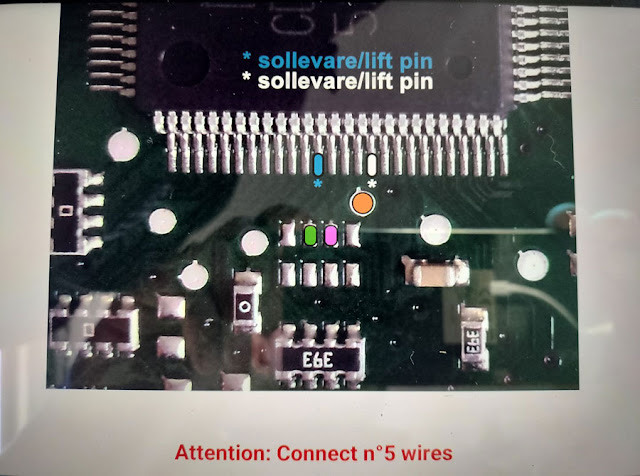
For example, Audi DQ500, press Help for ACDP connection.

Yanhua Mini ACDP Clone VAG DQ500 Gearbox 4

DQ500 0DE/0BH (Bosch) wiring connection

Method 1:

1).Prepare ACDP, DB15-LAN adapter, interface board and gearbox

2).Connect the interface board correctly to the gearbox interface

3). Short the CAN resistor on the DB15-LAN adapter to the “CAN-R”

4). Connect ACDP, DB15-LAN adapter, interface board and gearbox.


Yanhua Mini ACDP Clone VAG DQ500 Gearbox 5

Yanhua Mini ACDP Clone VAG DQ500 Gearbox 6

Yanhua Mini ACDP Clone VAG DQ500 Gearbox 7

Yanhua Mini ACDP Clone VAG DQ500 Gearbox 8

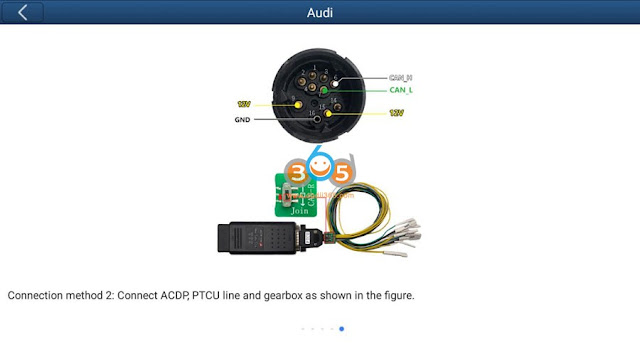
Method 2:

Connect ACDP, PTCU cable and gearbox as image shown below

Yanhua Mini ACDP Clone VAG DQ500 Gearbox 9

NOTE: DQ500 0BH (Continental) only has method 1 connection only. Same as above.

After connecting Yanhua ACDP with gearbox, select the correct TCU type, then perform cloning function.

Full backup data, then full Write Data

Yanhua Mini ACDP Clone VAG DQ500 Gearbox 10


See also:

Yanhua Mini ACDP ZF 8HP Gearbox Clone Update and Operation

VW Audi Gearbox Mileage Correction with Yanhua ACDP + Module 21