Yanhua Mini ACDP/ACDP2 released new module 33 for VAG MQB48 add key, all keys lost (need sync data) and mileage correction.
Module 33 has 13 full-set MQB adapters. There are two types of interface boards:
– Lock Fastening Interface board
– Thumb Screw-Fastened Interface board
Here we will show how to install ACDP MQB48 adapters.
Install ACDP Module 33 Lock Fastening Interface board
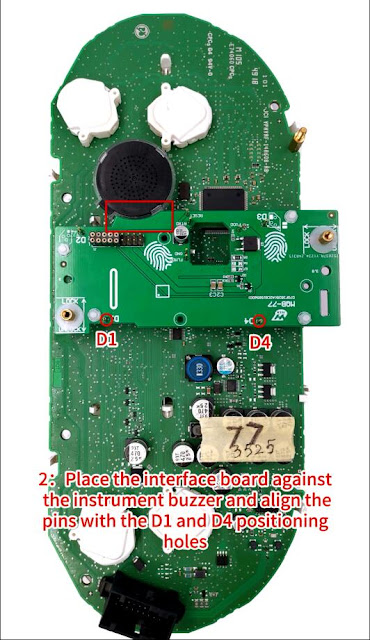
Take MQB-77 interface board as an example.
1. Push the lock fastening of the interface board to the unlock position.
Find the interface board installation area on the instrument according to the visual positioning mark on the interface board.
2. Place the interface board against the instrument buzzer and align the pins with the D2 and D4 positioning holes.
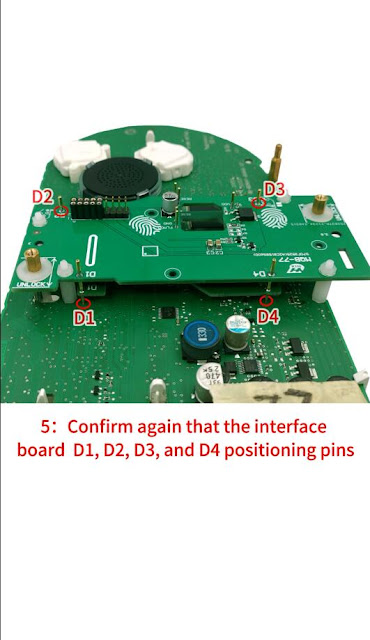
3. Check that the D1 and D4 positioning pins are completely aligned with the D1 and D4 positioning holes of the instrument
Make sure the PCB lock buckle is completely aligned.
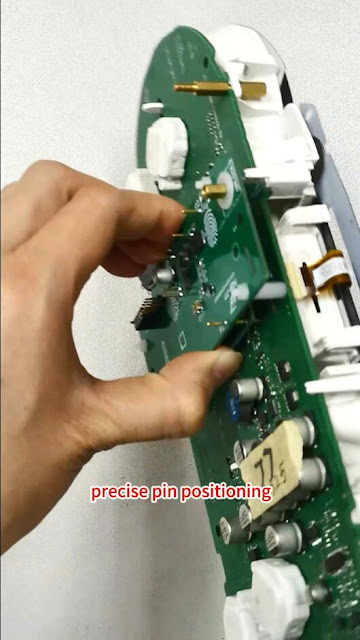
4. Place your finger on the fingerprint position of the interface board.
Press down on the interface board.
Push the PCB lock buckle to the Locked position to lock the interface board.
5. Confirm again that the interface board D1, D2, D3 and D4 positioning pins are completely aligned with the D1, D2, D3 and D4 positioning holes of the instrument.
After install MQB interface board, connect interface board with ACDP2/ACDP
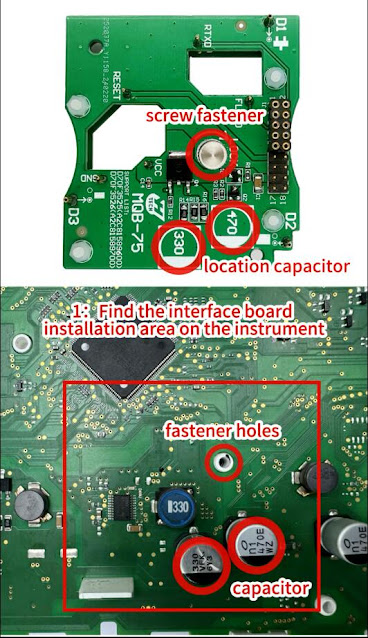
Install ACDP Module 33 Thumb Screw-Fastened Interface board
Take MQB-75 interface board as an example.
1.Find the interface board installation area on the instrument.
2. Find the correct positioning holes of D1, D2 and D3 on the instrument.
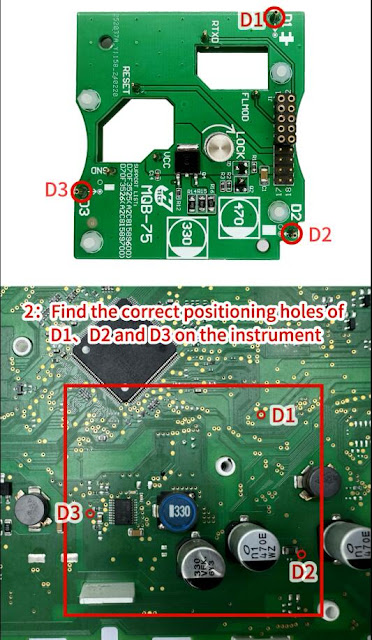
3. Align the interface board with the screw fastener holes and D1, D2 and D3 positioning points.

4. Press the interface board down with your left hand, tighten the locking screw with your right hand.

5. Confirm again that the interface board D1, D2 and D3 positioning pins are completely aligned with the D1, D2 and D3 positioning holes of the instrument.
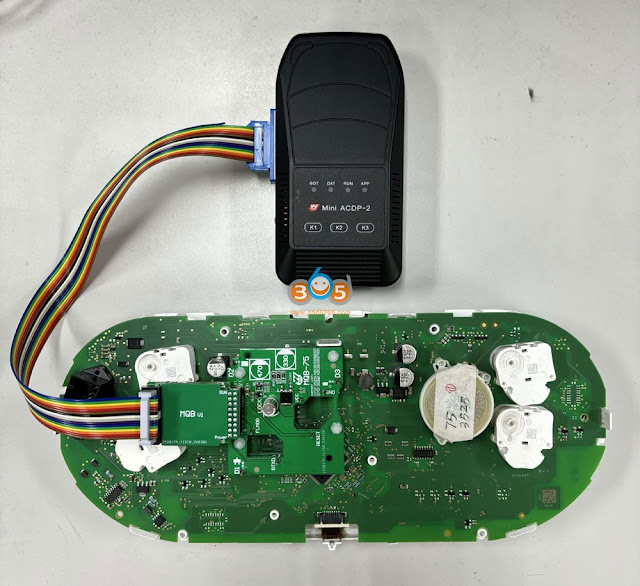
After install MQB interface board, connect interface board with ACDP2/ACDP







No comments:
Post a Comment