2025/04/29

JLR SDD Software V167 Free Download

 Jaguar Land rover JLR SDD software V167 has just been released.

 
Jaguar Land Rover – JLR SDD system supports ALL JLR vehicles from 2000 to 2017.
Jaguar since 2000 and Land Rover since 2005.
Vehicle Support List:
Discovery Sport, Jaguar F Type, Jaguar F-Pace, Jaguar New XF, Jaguar XE, Jaguar XF, Jaguar XJ, Jaguar XK, Land Rover Defender, Land Rover Discovery 3/LR3, Land Rover Discovery 4/LR4, Land Rover Freelander 2/LR2, New Range Rover, New Range Rover Sport, Range Rover, Range Rover Evoque, Range Rover Evoque China, Range Rover Evoque convertible, Range Rover Sport.
These models are also known as: L538C, L319, L494, L550, L320, X260, X150, X250, L322, X350, X152, X351, LS38UV, X760, X100, L359, X761, L316, L405, X400, X202.
 
Device: JLR VCI, VXDIAG VCX NANO JLRVXDIAG VCX SE JLR, VNDI JLR DoIP or Mongoose PRO J2534 interfaces.
 
Operating system: Windows 10, Windows 11 tested working fine.
 
 
Free Download JLR SDD V167 and Patch


How to Install JLR SDD V167 Software?
 
 
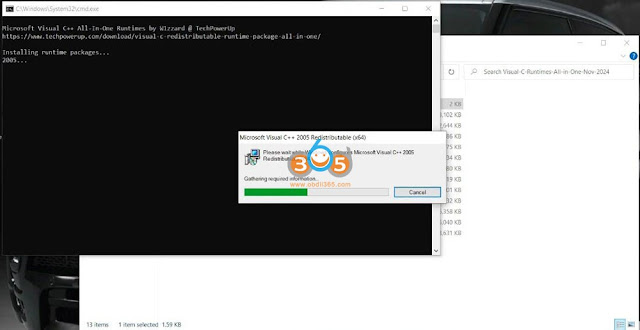
1. Run VCredist all-in-one FIRST before anything.
2. Install base program JLR v167
3. Run OFFLINE1.exe
4. Run JLR SDD, then log in using username and password below.
5. Exit SDD.
6. Run OFFLINE2.exe
7. Restart PC – run SDD and use as normal. – you may have to go to Settings > Network > and enable network connection to get online downloads working.
Network icon may be red, but downloads should still be working. NOTE: Working now with Edge no issues.
install jlr sdd v167 software 1

install jlr sdd v167 software 2

install jlr sdd v167 software 3

install jlr sdd v167 software 4

install jlr sdd v167 software 5

install jlr sdd v167 software 6


Fiat 500X 2019- SGW Gateway Location

 Where is the exact location of the SGW security gateway on a 2019- Fiat 500 X?

The Security Gateway (SGW) in modern Fiat vehicles can restrict access to diagnostic tools, making it difficult to perform tuning, coding, or troubleshooting. This guide will show you how to bypass the SGW on a 2018-2019 Fiat 500X using a simple FCA 12+8 bypass cable.


Step-by-Step Installation

1. Locate the SGW Module

  • The SGW is a small black box BCM located under the dashboard, above the accelerator pedal.

  • Use a flashlight to help locate it. You have to pull a little on the bcm and twist the scrap metal tab a little to be able to pass without tearing your hands off.

bypass Fiat 500X 2019- SGW Gateway 1

bypass Fiat 500X 2019- SGW Gateway 2

2. Disconnect the Factory Wiring

  • Carefully unplug the two cables connected to the SGW module.

3. Connect the Bypass Cable

  • Plug the SGW bypass cable into the same ports where the factory cables were connected.

  • Ensure a secure fit to avoid communication issues.

bypass Fiat 500X 2019- SGW Gateway 3bypass Fiat 500X 2019- SGW Gateway 4

4. Connect Your OBD Scanner

  • Attach your diagnostic tool (e.g., Autel MaxiSysLaunch X431) to the OBD-II port.

  • You should now have full access to the vehicle’s ECU and diagnostic functions.

bypass Fiat 500X 2019- SGW Gateway 5

Easy automatic gearbox, at the top of the brake pedal but manual a little more complicated, you lie on your back, head next to the pedals and feet in the ceiling light after having previously removed the covers and with your left hand you pass above the steering column and you grab the gateway connectors you disconnect them and you bring them towards the pedals to be able to connect your FCA cable, otherwise you have to remove the body or twist the legs etc.


Why Bypass the SGW?

  • Full Diagnostic Access – Removes restrictions for tuning, coding, and troubleshooting.

  • Faster Scanning – Some tools may work more efficiently without SGW interference.

  • Key Programming & Immobilizer Work – Essential for locksmiths and tuners.

Bypassing the SGW on a Fiat 500X is a quick and easy process that unlocks full diagnostic capabilities. With the right tools, you can perform advanced functions that were previously restricted.

2025/04/25

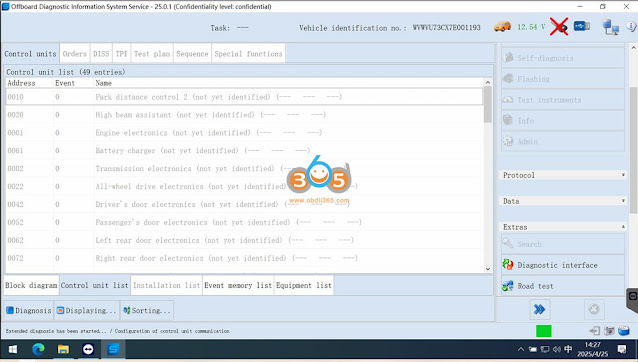
ODIS Service 25.0.1 Software Free Download

 Here we share the latest version of ODIS-S 25.0.1 (Offboard Diagnostic Information System) Service software with patch.


Compatible devices:

VXDIAG VCX SE 6154VNCI 6154A red dongle, VAS6154A or Passthru J2534 heads.

Operating system: Windows 10 or more.

Multi-language: Czech, English, German, Spanish, French, Italian, Japanese, Korean, Dutch, Polish, Danish, Thai, Hungarian


ODIS Service 25.0.1 Software download

Latest version of ODIS-S 25.0.1 with home online/offline switch.

Put on the desktop, and ODIS must be installed on drive “C”. This method works great.

Free to test at your own risk.


Install ODIS S 25:

1.Run OffboardDiagSetup-Service_VWMCD_25_0_1.exe

2.Run files from Patch folder

3. Extract and install ODIS-Service_update_25_0_1.zip

odis 25.0.1 software 1

The software comes with the offline patch (launcher) to bypass online connection.

odis 25.0.1 software 2

odis 25.0.1 software 3

odis 25.0.1 software 4


If you use VXDIAG 6154 interface, you don’t need to update 6154 driver in the VX Manager.

Select device type as VAS 6154.

odis 25.0.1 software vxdiag vcx se 6154

If you use VNCI 6154 red dongle, update firmware to the latest version. Current version is 1.1.6.8.

odis 25.0.1 software vnci 6154a

2025/04/23

Yanhua Mini ACDP Read BMW N16 DME ISN Code

Possible to read ISN from BMW R chassis N16 DME using Yanhua Mini ACDP2?


Yes, with module 3.

Go to DME ISN function.

Select OBD/CAN Mode Read/Write ISN.

Yanhua Mini ACDP Read BMW N16 DME ISN Code  1

ACDP supports the following DMEs via OBD or CAN mode.

N55, N20, N13, S63TU, N63TU, MSV80/MSV80.1, MSD80/MSD80.2, MSD81/MSD81.2,MSD85.1/MSD85.2, N62TUE, N62TUE2, MEV9 N46, MEV9N46L, N46, MSV70, MSS60, N12, N14, N16, N18 etc.

Yanhua Mini ACDP Read BMW N16 DME ISN Code  2

Yanhua Mini ACDP Read BMW N16 DME ISN Code  3

Yanhua Mini ACDP Read BMW N16 DME ISN Code  4

Select Read N16 (MEV1722D) DME ISN function.

Yanhua Mini ACDP Read BMW N16 DME ISN Code  5

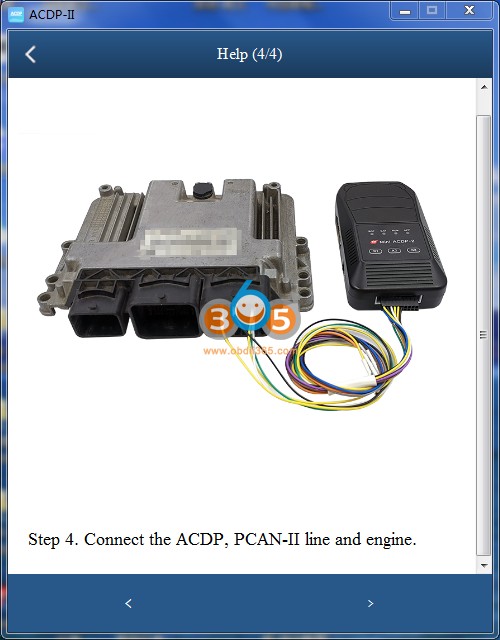
Check the connection diagram.

Yanhua Mini ACDP Read BMW N16 DME ISN Code  6

Yanhua Mini ACDP Read BMW N16 DME ISN Code 7

Yanhua Mini ACDP Read BMW N16 DME ISN Code 8

Yanhua Mini ACDP Read BMW N16 DME ISN Code  10

Then follow APP instructions to read ISN from N16 DME on bench mode.

2025/04/20

What Tool to Read Ford SID202 ECU?

 Question:

Looking for a tool that can read Ford Transit SID212 ecu (SID212EVO Continental/Siemens ECU).

Do you know any tool can make reading and checksum?


Ford SID202 ecu

Ford introduced a new ECU (Engine Control Unit) variant known as the SID 212.

The Ford SID212 ECU has the most heavily encryption on an ECU known to date. The software technically has the same level of encryption as bank security – this is going to be one very tough nut to crack, if it can be done at all.

However, one of the most significant limitations that Ford Custom owners and enthusiasts face is that the SID 212 ECU remains largely untuneable.

No tool can read/write this ECU at present.


Why Is the SID 212 ECU Unyielding?

  1. Security and Anti-Tamper Measures: Automakers, including Ford, have become increasingly concerned about the potential misuse of ECU tuning for illegal activities or to bypass emissions regulations. As a result, many ECUs, including the SID 212, have bolstered security and anti-tamper measures to prevent unauthorized access and modifications.
  2. OEM Control: Ford has been keen on retaining control over the performance and emissions standards of their vehicles. The SID 212 ECU, being an integral part of this control, has security measures in place to prevent modifications that could alter the vehicle’s original specifications.
  3. Warranty Concerns: Modifying the ECU can have an impact on the vehicle’s warranty. If the ECU is tuned, and a problem arises, the warranty may be voided. This concern dissuades many vehicle owners from pursuing ECU tuning.
  4. Emissions Compliance: The SID 212 ECU also plays a crucial role in ensuring that Ford vehicles comply with emissions regulations. Any changes to the ECU could jeopardize compliance with these standards, which may have legal consequences.


Ford Transit Custom sid212 has no DCU, SCR can’t be deleted.
Ford Transit MK9 sid212 has DCU, DCU can be read with FLEX and SCR only can be deleted.

PCMFlash also has Module 88 to read the Adblue Module DCU17PC43, Bench Pinout in PDF from Module 71 ,Last Page

The DCU module is the B-pillar on the inside of the car.

Ford SID202 dcu location 1

Ford SID202 dcu location 2

No tool can read at the moment.  But adblue easily done by SCR unit DCU17PC43 (tc1724) which Flex or Autotuner reads bench.


Flex reads DCU17PC43 on bench.

flex dcu17pc43

Autotuner also reads DCU17PC43.

For example.
2021 Ford Ranger Sid212 Ecu Adblue delete.
the Adblue in later ford models the solution is supplied directly to the adblue module the Dcu17PC43.

autotuner ford dcu17pc43

Emulator possible SCR, DPF OFF as well.


You can cancel adblue system easily and if you want you can remove dpf filter completly. or you can leave it. vehicle will complete regeneration with emulator. this is not like ecu reflashing solution. Its easy , there is no risk , and no need extra tool to use it. Emulator is looking new age to solve adblue/dpf problems.

2025/04/17

OBDSTAR P50 Reset Ford Explorer 2023 Airbag by OBD

 OBDSTAR P50 is economical and works well on Honda and Ford. The P50 will find and clear crash data for Ford Explorer LB5T-14B321-PA. Memory type is Infineon TriCore SAK-TC222S-16F.


carprog, carprotool etc will reset crash for this airbag module on bench via dump. OBDSTAR P50 can do it VIA OBD!!!.


Part number: LB5T-14B321-PA.


P50 can do it via OBD. So don’t need to remove SRS module from vehicle.


Model example:

Ford Explorer 2023
Airbag Module Crash reset with P50 via OBD2.
It takes me 10-15 minutes reset, including read/write eeprom.

OBDSTAR P50 Reset Ford Explorer 2023 Airbag by OBD 1

OBDSTAR P50 Reset Ford Explorer 2023 Airbag by OBD 2

OBDSTAR P50 Reset Ford Explorer 2023 Airbag by OBD 3

OBDSTAR P50 Reset Ford Explorer 2023 Airbag by OBD 4

OBDSTAR P50 Reset Ford Explorer 2023 Airbag by OBD 5

OBDSTAR P50 Reset Ford Explorer 2023 Airbag by OBD 6

OBDSTAR P50 Reset Ford Explorer 2023 Airbag by OBD 7

OBDSTAR P50 Reset Ford Explorer 2023 Airbag by OBD 8


2025/04/15

How to Add BMW G Series BDC2 Key with Vapon VP100?

 Vapon VP100 BMW key programmer is an affordable solution for BMW BDC2 key programming. VP100 supports adding spare keys for 2015-2021 BMW G series with BDC2 chassis.


SUPPORTED BDC2 VEHICLES

ModelChassis CodeYear Range
X3F972019/04 – 2021/07
X3G012017/12 – 2021/07
X4G022018/04 – 2021/07
X4F982019/04 – 2021/07
5 SeriesG302016/11 – 2020/06
5 SeriesG312017/03 – 2020/06
5 SeriesG382017/05 – 2020/08
6 SeriesG322017/07 – 2020/06
7 SeriesG11/G122015/07 – 2019/02
X3/iX3G082018/05 – 2021/08
M5F902017/11 – 2020/06


Here is the procedure to add BMW BDC2 key using Vapon VP100.

Main steps:

1. Backup data.
2. Preprocess Data.
3. Generate dealer key.
4. Learn key.


Step 1: Back up coding

Connect Vapon VP100 key programmer with BDC2 module as picture below.


How to Add BMW G Series BDC2 Key with Vapon VP100 1

Before programming key, we need to back up the data.

Select Backup Encoding function.

How to Add BMW G Series BDC2 Key with Vapon VP100 2
Reading coding data.
Backup data completed.

How to Add BMW G Series BDC2 Key with Vapon VP100 3

How to Add BMW G Series BDC2 Key with Vapon VP100 4

How to Add BMW G Series BDC2 Key with Vapon VP100 5

Step 2: Preprocess data

Before pre-processing data, disconnect cables from VP100 device.
Disconnect cables from BDC2 module.
Connect BDC2 adpater with BDC2 module.
Then connect BDC2 adapter with VP100 programmer.

How to Add BMW G Series BDC2 Key with Vapon VP100 6

How to Add BMW G Series BDC2 Key with Vapon VP100 7

How to Add BMW G Series BDC2 Key with Vapon VP100 8

Start the preprocessing procedure.
1). Boot profeamming mode.
2). Download BOOTLOAD (bench).
3). Read FLASH data (bench).
4). Restore SWFL.
5). Restore coding data.

How to Add BMW G Series BDC2 Key with Vapon VP100 9

How to Add BMW G Series BDC2 Key with Vapon VP100 10

How to Add BMW G Series BDC2 Key with Vapon VP100 11

How to Add BMW G Series BDC2 Key with Vapon VP100 12

How to Add BMW G Series BDC2 Key with Vapon VP100 13

How to Add BMW G Series BDC2 Key with Vapon VP100 14

How to Add BMW G Series BDC2 Key with Vapon VP100 15

Preprocess data completed.


Step 4: Make dealer key

Disconnect BDC2 adapter from VP100 and BDC2 module.
Connect cables with BDC2 module and Vapon VP100 again.

How to Add BMW G Series BDC2 Key with Vapon VP100 16
Select Generate dealer key function.
Insert original key into VP100 RFID slot.

Select an unused key position, here key #8

How to Add BMW G Series BDC2 Key with Vapon VP100 17
Obtain key information.
Insert a new key into RFID slot.

Write key information.

How to Add BMW G Series BDC2 Key with Vapon VP100 18
Generate key completed.

How to Add BMW G Series BDC2 Key with Vapon VP100 19

Step 5: Learn key
Put new key into the ignition and turn on the ignition.
Press the ignition button for at least 15 seconds.

How to Add BMW G Series BDC2 Key with Vapon VP100 20
This is the key learning process.
Select Learn key function.
Now you can see key #8 has a new key programmed.

How to Add BMW G Series BDC2 Key with Vapon VP100 21
Key learning is completed.

Install BDC2 module back to the vehicle.

Test both keys.

Done.

Video guide:


http://blog.obdii365.com/2025/04/15/how-to-add-bmw-g-series-bdc2-key-with-vapon-vp100-on-bench/