Showing posts with label Mini VCI. Show all posts

2022/03/23

Openport 2.0 Clone High Quality vs Low Quality

 In this article, we will explain how to get the right clone Tactrix Openport 2.0 J2534 adapter and why Openport 2.0 is better than Mini VCI J2534 interface. 


Openport 2.0, like its colleagues MVCI 3 in 1 and Mini-VCI, is a J2534-1 compatible adapter and works with any software (VAG ODIS, Toyota Techstream, etc.) supporting PassThru library/driver.


Choosing the right clone
There are two clone versions available on the Internet.

Openport 2.0 Clone High Quality vs Low Quality  1

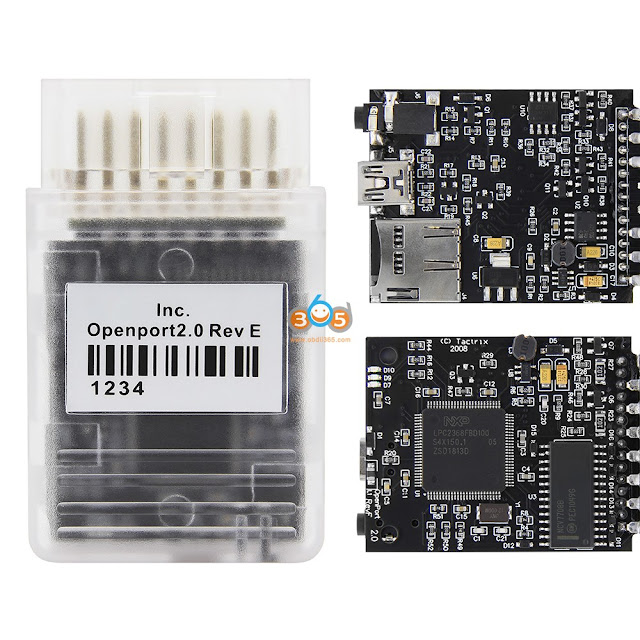
Adapters differ not only in Golden Pin, best quality (Full Chip or New Version) and Black Pin, Poor Quality (standard version) and the type of sticker but also the board inside.

A bad OBD2 clone has a black connector and a green board inside:

Openport 2.0 Clone High Quality vs Low Quality  2

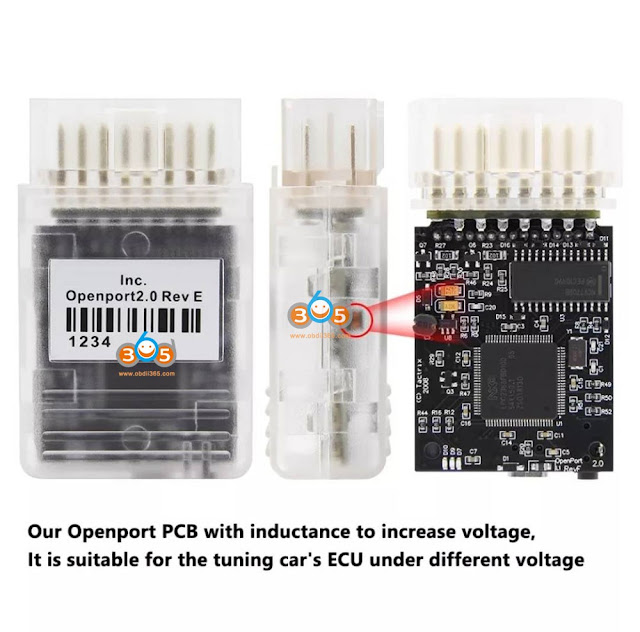
The correct clone has a transparent OBD2 connector and a black board :

https://www.obdii365.com/wholesale/new-tactrix-openport-2-0-ecuflash.html

Openport 2.0 Clone High Quality vs Low Quality 3

Openport 2.0 Clone High Quality vs Low Quality  4

Openport 2.0 Clone High Quality vs Low Quality 5

Let’s figure out which chips the correct clone is built on:
1. LPC2364FBD100 – microcontroller: Arm7TDMI-S™ processor, microcontroller for embedded applications featuring a high level of integration and low power consumption at frequencies of 72 MHz. Features 128 kB of flash memory, 34 kB of RAM, Ethernet MAC, USB Device/Host/OTG, DMA controller, 4 UARTs, 2 CAN channels, 3 SSP/SPI, 3 I2C, I2S, 8-channel 10-bit ADC, 10-bit DAC, 2 PWM, 4 general purpose timers, low power Real-Time Clock with separate battery supply, and up to 70 general purpose I/O pins.
2. NCV7708B – Six-channel signal switcher (Double Hex Driver)
3. 6251DS – CAN bus transceiver (transceiver)
4. LM317L– voltage regulator 1.25-32 volts (adjustable, positive-voltage regulator capable of supplying 100 mA over an output-voltage range of 1.25 V to 32 V. It is exceptionally easy to use and requires only two external resistors to set the output voltage) .
Support for K / L-line, in this adapter, is made on transistors.
Since the microcontroller 2364 does not have a built-in SD card controller, work with a MicroSD card designed for recording logs is implemented here via the SPI bus.
Minijack connector (stereo connector) is used to connect an adapter for supplying programming voltage. For example, on Mitsubishi, 18 volts are supplied through it, on Honda 5 volts, etc. (set automatically by a diagnostic program such as Techstream, etc.

Supported protocols
CAN 2.0 (CAN/ISO15765)
K-line (ISO9141/ISO14230(KWP2000)/dual K line)

Ability to supply voltage for programming and recording logs to a MicroSD card:
An adapter capable of switching GND or voltage (from 5 to 25 volts) to pins 1,3,9,11,12,13 of the OBD2 connector or an auxiliary 2.5mm stereo connector:

Openport 2.0 Clone High Quality vs Low Quality 6

Also, the adapter’s firmware can record the log received from the 2.5 mm minijack (stereo) connector from Innovate Motorsports devices (lambda probes, etc.) via the MTS data bus protocol to an SD card.

Contact assignment:

Openport 2.0 Clone High Quality vs Low Quality 7

The CANL and CANH pins are used for CAN and ISO15765 communication.
Contact ISO-9141 K and ISO-9141 L are used for ISO-9141 and KWP2000 communication. Often, only ISO-9141 K line is used.
The J1850+ and J1850- pins are used for SAE J1850 communication. For J1850PWM, both J1850+ and J1850- pins are used. For J1850VPW, only the J1850+ pin is used. Despite the presence of physical binding on the J1850+ and J1850- contacts, there is no protocol support in the firmware.
Contacts Ring and Sleeve 2.5mm minijack are used to receive data from other devices via the RS-232 protocol. Typically, these are devices such as the Innovate Motorsports wideband oxygen sensor or other MTS bus compatible devices from other manufacturers.
The Tip 2.5mm pin of the mini jack is software connected to the OEM12 pin and can be used as an ADC output: a setpoint voltage or ground can be supplied here by software, for use with adapters for non-OBD2 connectors. When a 2.5mm mini jack is inserted into the connector, to protect the adapter and the vehicle, the microcontroller disables the 12th pin of the OBD2 connector.
Voltage from 5 to 25 volts can be applied to contacts: OEM1, OEM3, OEM9, OEM11, OEM12, OEM13. The J1850+ pin can also be driven from 5 to 8 volts.
GND can be applied to pins: OEM1, OEM3, ISO-9141 K, OEM9, J1850-, OEM11, OEM12, OEM13, ISO-9141 L
Voltage using the ADC (analog to digital converter) input of the 2364 chip and, accordingly, the firmware and software, can be read from the following pins: OEM8, OEM12, Vbat

Why you can’t buy a clone with a black OBD2 connector (green board inside):

  • 1. Serial numbers of microcontrollers on these boards are blacklisted in Openport 2.0 drivers.
    When the adapter is connected to the USB port of a PC / laptop, the op20pt32.dll driver (containing the firmware) or ECUFlasher (software bundled with the adapter) checks the firmware version in the microcontroller and, if it is younger, flashes a new version. The firmware first of all checks the serial number of the microcontroller and if it is on the black list, it erases the flash memory of the microcontroller and turns on write protection. Thus, the clone becomes inoperable. If, when checking, the firmware versions in the driver and in the microcontroller match, but there is an Internet connection and a new firmware is available, it is automatically downloaded, sewn, and if the check fails, the microcontroller is corrupted.
  • 2. In the circuitry of the green board, as many as 20 differences from the original, without correcting which, after a short use (2 or 3 times), the adapter fails in terms of power supply.


Advantages of Openport 2.0 adapters with a transparent connector and a black board:

  • 1. They have unbanned serial numbers, you can sew with official firmware from the Internet.
  • 2. For refinement, it is enough to replace 6 resistors (if you need network connection).
    In addition to replacing the resistors, you can do the following:
    1). To capacitor C8, soldered a ceramic capacitor of 10 uF
    2). On pins 1 and 3 of LD33, added an electrolytic capacitor of 100 uF, 25 V.
    3). From plus C12 to pin 53 (P2[10] /EINT0) LPC2364, added a 10 kΩ resistor. This modification prevents the bootloader located in the LPC2364 from starting when the RESET command is given to the microcontroller. (An modification tutorial will be attached soon)

What are the benefits of an Openport 2.0 clone over Mini VCI and HEX-CAN+USB clones?
1. Openport 2.0 has a USB interface for communication with a PC / laptop, connected directly to the microcontroller and capable of operating at high speed, unlike the outdated and slow FT232R chip used in Mini-VCI and HEX-CAN + USB.
2. Openport 2.0 can supply voltage to the minijack connector or OBD2 connector pins, which is mandatory for some Toyota, Honda, Mitsubishi, Subaru

3. The openport 2.0 is verified working no issue with Mercedes Xentry passthru program.


Disadvantages:
1. You cannot install the new official driver (the last update was released in 2016). Although the situation is the same today with Mini-VCI, MVCI 3in1, HEX-CAN + USB and VAS5054A adapters.
2. Just like Mini-VCI, MVCI 3in1 and VAS5054A – does not support J2534-2 standard protocols
3. Does not support legacy VPW and PWM protocols. An inscription hangs on the official website that work to add support for these protocols is in the process, but the openport clone says that this will never happen.

2017/11/06

Toyota Techstream Erase transmitter ID2 Code C2122

Here we will share experience about how to erase transmitter ID2 code C2122 and add new TPMS sensor on Toyota Lexus or Scion. Help it helps!

What tools you need for erase transmitter ID2 code C2122?

After a quick look online, i get the software and USB adapter (it’s called mini vci with tecshtream software) for usually under $25 shipped.

Don’t pay high insane dealer fees!! Also I have no idea how to do aftermarket TPMS sensors. I ONLY put OEM parts in my Toyota Vehicles. So I know there is some other weird programming you have to do with the aftermarket sensors.

I got this OEM Denso TPMS Sensor from obdii365.com for $35 shipped. MAKE SURE you know the CORRECT TPMS DENSO PART NUMBER for your vehicle!!! There are a few different ones this software will do ALL OEM sensors but you need to make sure you have the right sensor!!!

Note: We are not responsible for the damage. 

Procedure:
techstream-erase-code-c2122-1
techstream-erase-code-c2122-2

TPMS is not ON actually. Flashing means that i have an actual tire so it’s not that i have low tire even though i could have a low tire. It’s the fact, there must be something wrong with the TPMS.

Then go to the software Teachstream:
Click on Connect to vehicle
Confirm vehicle info: Toyota Highlander 2010, 2GR FE, W/O Smart key
techstream-erase-code-c2122-3
Select The Pressure Monitor
techstream-erase-code-c2122-4
Code C2122: cannot receive data from transmitter ID2
techstream-erase-code-c2122-5
Go to data list and read ID2 code
techstream-erase-code-c2122-6
Tire ID2 location
techstream-erase-code-c2122-7
BD7540 means a bad old sensor
techstream-erase-code-c2122-8
Then back to Toyota Teachstream
Click on Unity
Perform the function of Tire ID registration for the tire pressure warning system
Note: registration will fail if the time limit its exceeded for any step
Warning: registration will fail if the system is still in the process of initialization
techstream-erase-code-c2122-9
Click on Next
techstream-erase-code-c2122-10
Input each transmitter ID code
Press Next to input the next code
Continue until all codes are registered
techstream-erase-code-c2122-11
techstream-erase-code-c2122-12
techstream-erase-code-c2122-13
techstream-erase-code-c2122-14
techstream-erase-code-c2122-15
techstream-erase-code-c2122-16
Id registration is complete
techstream-erase-code-c2122-17
Click on Exit
Go to data list, concerned parameters are changed
techstream-erase-code-c2122-18
Then go to trouble codes
techstream-erase-code-c2122-19
Code C2122 was cleared!
techstream-erase-code-c2122-20

2017/09/18

Free Download and Install Toyota Techstream 12.02.024

Toyota TIS Techstream V12.20.024 new software  has been tested without issues on Windows 7 operation system and verified working like a charm.

Software version: V12.20.024 
Toyota Techstream 12.20.024 crack free download:
(It’s crack version. Does not need activation)
Operation system: Windows 7 32 bit

Toyota Teschstream v12.20.024 has been tested OK with:
Mini VCI cables (SV46, SV46-B), Mangoose VCI (SV46-C) and Vxdiag Vcx Nano for Toyota
mini vci
mangoose-vci
vcx-nano-for-toyota
How-to’s:
 Step 1: install Toyota Techstream 12.20.024 software

open Techstream 12.20.024 disk F:
copy all files to another new folder on Desktop
open Techstream 12.20.024 setup application
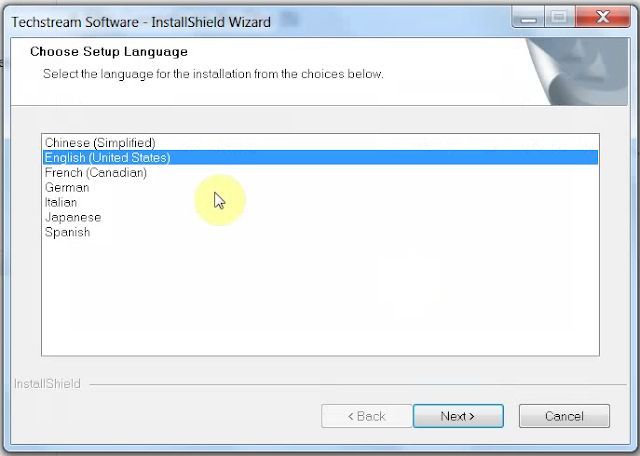
choose a setup language for installation
install-techstream-12-20-024-01
preparing setup
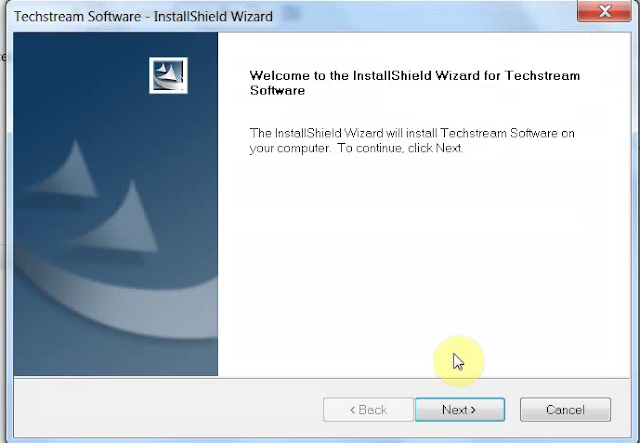
Next to install Techstream software
install-techstream-12-20-024-02
accept the agreement
enter the user name and company name, then Next
begin Techstream 12.20.024 installation
installing Techstream 12.20.024…
successfully installed Techstream
install-techstream-12-20-024-03
Finish Techstream v12 installation


Step 2: replace the MainMenu.exe

copy the MainMenu.exe
go to Techstream Properties on Desktop
open file location
paste and replace MainMenu.exe in Program files/toyota diagnostics/techstream/bin


Step 3: install MVCI driver

run MVCI driver for TOYOTA TIS SETUP
Next to install MVCI driver
install-techstream-12-20-024-04
Install
installing MVCI driver
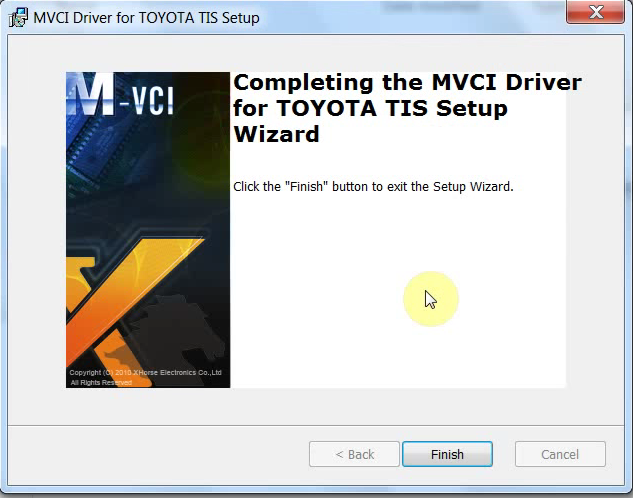
Finish MVCI driver installation


Step 4: register Techstream

run Techstream application on Desktop
Yes to continue
close the internet explorer
this is Toyota Techstream ver.12.20.024 interface
install-techstream-12-20-024-05
register Techstream software 12.20.024
it’s Techstream crack version
use key (attached to the Instructions.txt) to register
install-techstream-12-20-024-06
OK
exit Techstream


Step 5: check MVCI fw version

run MVCI firmware update tool on Desktop
Device info
install-techstream-12-20-024-07
exit MVCI firmware update tool


Step 6: run Techtsream 12.20.024

run Techstream application on Desktop
Yes to continue
close the internet explorer
install-techstream-12-20-024-08
install-techstream-12-20-024-09
install-techstream-12-20-024-10
install-techstream-12-20-024-11
Techtsream 12.20.024 Windows 7 installation success!

2017/04/06

How to Install Toyota Techstream 12.00.127 for MINI VCI MVCI

The newest Toyota Techstream software v12.00.127 is verified to work 100% with the MINI VCIcable, Xhorse MVCI ,VXDIAG VCX NANO for Toyota, Toyota OTC 2 diagnostic tool. So, Techstream 12.00.127 Windows 7 / Windows XP, how to install? Here are the Tis Techstream 12.00.127 installation demos and step-by-step installation guides of.

How to install Toyota Techstream 12.00.127 on Windows 7
Operation system:  Windows 7 (Windows XP also no issues)


Install Toyota Techstream V12.00.127 for MINI VCI/Xhorse MVCI:
Go to disk E: toyota mangoose
Open GTS_12.00.127_TME_NDSI application
Choose the Techstream setup language
select-language
Begin to install Techstream software
install-setup
Accept the agreement
Enter the name and company
Techstream software is configuring your new software installation…
Installing….
Click on Finish
Successfully installed Techstream 12.00.127 software!
install-mvci-driver
Copy MainMenu application
Go to Techstream properties
Open File Location:…Program files/Toyota diagnostics/Techstream/bin
Copy and replace MainMen
Run MVCI Driver for TOYOTA to install (it’s in disk E:)
Begin to install MVCI driver
driver-install-completed
Installing MVCI driver for toyota tis…
Finish MVCI driver installation

Pop-up: instilling device driver software
Pop-up: your device is ready to use
Run MVCI Firmware Update Tool on Desktop
run-mvci-firmware-update
Run Techstream on Desktop
Pop-up: Java can be obtained from the web? NO!
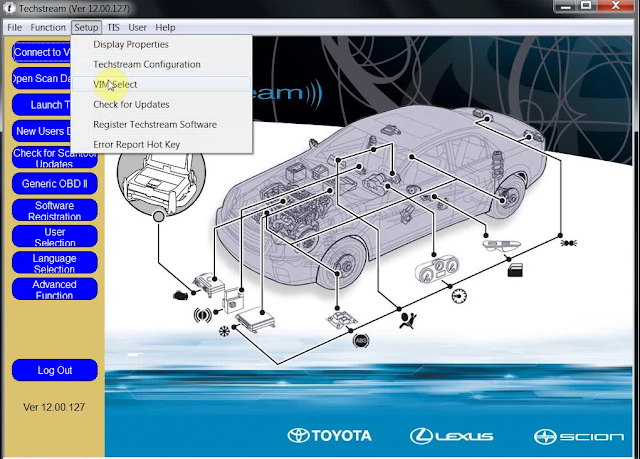
Go to Setup->Techstream Configuration
techstream-configuration
Select Area: Europe, Language: English,
select-region-language
Add caption
enter-registration-code
Connect to Vehicle
Enter the new key with the help of “key” text in software disk:
enter-register-key-on-key-pad
Initializing USB communication
Connecting to vehicle…
Techstream 12.00.127 diagnose VIOS ok
toyota-techstream-12-00-127-1
toyota-techstream-12-00-127-2
toyota-techstream-12-00-127-3
toyota-techstream-12-00-127-4
toyota-techstream-12-00-127-5
NOTE:
This how-to’s is for users with MINI VCI, MVCI 3 in 1
For users with Toyota OTC2 diagnostic tool , please refer the video below:

How to install Techstream v12.00.127 for Toyota OTC2
Only differs from the driver installation!
Have fun!