Showing posts with label Mitsubishi MUT III. Show all posts

2024/04/27

Free Download Mitsubishi MUT-III 2023.06 Software

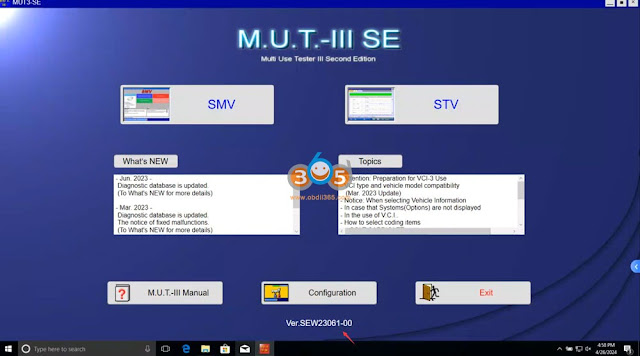
 Obdii365.com here provides 23061-00 2023 Mitsubishi MUT-III diagnostic software download free.


MUT-III is the comprehensive diagnostic suite that supports ABS, SAS, SRS, TPMS, EPB, and DPF, IMMO, ETACS systems and more for Mitsubishi ! You will essentially have dealer functionality at home! 


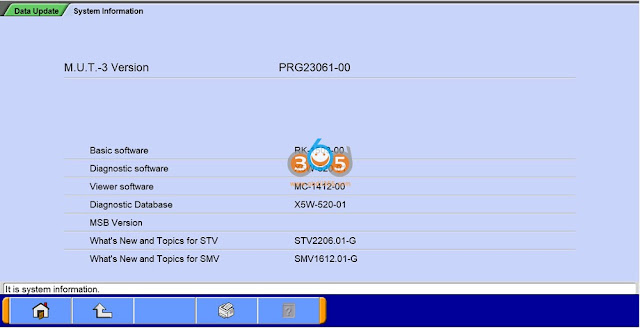
Software version: 23061-00 [2023]

Operating system: Win10 63bit


Compatible devices: VNCI RNM, original RNM, J2534 adapters (J2534 requires replace file)


Examples of some Supported features:
 
  • Diagnostics of electronic systems of Mitsubishi vehicles
  • Viewing and recording of operating parameters in real-time
  • Adaptations implementation and resetting
  • Service procedures
  • Key/Remote programming
  • ETACS option coding
  • ETACS reset
  • Injector coding\testing\learning 
  • Component calibration
  • Changing VIN number
  • And many more!


To use with VNCI RNM, you also need to download Bosch RNM VCI driver and VNCI device manager drivers.

Download both drivers in the previous post:

Free Download VNCI RNM Nissan Renault Mitsubishi Software

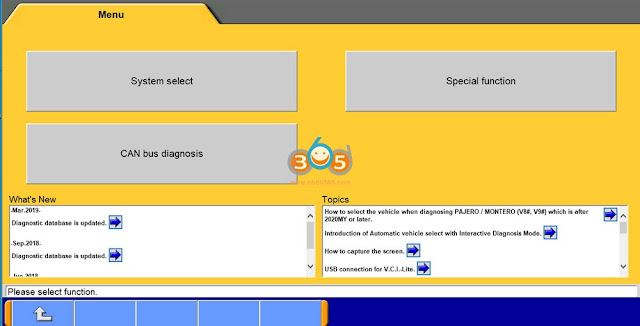
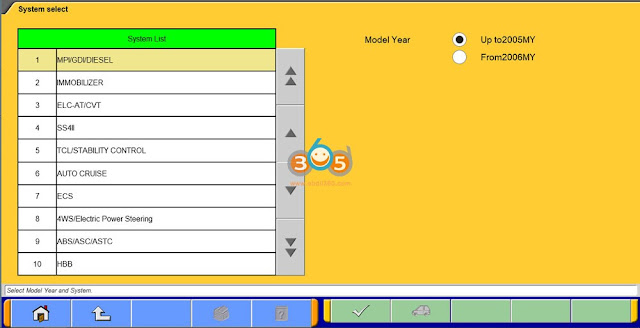
MUT 3 23061-00 Software Display:

Free Download Mitsubishi MUT-III 2023.06 Software 1

Free Download Mitsubishi MUT-III 2023.06 Software 2

Free Download Mitsubishi MUT-III 2023.06 Software 3

Free Download Mitsubishi MUT-III 2023.06 Software 4

Free Download Mitsubishi MUT-III 2023.06 Software 5

If use MUT II 2023 software with J2534 adapters, here is the passthru solution:
Download ‘common‘ registry replacement file.

Right click on mut3se shortcut, open file location, go one folder back to see the common folder.
Rename the common folder to anyname like commonORI for example.
Extract the common.rar to same location and start your mut3se from your desktop shortcut.


Some supported J2534 adapters:
  • Tactrix OpenPort 2.0 (Recommended)
  • ScanDoc Compact (Recommended)
  • Scanmatik 2 Pro (Recommended)
  • Godiag J2534
  • Bosch
  • CarDiag
  • Actia
  • Autel J2534
  • Mini-VCI
  • Chipsoft J2534
  • Other J2534 adapters – provided that the adapter is 100% compliant

Obdii3565.com engineer has tested Godiag J2534 with MUT3 2023. Working well.

2019/09/16

FAQ Mistubishi MUT-III Clone Diagnostic Tool

Here are questions and answers about Mitsubishi MUT-III VCI china clone or genuine.
mitsubishi-mut-iii

What is MUT-III?
MUT stands for Multi-Use-Tester.
The MUT-III can perform a variety of functions including rewriting the vehicles ECU, rewriting the vehicles TCM, reading diagnosis codes, and clearing diagnosis codes.
What is the difference between the 1000$ and 600$ Chinese mut 3 and What is the function of the cf car includes in some mut3
There is no generic answer as that totally depends on vendors, etc. Pick two actual auctions or items for sale and compare those two.
There are usually two flavors available – one that reads codes and stuff and the other that is capable of doing programming. The programming units are usually a higher price.


I read I can download a MUT III online. Is that true? Where?
There are various sources to obtain the MUT-III SOFTWARE online. However doing so through a torrent or FTP site is software considered piracy and illegal.


Do I need to install the file somewhere in my hard drive?
Yes, you will need to manually copy the FILE. it does not appear in the DB anywhere.
You select the TCU portion, then Options, then program TCU and manually search for the file. Then tell it Yes to continue with the programming.
Someday I’ll do screen shots but that’s not gonna be this weekend.

Any instruction for Chinese MUT3 install?
Look here:

My vin’s not recognized either! Where do you find the b001?
The DB in your installation is not for the proper region. Not to worry. It should show the current VIN and you can use that same one when doing VIN programming.
Note the “CFF_SST” subdirectory in the CDE12031 subdir (or off the root of the new CD you burned). All the different SST TCU ROM files are in there. Three for EVO (A749, B001, B151), some for Ralliart, some for other models with an SST.
You will need to manually copy those files to the computer then specifically tell the MUT3 program where to locate them. It’s not intuitive on how to do this, but it’s not particularly difficult either.
It’s just like falling off a bicycle – Learn it once and know it for life.


No communication with V.C.I. i have the newest mitsubishi software: PRE14031_00 ….

Is the VCI (large black box with both cables connected to it) powered on (there’s a small rocker switch on the side). A green light will come on.

Next are you using the blue db25-OBD2 cable?

Was the VCI recognized by th OS when the USb cable was connected to the computer? It should install a driver for it. Look in Computer Manglement. Devices to see if it’s seen by the OS (with it connected, powered on).

Try different USB cable.

Lastly the ignition switch must be in Run position, engine does not need to be running.

It’s always a good idea to have a battery charger connected when doing programming. Just in case the battery isn’t strong enough.

Outside of a defective unit or cable, that’s about it. The CF card plays no part as far as connecting to the car.


Chinese MUT 3, can it do teach in and reprogramming?
Yes, it works.


Is it true I can unlock Super Sport Mode and Launch Control with a MUT-III?
Yes.


I don’t know of anyone who got the ecu update thing to work
but you don’t need it , it all works fine without it

I have been successful in getting EVERY update to install. But I agree there’s not much useful in there for me so far.
( I hate how html’ing screws up tabs and directory listings!! )
Original DVD directories:
08/06/2013 03:05 PM <DIR> CD3E12031
08/06/2013 03:05 PM <DIR> PRE12031
cd PRE12031 (Path = \PRE12031):
Dir:
08/06/2013 03:06 PM <DIR> .
08/06/2013 03:06 PM <DIR> ..
07/13/2012 12:40 AM 53 autorun.inf
08/06/2013 03:05 PM <DIR> BAT
08/06/2013 03:06 PM <DIR> INSTALL
07/13/2012 12:40 AM 139,264 Mut3Check.exe
07/13/2012 12:40 AM 633 Mut3Check.exe.manifest
07/13/2012 03:01 AM 4,511 MUT3Check.ini
08/06/2013 03:06 PM <DIR> N
08/06/2013 03:06 PM <DIR> UNINSTALLER
So one would execute \PRE12031\Mut3Check.exe to install the MUT3 *program*.
Back on DVD:
cd ..\CD3E12031 (Path = \CD3E12031)
dir
07/13/2012 12:40 AM 61 autorun.inf
08/06/2013 03:05 PM <DIR> CFF_SST
07/13/2012 12:40 AM 225,280 ECUUpdateJudg.exe
08/06/2013 03:05 PM <DIR> ENV
08/06/2013 03:05 PM <DIR> MUT3
Burn the above files and directories to a new CD so these are in the ROOT of the CD (NOT in a subdirectory)
Dir on the new CD will show this:
07/13/2012 12:40 AM 61 autorun.inf
08/06/2013 03:05 PM <DIR> CFF_SST
07/13/2012 12:40 AM 225,280 ECUUpdateJudg.exe
08/06/2013 03:05 PM <DIR> ENV
08/06/2013 03:05 PM <DIR> MUT3
Then run the ECUUpdateJudg.exe program. All this does is populate the database with stuff that you probably won’t need. There can be useful ETACS/ABS/AYC/etc. updates but we have no way – just now – of knowing which ones we may want or what they do, or how to get back to what we just over-flashed.

2019/09/15

How to install Mitsubishi MUT III Software crack?

The MUT-3 software with the Chinese usually comes as two directories on one DVD. The first one is the program installation, which must be installed first. It is named something like with PRExxxxx, with “xxxxx” indicating the program version. The installer program, Mut3Check.exe, can be run from the sub-directory on the distribution DVD.
Note that if you have a local security password policy on the computer, the PRG install may fail as the SQL installation does not use a complex password.
After the Mut3Check.exe program is installed and the computer has rebooted, you can install the database updates. Typically in e sub-directory CD3Exxxxx, where “xxxxx” is the version of the update. Only ONE version of Mut2Check.exe can be installed without removing any existing version while MANY updates can be added.
In my experience, the Db update MUST be executed from a root directory of a CD or DVD, NOT from a sub-directory. I got all kinds of “Failed to install” & “failed to update” errors when running the update from the VD sub-dir.
Burn a new CD with the CD3Exxxx files in the root, so ECUUpdateJudg.exe is in the root of the CD. Then run ECUUpdateJudg.exe from the CD.
Look here:
Some of the Mitsubishi MUT3 functions are passworded and those passwords are [usually] matched to the MDB password fields included in the updates. Which vary by distribution, version and locale. Get a MS Access password cracker and run it on the MDB files in your distribution to learn the passwords.
The Teach-In Function requires a certain version, or later, of the TCU firmware to be installed in the desired TCU. The MUT3 can do this and the newer firmware files are included in the MUT3 software distribution for 2010 and later but must be manually copied over to the computer. Until that TCU version is in the TCU, the MUT 3 will not display the Teach-In option.

Look here:

Attachment: MUT3 requirements, abilities

  1. MUT3 PC requirements:
  • Operating System: Windows 7 Professional – 32/64-Bit
  • Processor: Intel Core – Intel Core i3-4010U Processor (1.7GHz, 3M cache)
  • Memory: 4GB (1x4GB) 1600MHz DDR3L Memory
  • Hard Drive: 500GB (5400rpm) Serial ATA Hard Drive

  1. Mitsubishi MUT-III functionality:

FunctionYes
DTC Code Retrieval
Retrieve OE DTC with code DefinitionX
Link DTC to service informationX
Customizable PID displayX
Data Logging
BodyX
ChassisX
ElectricalX
PowertrainX
Pressure/Vacuum TestsX
Bi-Directional tests
BodyX
ChassisX
ElectricalX
PowertrainX
Network Test
CANX
Module Programming
Programmable Module Installation (PMI) proceduresX
Module Reprogramming (Reflash)X
CodingX
Supplemental restraints initializationX
Programmable Parameters ( ability to change in service settings ie, tire size, personality, customer convenience etc.X
Body Controls
Anti-theft System FunctionsX
Remote Keyless EntryX
Restraints (supplemental restraints and seat belts)X
Chassis Tools
ABS Service BleedX
ABS/ Brake system functionsX
IVD Initialization SequenceX
Tire pressure monitor functionsX
Cruise Control System testsX
Electronic Ride controlX
Electrical Tools
Charging System TestsX
Parking Aid TestsX
AudioX
Powertrain Tools
EVAP TestX
Force monitors to runX
Drive belt tension measurementX
Fuel System Test/Relative Injector Flow TestX
Bi-directional control of fuel componentsX
Transmission bi-directional TestsX
Engine Checks and OBD Tests (Drive Cycle, Mode 01, Mode 06 & Mode 09)X
EGR TestX
Digital Multimeter
Basic DMM functionsX
Pressure/Vacuum measurementsX

2019/07/02

Mitsubishi MUT 3 customization, coding, reprogramming guide

MUT 3= Mitsubishi MUT III Diagnostic System with VCI MB991824
This includes module reprogramming, key programming, and many other functions. This is the same tool used by Mitsubishi dealerships with the same level of functionality. The MUT III is a PC based Scan Tool that utilizes a USB equipped PC.

Mitsubishi MUT 3 image:
mut3

How to use mb991958 scan tool mut iii:

Part 1: Mitsubishi MUT 3 customization
Part 2: Mitsubishi MUT 3 coding
Part 3: Mitsubishi MUT 3 ecu reprogramming

in detail…

Part 1: How to use Mitsubishi MUT 3 VCI for customized settings

Confirm the current customization data

Select “ETACS” on the System Selection screen
mitsubishi-mut-3-customization-1
Press Special Function button
mitsubishi-mut-3-customization-2
Special function menu is displayed
Customization – Writing a customization data
Customization Information – Reading the current customization data and saving the data to file
mitsubishi-mut-3-customization-3
The current customization data is displayed
Save data
mitsubishi-mut-3-customization-4
Save customization data
mitsubishi-mut-3-customization-5
Confirm the displayed name which the saved file.
mitsubishi-mut-3-customization-6
The file name of the saved file is set as ”ECU parts No., Date and No.”

Customizing….
The current customization data and the customization data to be written are displayed.
Load the customization data file or change the value
mitsubishi-mut-3-customization-7
Start customizing
mitsubishi-mut-3-customization-8
Customizing has been completed
mitsubishi-mut-3-customization-9
Written the customization data is displayed.
Check if the customization data is written correctly
mitsubishi-mut-3-customization-10

Load the customization data

The applied customization files by the inputted are displayed.
Choose a customization file to be written
mitsubishi-mut-3-customization-11
Note: -The background color of the line containing the selected file changes into yellow.

Delete customized files
To delete a data file loaded on the PC, click the check box next to file No. in the file list to place a check mark, then press the button at the bottom right corner

Load Customization items List (Not available in US)
Input vehicle information where you want to confirm the customization function.
mitsubishi-mut-3-customization-12
The relative page for the customization items is displayed
* A vehicle after 10MY is a target
mitsubishi-mut-3-customization-13

Part 2: How to use MUT 3 tester for Mitsubishi coding

Confirm the current coding data

Select  “MFI” on the System Selection screen.
(For instruction on how to select a system, refer to 3-3-1)
mitsubishi-mut-3-coding-1
Note:
As a typical example, procedure for Coding MFI is explained below.
Other system may have different menu structure but procedure is basically the same.

Press coding button
mitsubishi-mut-3-coding-2
Coding menu is displayed
On vehicle coding — Writing coding data
Coding information & copy — Reading the current ECU coding data and saving the data to file
mitsubishi-mut-3-coding-3
The current ECU coding data is displayed
mitsubishi-mut-3-coding-4

Save ECU coding data

mitsubishi-mut-3-coding-5
Note:
If diagnostic trouble codes are currently stored in the ECU, the file cannot save. Retry after the vehicle is repaired.

Confirm the displayed name which the saved file.
mitsubishi-mut-3-coding-6
Note:
The file name of the saved file is set as ”ECU parts No., VIN No., Date and No.”

Variant Coding Writing

Yes! Execute this function where ECU is installed on the vehicle
mitsubishi-mut-3-coding-7
Input a VIN to list up applied coding files and press
mitsubishi-mut-3-coding-8
If left screen is displayed, press tick button
mitsubishi-mut-3-coding-9
Note:
-Don’t change each value in this screen
Note:
If coding file is not found in the folder, left screen may appear. In such case, press back button. button. Save the correct file in the folder and try again.
mitsubishi-mut-3-coding-10

The applied coding files by the inputted are displayed. Choose a coding file to be written
-The background color of the line containing the selected file changes into yellow.
mitsubishi-mut-3-coding-11
The current ECU coding data and the coding data to be written are displayed.
mitsubishi-mut-3-coding-12
Confirmation dialog box appears
mitsubishi-mut-3-coding-13
Note:
-In case of ETACS, “ETACS customize” and “Option Coding” are initialized after writing variant coding. Rewrite them after finishing coding.
-It is not need that “Option Coding” is executed because the data of “Option coding” includes in variant coding data, if “Copy Coding” was executed.

Coding is completed!
mitsubishi-mut-3-coding-14
Written the coding data is displayed. Check if the coding data is written correctly.
mitsubishi-mut-3-coding-15

Delete coding data

To delete a data file loaded on the PC, click the check box next to file No. in the file list to place a check mark


Part 3: How to use mut-3 VCI for Mitsubishi ecu reprogramming

Reprogramming with V.C.I. alone
(Not supported by V.C.I.-Lite)

Data Transfer (PC –> Memory Card)

Start up the M.U.T.-III system
Insert the Memory card (MB991853, MB992228) into the Card Adaptor (MB991939), and then insert them into m-card slot on PC.
mitsubishi-mut-3-reprogramming-1
Press Special Function button on STV Top Menu
mitsubishi-mut-3-reprogramming-2
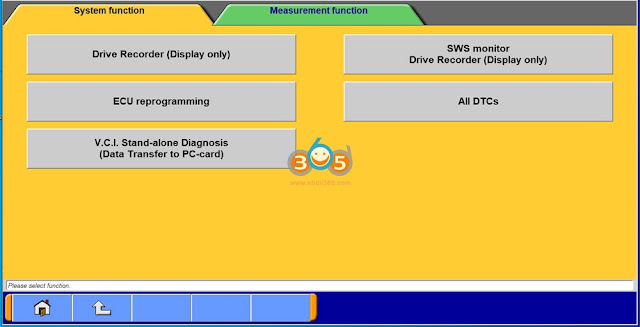
Select System Function tab and press ECU reprogramming button
mitsubishi-mut-3-reprogramming-3
Caution:
-In case an update CD-ROM is set in the PC with update undone, data update starts

Press Memory card transfer button
ALL reprogramming data in the M.U.T.-III PC are transferred to the memory card.
mitsubishi-mut-3-reprogramming-4
Caution:
-Do not remove the memory card from PC.

Select a memory card drive to start transferring
mitsubishi-mut-3-reprogramming-5
It transfers data to the memory card. Are you ready?
mitsubishi-mut-3-reprogramming-6
Data transferring…
The progress bar is displayed during the transfer.
mitsubishi-mut-3-reprogramming-7
The data transfer is complete
mitsubishi-mut-3-reprogramming-8
Before you remove the memory card, double-click the below icon for removal of the adaptor.
mitsubishi-mut-3-reprogramming-9
Select [PCMCIA IDE/ATAPI Controller] or the other appropriate devices, then stop
mitsubishi-mut-3-reprogramming-10
Verify the contents of the selection, then OK
mitsubishi-mut-3-reprogramming-11
After displayed the message “The device can now be safely removed from the system”, push the lever on the side of PC card slot and remove the memory card.
mitsubishi-mut-3-reprogramming-12
Caution:
Do not remove the memory card away unless complete above method or turn off the PC.

Set up equipment

(1)Insert the Memory card (MB991853, MB992228), which is storing the reprogramming data, into the Card adaptor (MB991939) and insert them into V.C.I. main unit (MB991824)
(2)Connect M.U.T.-III Main Harness B (MB991911) or
A (MB991910) to V.C.I. main unit securely. (Refer to 10-2.) Note:
Select appropriate harness by instruction below.
-Main harness A: For vehicle only equipping 16 pin data-link-connector.
-Main harness B: For other vehicles.
-Adaptor harness (12-13): Outlander, Montero (after ‘02MY) (To connect Main harness B and 13pin data-link-connector)
(3)After verifying the ignition switch position at LOCK (OFF), connect the M.U.T.-III Main harness B or A to the data-link- connector.
(4)Turn Ignition switch on, and turn V.C.I. main switch on. (Do not start engine)


Retrieve Data (Memory card –> V.C.I.)

(a). Automatic Data Retrieval
(b). Select and Load Data
(c). (Special case)

Retrieve Automatic Data

(1)Select “Automatic RPG” in main menu and press Enter key. Version No. of data base file appears.
By waiting 10sec or pressing Enter key, V.C.I starts communicating with ECU and retrieves reprogramming data file with the ECU’s parts No. and ROM-ID.
mitsubishi-mut-3-reprogramming-13

(2)The appropriate reprogramming data file No. is displayed. Pressing Enter key starts transferring the data file into V.C.I
built-in-memory.
mitsubishi-mut-3-reprogramming-14
Remark:
To search another data, press Esc key. If another appropriate reprogramming data exist, it will be displayed.

The message bellows are displayed depends on ECU parts No, ROM-ID and condition of ECU. Press Enter Key to move back to Main menu.
  • “No update data in PC card”
This message appears if no pertinent reprogramming data exists. No data will be transferred.
  • “ECU at current level of VCI”
This message appears if the ECU has been already reprogrammed. No data will be transferred.
mitsubishi-mut-3-reprogramming-15
(3)Progress is displayed on the monitor.
* mark is increased by steps.
mitsubishi-mut-3-reprogramming-16
(14) After completing data transfer, ECU reprogramming starts sequentially
mitsubishi-mut-3-reprogramming-17

Select and load data

Select “Load RPG file” in main menu
mitsubishi-mut-3-reprogramming-18
Select a reprogramming data file
mitsubishi-mut-3-reprogramming-19
Esc key: Move back to main menu.
Remark:
-The data files are displayed in numeric order of data No.. (From big to small; new to old)

Reconfirm the data file No., and press Enter key to start transferring the data into V.C.I. built-in-memory.
Esc Key: Cancel
mitsubishi-mut-3-reprogramming-20
Progress is displayed on monitor
* mark is increased by steps
mitsubishi-mut-3-reprogramming-21
After completing data transfer, ECU reprogramming starts sequentially
mitsubishi-mut-3-reprogramming-22

Special case:

If V.C.I. has already stored the reprogramming data, select “ECU Reprogram” in main menu, and press Enter key
mitsubishi-mut-3-reprogramming-23
Reprogramming data file No. and program version No. in the V.C.I. memory are displayed for a few seconds, and then ECU reprogramming starts sequentially.

Reprogramming ECU…(VCI to vehicle ECU)

ECU parts No. and ROM-ID No. are displayed. Press Enter key to start reprogramming.
mitsubishi-mut-3-reprogramming-24
Note:
-Reprogramming must carry out on the condition of engine stop and IG switch on.
Do not disconnect harness/ turn off the IG switch during ECU reprogramming.

[Messages before/during reprogramming process]
mitsubishi-mut-3-reprogramming-25
a)“RPG data doesn’t apply to ECU”
Reprogramming stopped owing to the data in V.C.I. memory being not appropriate for the ECU.
Note down the displayed ECU parts No. and ROM-ID.
Restart V.C.I. by pressing Enter key, and confirm the matching of the data file No, which is displayed by reboot, and the ECU part No./ ROM-ID for reprogramming.

“ECU same as VCI, CK for new data” (CK; check) Reprogramming stopped because reprogramming has been already done
mitsubishi-mut-3-reprogramming-26
5 steps progress is displayed while reprogramming
mitsubishi-mut-3-reprogramming-27
Caution:
Do not press any key during reprogramming automatically proceeding.
Do not turn off V.C.I. power or IG switch during reprogramming.
STEP1: Saving the data to the back up memory.
STEP2: Erasing data in ECU.
STEP3: Writing reprogramming data
STEP4: Verifying the data between ECU and V.C.I.
STEP5: Erasing diagnosis code and back up memory

On completion of the 5 steps, new reprogrammed ECU parts No. and ROM-ID are displayed.
Turn IG switch LOCK(OFF)
mitsubishi-mut-3-reprogramming-28
Note:
Diagnosis code might be memorized in ECU if without turning IG switch Lock (off)

ECU reprogramming completed
mitsubishi-mut-3-reprogramming-29
Verify the system properly operated by starting engine. Enter key: V.C.I. restart.