
Here is a guide for flashing prodiag/pro5 for Thinkdiag 2 diagnostic interface. After flashing bin file for Thinkdiag2 or DBSCAR7, you will be able to use it on PRO5/Prodiag software.
NOTE:
Don’t need to flash with jlink to use Diagzone with thinkdiag2. It works with original boot.
Only for diagzone you no need to flash. For xpro5, prodiag, xdiag you need flash your device.
Disclaimer:
For sharing purpose only. You are at your risk. Take a backup of thinkdiag before playing around!
Preparation:
Download thinkdiag2 boot flashing file (LINK), No password.

Instruction:
The procedure is the same with DBscar VII. (Check Thinkdiag2 vs DBScar 7)
Remove the rubber, unscrew 4 screws.


and again unscrew 4 screws

Connect to j-link V9, no lower version
wiring diagram to put wires into the jlink
General Designation Of Pins
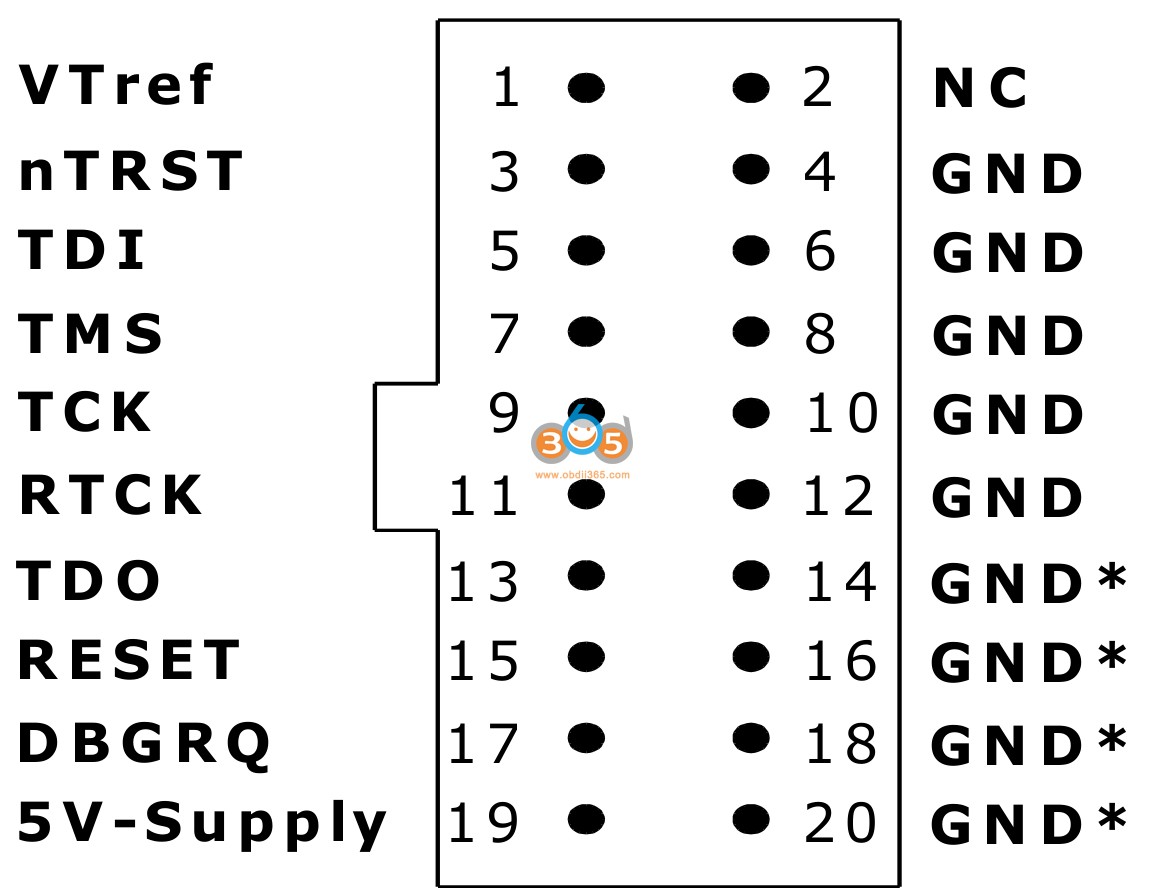
Pins used


Start program J-Flash and push Open project

in folder select TD2.jflash

in program select Target/Connect

Now erase your chip: Go to Target/Manual Programming/Erase chip

From the TD2 flash folder, drag the file Boot_TD_2.bin here


OK Now go to : Target/Production Programming.
If everything is fine, you will see this message- ‘Target erased, programmed and verified successfully’.

In sum,
1) Load project file
2) Target – connect
3) If connect and all ok
4) Target – Manual Programming – Read back – Entire chip
5) After read you will see ic content
6) save file in safe place.
FYI:
Here is the backup of thinkdiag2 original boot-(TD2 original boot) for anyone that needs it.
For Xdiag app, firmware and instructions are available in xdiag.pro web.

No comments:
Post a Comment