2026/10/10

Keydiy KD-X4 Adds 2022 VW Golf 8 MQB49 5D Key

Keydiy KD-X4 added a spare VW Golf 8 GTE 2022 MQB49 5D key successfully.

The original key has UWB function. It has a black inductor.

Must add an original 5D key.

KD 5D key does not support UWB function.

Read original key data with KD-X4, genereate dealer key and learn key ok.

Keydiy KD-X4 Adds 2022 VW Golf 8 MQB49 5D Key 1

Keydiy KD-X4 Adds 2022 VW Golf 8 MQB49 5D Key 2

Keydiy KD-X4 Adds 2022 VW Golf 8 MQB49 5D Key 3

Keydiy KD-X4 Adds 2022 VW Golf 8 MQB49 5D Key 4


2026/10/09

Xhorse Multi Prog Adds Locked BMW MD1 MG1 ECUs

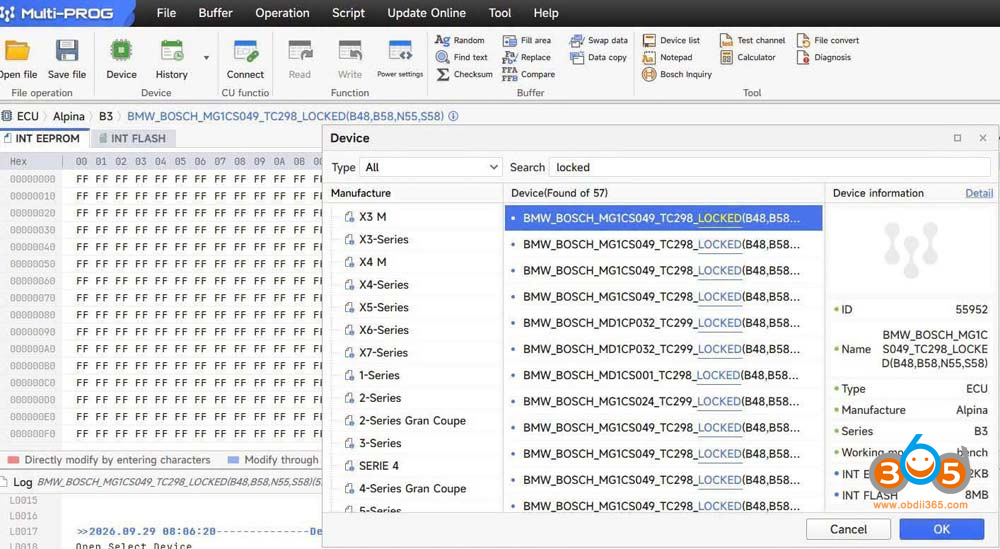
Xhorse Multi Prog programmer free update 2020.06- BMW “Locked” B48/B58 DME ECUs.


Supports reading 2020.06- BMW locked B48, B58, N55, S58 DME ECUs.

Including:
Bosch MG1CS049 TC298 Locked
Bosch MD1Cp032 TC299 Locked
Bosch MD1CS001 TC298 Locked
Bosch MG1CS024 TC299 Locked
etc

Bench mode. No need to open ECU.

Read ONLY. Multi PROG will read BMW locked MD1/MG1 ECU eeprom, flash data and ISN code. It does not write these locked DMEs.

xhorse multi prog adds locked BMW MDG1 1

What adapter to read these locked DMEs?

Use the ECU adapter.

xhorse multi prog adds locked BMW MDG1 2 

Multi-Prog pinout to BMW locked MD1/MG1 B48 B58 DMEs

xhorse multi prog adds locked BMW MDG1 3


Tips to Unlock DAF Delphi ETC3 UDS ECU by Flex Korhex

MMS Flex Korhex DAF Delphi ETC3 UDS locked ECU unlocking review:

With the new Flex + Korhex solution, ETC3 UDS units can now be unlocked and programmed directly in our workshop, eliminating the need to ship the control unit elsewhere.

Supported DAF models with Delphi ETC3 UDS:

  • DAF CF (IV)
  • DAF XF 106 (II) 2017–2024
  • PACCAR MX-11 10.8L / MX-13 12.9L


“It’s a hard job to open the ECU. Took more than 1 hour to open the ECU.

Tips to open the case: Use a hydraulic press with wooden blocks to secure the connectors and prevent them from moving. Then, use a large pry bar to remove them.

You connect your 12v starter (or the one provided by flex on the tool) but the ECU you connect directly in 24V.
The only pins you use from FLEX are CAN L / H and PW 1/2.
You need 2 power supply one 12v for flex box only!
And one for powering ecu ( so put +24v on pin 1 and 60 and ground on pin 57 ).
Start boot glitch unlocking.

After unlocking, no need to use KorHex.

Read and write with Flex, all done.”

Unlock DAF Delphi ETC3 UDS ECU by Flex Korhex 1

Unlock DAF Delphi ETC3 UDS ECU by Flex Korhex 2

Unlock DAF Delphi ETC3 UDS ECU by Flex Korhex 3

Unlock DAF Delphi ETC3 UDS ECU by Flex Korhex 4

Unlock DAF Delphi ETC3 UDS ECU by Flex Korhex 5


2026/10/08

Autotuner BMW Locked MDG1 ECU Unlocking Guide

Autotuner first released support for BMW DME8 ECUs back in 2019. However, in 2020, Bosch and BMW released an update that effectively locked everybody back out, meaning technicians could no longer read and write to these ECUs in the field.

Now, that access has been restored. All you need is an Autotuner tool.

Now, any shop around the world with an AutoTuner Tool can perform supported BMW DME8 unlocks in-house.

For an experienced tuner, the process is quick and straightforward. And best of all? AutoTuner doesn’t charge you to perform the unlock.

Once you own the AutoTuner Tool, you can unlock as many supported ECUs as you want, with no subscriptions, no per-unlock charges, and no additional fees from AutoTuner.


Supported Lineup (Bosch MD1CP002 / MD1CS001 / MG1CS003):
BMW (Petrol & Diesel):
1 Series to 8 Series & Z4: 116d up to M40i / 50i
X Range (X1, X2, X3, X4, X5, X6, X7): 18d up to M50d / M40i / 50i
Mini: Clubman, Cooper, Countryman (16d, 18d, 2.0 sd, 20d)
Alpina: D3 S, D5 S, XD3, XD4 (3.0d / 40d)


Two Ways to Flash

There are two methods for flashing the ECU:

  • Bench flashing – Connect to the harness on the bench.
  • OBD flashing – Apply an OBD patch, then flash through the OBD port in the vehicle using either the Autotuner tool or many of the popular handheld flashers on the market today.

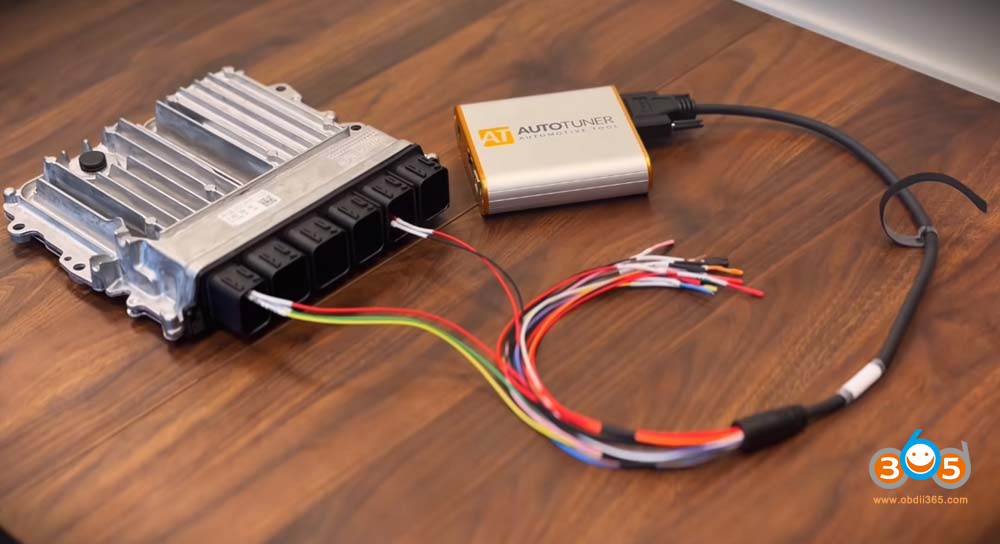
The entire process can be done with all of the parts that come with the Autotuner tool: the tool itself, a power supply, a USB cable, and a universal harness used to connect to the ECU.


Step-by-Step Process

1. Connect the tool to the PC. Plug the Autotuner tool into the computer.

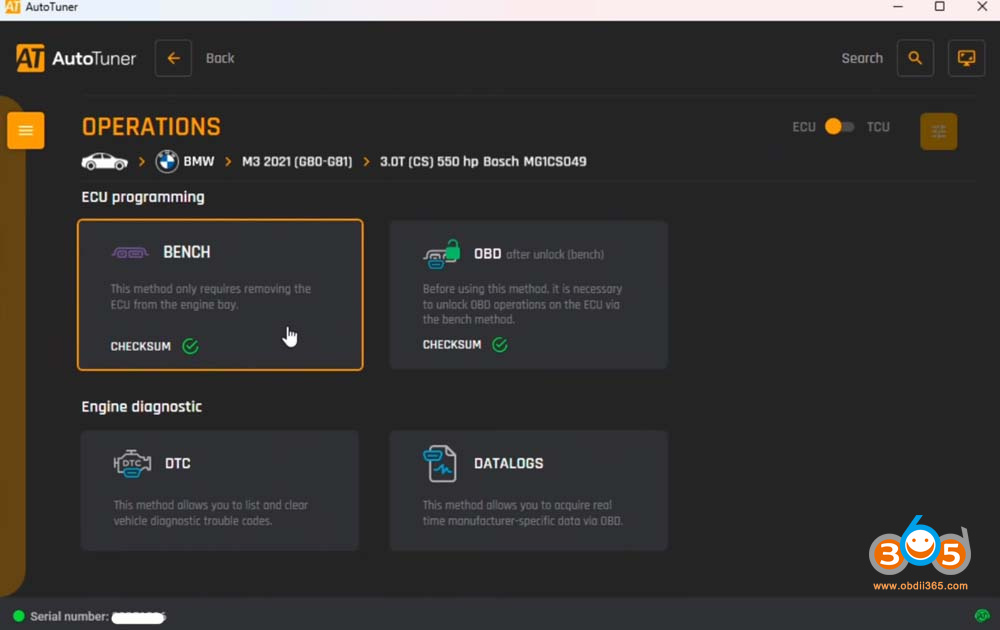
2. Load the Autotuner program and find the protocol. With the program open, click “ECU operations,” then click “vehicle.” Scroll down to BMW. In the example shown, the vehicle is believed to be a BMW M3, G80 series. Among the available options, select “MG1CS049.”

autotuner bmw locked mdg1 unlocking 1

3. Choose bench mode. After selecting the ECU, choose “Bench.”

autotuner bmw locked mdg1 unlocking 2

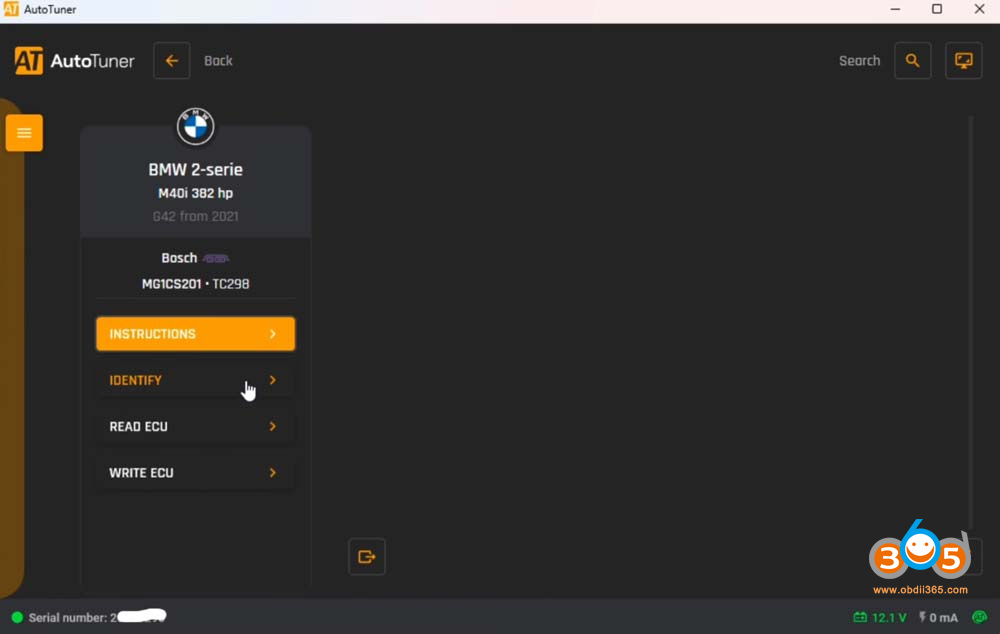
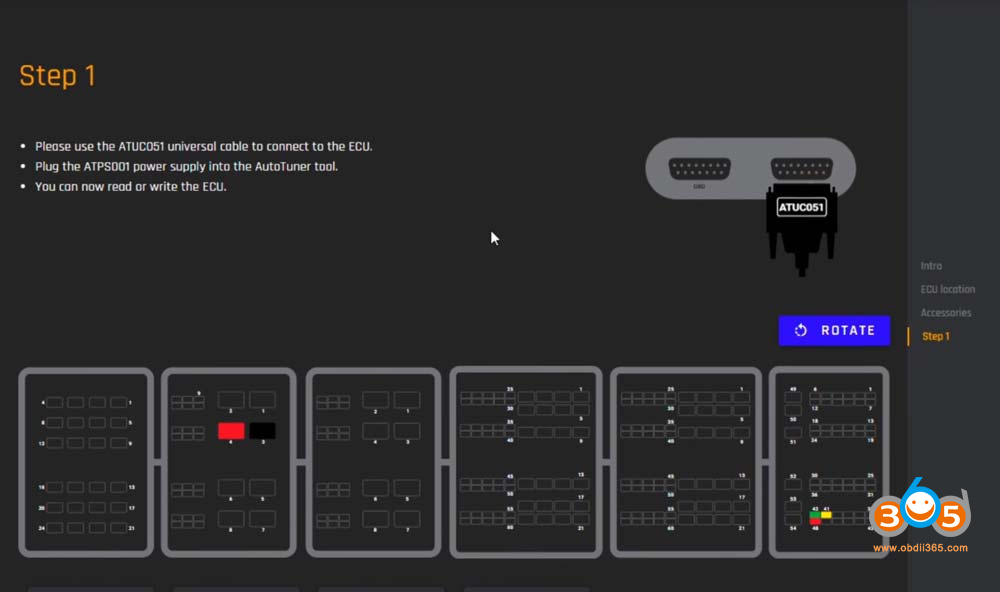
4. Review the instructions. Clicking on the instructions will tell you how difficult everything is, show you where the ECU is located in the vehicle, list the accessories you need, and explain how to connect to the ECU.

autotuner bmw locked mdg1 unlocking 3

autotuner bmw locked mdg1 unlocking 4

5. Pin out the ECU. Pinning out the ECU is described as “not that difficult.” However, for those who want to save time, Autotuner also makes a plug-and-play harness—you simply plug it in and go.

autotuner bmw locked mdg1 unlocking 5

6. Identify the ECU. Once connected, the next step is to identify the ECU. Now everything is identified correctly.

autotuner bmw locked mdg1 unlocking 6

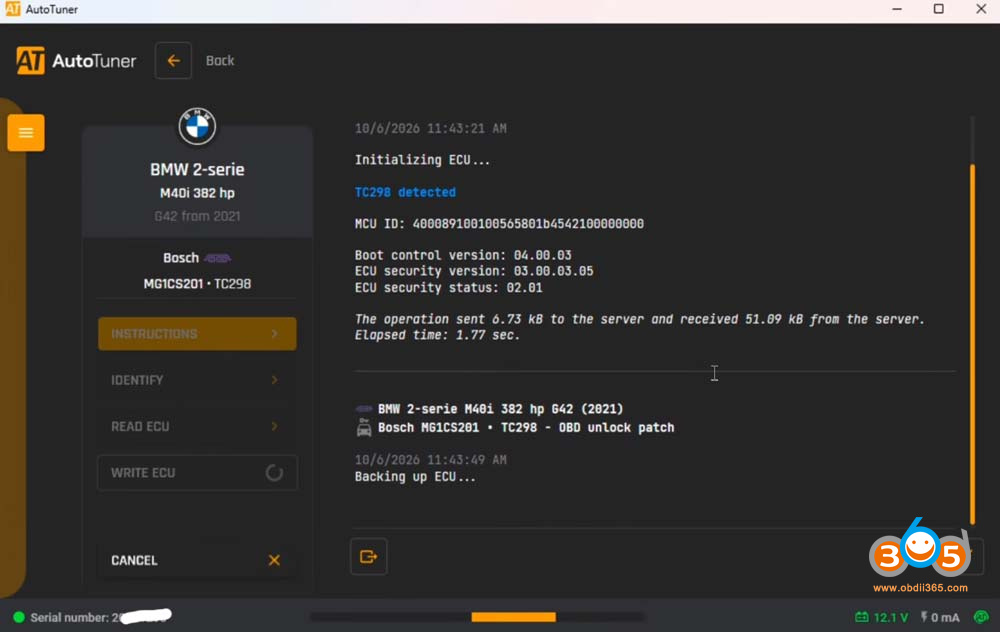
7. Back up the ECU. Normally, the next step would be to back up the ECU before doing anything. In this case, however, the process is to do an OBD patch—and the Autotuner tool will automatically back up the ECU before applying the patch.

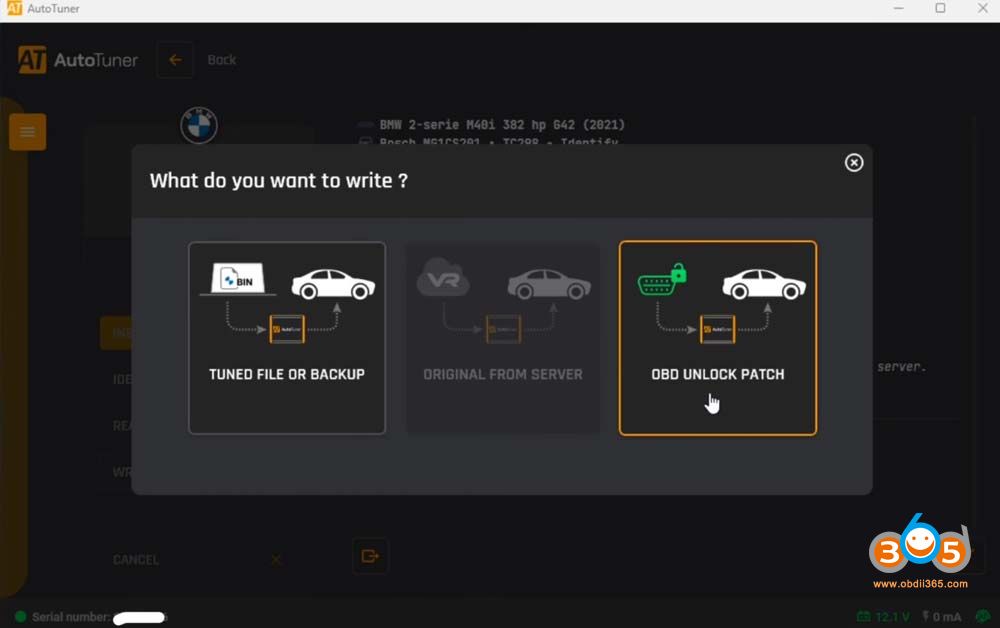
8. Write the ECU. Go down to “write ECU,” select “OBD unlock patch,” and let it start working.

autotuner bmw locked mdg1 unlocking 7

autotuner bmw locked mdg1 unlocking 8

The entire unlock process in the Autotuner tool takes a couple of minutes. It will run through, you’ll see some sectors being written, and it will chime when it’s all finished.


Both the slave and master versions of the Autotuner tool work for this procedure.

bFLASH Adds Ford EMS2910 EMS2916 ECUs by OBD

 bFlash programmer released new OBD protocols on October 8th, 2026.

Two new Vitesco EMS2910 & EMS2916 ECUs for Ford are now available via OBD, in both VR and NR. You can now work on recent Ford models with EcoBoost engines:
EMS2916: 1.0 EcoBoost
EMS2910: 1.5 / 2.0 / 3.5 EcoBoost


Normal Read: ~20 min
Write (calibration only): ~5 min
Write (full flash): ~15 min
Update your bFlash and get started today.

bFLASH Adds Ford EMS2910 EMS2916 ECUs by OBD


Ford Transit S6J334CJEE Cluster Mileage Correction

For Ford Transit models from 2024 onward, when correcting the odometer, you need to adjust the mileage in both the instrument cluster and the engine computer (ECU).

Set the instrument cluster to 0 km.
Set the engine ECU to the desired mileage.
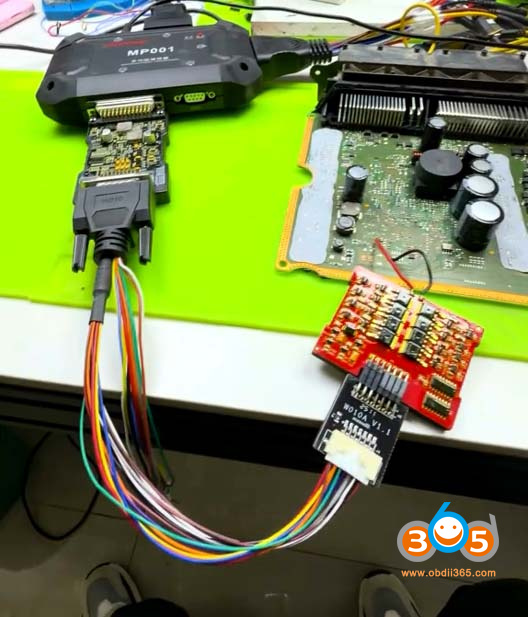
Then synchronize them, and it’s done.
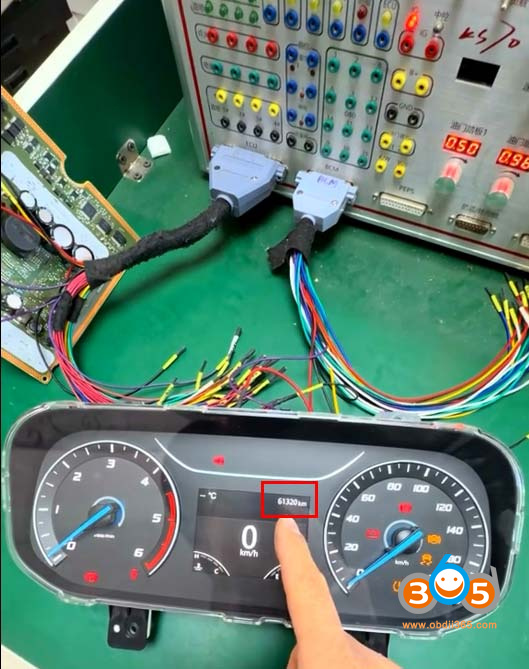
 

Cluster: Spansion S6J334CJEE ARM chip

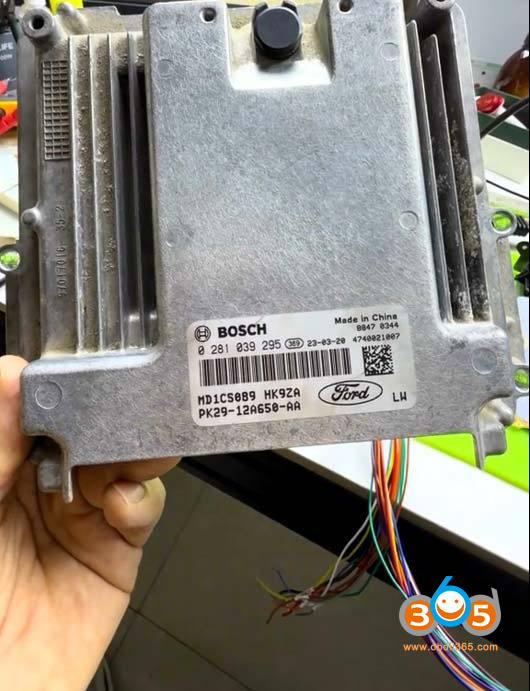
Engine ECU: Locked Bosch MD1CS089


Reset mileage in cluster:

Use CG100X or similar programmers to reset S6J334CJEE cluster mileage to 0.

Ford Transit S6J334CJEE Cluster Mileage Correction 1

Here is the S6J334CJEE cluster pinout to CG100X programmer.

Ford Transit S6J334CJEE Cluster Mileage Correction 2 Ford Transit S6J334CJEE Cluster Mileage Correction 3

Correct mileage in engine ECU:

Read/back up locked MD1CS089 ECU eeprom & flash data with OBDSTAR DC706 + C4 06 adapter or other programmers (Flex, KESS3 etc).

Ford Transit S6J334CJEE Cluster Mileage Correction 4

Ford Transit S6J334CJEE Cluster Mileage Correction 5

Manually modify the mileage data inside.

Then write the modified data into the ECU.


Connect the engine ECU and the instrument cluster to synchronize the data. Now we can see that the mileage data has been synchronized to the instrument cluster.

Ford Transit S6J334CJEE Cluster Mileage Correction 6